Hole 7 at TPC Southwind
- Par
- 4
- Yardage
- 482 yds
- Stroke index
- 7
- Hazards
- 6 bunkers
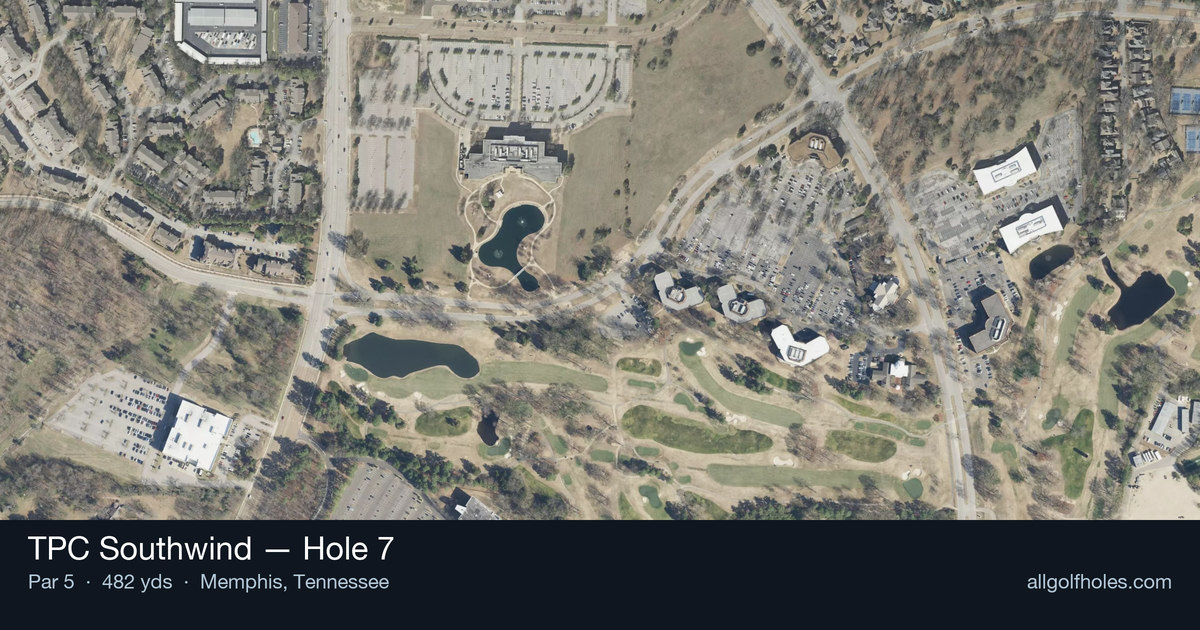
Aerial source not provided
Green size: 30 yds deep × 22 yds wide
Scorecard yardage is for Championship tees. The aerial shows its labeled reference position; distance rings measure to the green.
Championship tees · Par 4 · 482 yards
The plan for No. 7
TPC Southwind hole 7 stands as one of the course's most demanding tests, a formidable par 4 stretching 482 yards through a dogleg right that rewards precision over power. The tee shot presents an immediate visual challenge, with woods lining the left side threatening to swallow any pull off the tee. Golfers must navigate the bend strategically, positioning their drive to open the best angle for the approach shot ahead. The green complex proves equally punishing, guarded by multiple bunkers—sand traps that flank the target from various angles and demand accuracy with the second shot. A greenside wooded area adds another layer of trouble for wayward approaches. This hole's combination of length, dogleg strategy, and green-side hazards makes it a genuine handicap-7 challenge, requiring disciplined course management from tee to green to escape with par intact.
Off the tee
Off the tee at the 7th, playing to roughly 482 yards for tournament setups, your priority is fairway position over pure distance. A driver is the obvious play for most golfers, but if the fairway pinches or you're fighting a tendency to miss right or left, consider a 3-wood to find the short grass — being in the fairway here matters more than shaving off ten yards, since the second shot is long and demanding regardless. Your approach will likely be a mid-iron, but exactly how "mid" depends heavily on how well you drove it. This is a green that rewards precision, so commit to a full, confident swing rather than easing up — a firm, decisive strike into a mid-iron number will hold the green far better than a delicate half-swing that comes up short or leaks off-line. Take note of pin position and favor the center of the green when in doubt; this is not a hole to get greedy at a tucked flag. Around the green, be conservative with any recovery shots. Given the length of the hole and the quality of ball-striking required to reach the putting surface in two, a miss here often means a longer up-and-down than usual — favor a simple chip or bump-and-run over a flop shot unless you're fully confident. What to avoid: don't sacrifice fairway accuracy for extra yardage off the tee, and don't attack pins aggressively on the approach. This hole punishes ego swings — smart, committed shots win the day.
Approach & recovery
Because of the hole's length, most players will be looking at a mid-iron to long-iron approach even from a well-placed tee shot. The green is protected on multiple sides by bunkers—with sand hazards positioned both short and around the green—making distance control and trajectory critical. A shot from the left-center of the fairway offers the cleanest look, reducing the impact of the surrounding sand. Approaches from the right side of the fairway face a more obstructed line, often bringing the greenside bunkers more directly into play. Club selection should account for the firmness of the green and any hole location tucked near the bunker complexes; err on the side of the fat part of the green rather than firing directly at flags cut close to sand.
On the green
With green size and shape unknown, players should rely on a cautious, conservative read until they get a firsthand look at the surface. Long approach putts are common on this hole given its length, so lag putting and speed control become paramount. Favor putting to the "fat" side of the green when hole locations are tucked near any of the bunker clusters, minimizing the risk of a tricky up-and-down. Take extra time to read subtle breaks given the green's undefined contours, and prioritize distance control over aggressive line-reading when facing longer birdie putts. 5. Risk vs. Reward The primary risk/reward decision comes at the tee: attacking the dogleg with an aggressive line can shorten the approach and set up a scoring opportunity, but it brings the left-side woods into direct play. A more conservative tee shot leaves a longer approach, but that longer shot into a green well-defended by five total sand hazards is no easy proposition either. Given the severity of the trouble on both the tee shot and approach, this hole plays as a "survive and advance" test for most golfers rather than a hole to attack outright. Birdies are earned through smart positioning, not brute force. 6. Different Skill Levels High-handicap players should prioritize staying out of the woods left off the tee, even if that means laying up with a fairway wood or hybrid to guarantee a fairway lie. From there, playing a comfortable club to the widest, safest portion of the green—avoiding any of the bunker clusters entirely—will lead to more bogeys than double bogeys, which is a win on a hole this demanding. Low-handicap and skilled players can take a more assertive approach, using driver to challenge the dogleg when conditions allow, provided the target line stays away from the tree-lined left side. With a well-executed tee shot into the ideal portion of the fairway, better players can attack the green with a mid-iron, using the correct angle to attack pins that would otherwise be guarded by the surrounding sand. Precise club selection and trajectory control on the approach will separate the players who convert this hole into a scoring opportunity from those who settle for a routine par.
Hole 7 Green Complex
Mapped green boundary
Green size: 2,994 sq ft
Course coverage
Tournament and creator videos about TPC Southwind — shared course coverage, not hole-specific clips.
Tournament coverage
FedEx St. Jude Championship highlights
FedEx St. Jude Championship | Final Round Highlights
2025
How did Hole 7 play?
How did this hole play today?
Frequently asked questions
Yardage reference: Championship tees · 482 yards.
What's the best strategy off the tee?
↓
For this 482-yard par 4, most players will hit driver to set up a comfortable approach.
How difficult is hole 7?
↓
This hole is one of the tougher holes on the course for most golfers. Key challenges include: long par 4, heavily bunkered, small green.
How big is the green on hole 7?
↓
The green is small and requires precision. The green is deeper than wide, so club selection is crucial. Expect challenging pin positions with limited room for error.
What's a good score on hole 7?
↓
This hole is one of the tougher holes where par feels like birdie. A challenging par 4. Accept that bogey happens and avoid big numbers.