Hole 3 at Sage Valley Golf Club
- Par
- 4
- Yardage
- 405 yds
- Hazards
- 4 bunkers · Water
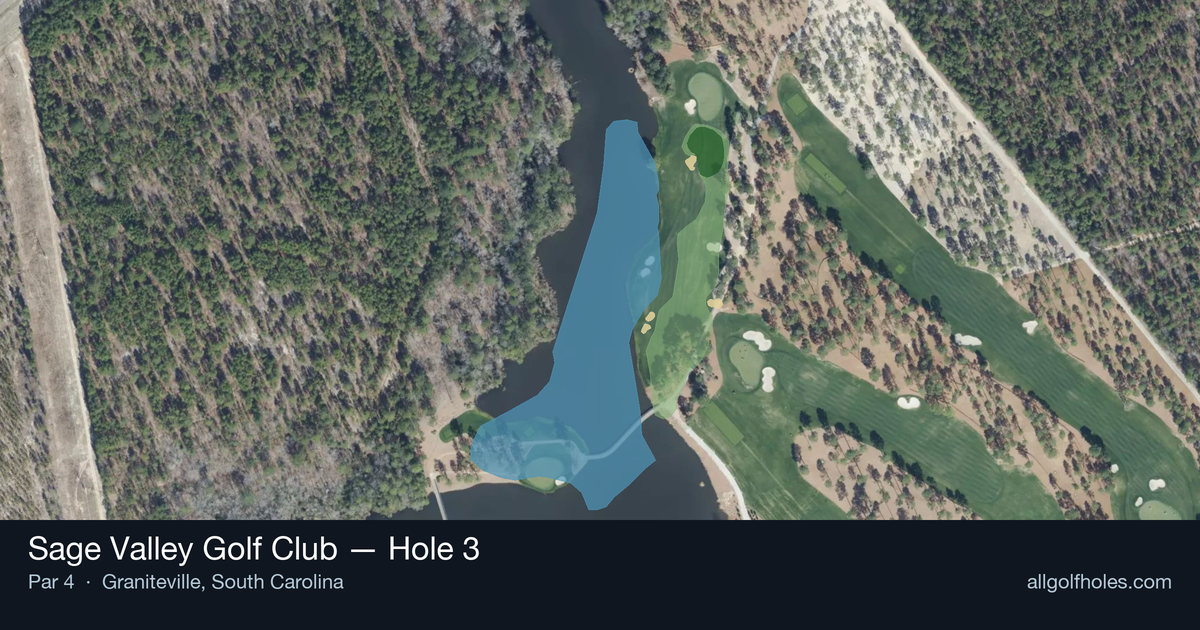
Aerial source not provided
Green size: 40 yds deep × 40 yds wide
Scorecard yardage is for Pro tees. The aerial shows its labeled reference position; distance rings measure to the green.
Pro tees · Par 4 · 405 yards
The plan for No. 3
Sage Valley Golf Club's third hole presents a deceptively challenging par 4 that epitomizes the course's reputation for strategic shot-making. At 405 yards, this straight-away hole demands precision over power, with its narrow fairway corridor requiring an accurate tee shot to set up the approach. The absence of traditional hazards shifts focus to course management and club selection, as players must navigate subtle elevation changes and contours that can influence ball flight. The small green complex becomes the hole's defining feature, rewarding precise approach shots while punishing anything slightly off-target. This hole perfectly showcases why Sage Valley Golf Club has earned acclaim among discerning golfers who appreciate nuanced design that tests every aspect of the game.
Off the tee
The tee shot strategy centers on finding the optimal position for your approach. Most players should focus on the center-left portion of the fairway, which typically provides the best angle into the green. A smooth driver or 3-wood depending on your comfort level will leave you in prime position. The key is avoiding the temptation to overswing - rhythm and accuracy will serve you better than raw distance on this hole. For your target line, aim for the widest part of the fairway and commit to your swing. Without hazards to worry about, you can be aggressive with your line while maintaining control of your tempo.
Approach & recovery
The approach shot is where this hole's true challenge reveals itself. That small green requires precise distance control and the right trajectory to hold the putting surface. Depending on your tee shot position, you'll likely face anywhere from a short iron to a mid-iron into the green. Focus on taking enough club to reach the center of the green rather than attacking pins. The small target means even well-struck shots can run off if you're short-sided. Consider the wind conditions carefully, as they'll have a magnified effect on a smaller landing area.
On the green
With a small green, putting becomes about lag putting and avoiding three-putts rather than hunting birdies from long range. The key is getting your first putt close enough for a comfortable second putt. Read the green carefully from multiple angles, as subtle breaks can be deceiving on smaller surfaces. Pay attention to grain direction and any slope that might affect your ball's roll. Conservative putting strategy often yields better results than aggressive lines on compact greens like this one. ## RISK VS REWARD This hole offers excellent risk/reward balance favoring the reward side. With minimal trouble, you can play aggressively off the tee while still maintaining control. The reward comes from positioning - a well-placed drive sets up a scoring opportunity that higher handicap players especially should capitalize on. The main risk is getting too aggressive with pin hunting on the approach. Playing to the center of the green and two-putting for par is often the smart play, with birdies coming naturally from good execution rather than risky shots. ## DIFFERENT SKILL LEVELS **High Handicappers:** Focus on fairway first, green second. Use whatever club gives you confidence off the tee, even if it's a hybrid or long iron. On the approach, take one extra club and aim for the middle of the green. This conservative strategy maximizes your chances of avoiding big numbers. **Low Handicappers:** This is a hole where you can be more aggressive with your target selection. Driver should be comfortable here, and you can attack pins when conditions allow. Still respect the small green size, but don't be afraid to hunt birdies when you're in good position. **Mid Handicappers:** Strike a balance between aggression and caution. Play your normal tee shot but be extra careful with approach club selection. This is an excellent hole for building confidence and momentum in your round.
Watch for
- Course conditioning and mapped hazards may affect line selection; confirm from the aerial.
Hole 3 Green Complex
Mapped green boundary
Green size: 7,945 sq ft
Course coverage
Tournament and creator videos about Sage Valley Golf Club — shared course coverage, not hole-specific clips.
Featured by these creators
Creator videos about this course
YouTube creators who filmed or featured Sage Valley Golf Club. · Stats as of Oct 12, 2026 · 6d ago
The First Ever YouTube Match at Sage Valley
How did Hole 3 play?
How did this hole play today?
Frequently asked questions
Yardage reference: Pro tees · 405 yards.
What's the best strategy off the tee?
↓
For this 405-yard par 4, most players will hit driver to set up a comfortable approach.
How difficult is hole 3?
↓
This hole is one of the tougher holes on the course for most golfers. Key challenges include: water in play, heavily bunkered, large green requiring good lag putting.
How big is the green on hole 3?
↓
The green is large and can play quite long. The green is deeper than wide, so club selection is crucial. Three-putt territory if you don't manage your approach distance well.