Hole 10 at Oakmont Country Club
- Par
- 4
- Yardage
- 462 yds
- Stroke index
- 4
- Hazards
- 10 bunkers
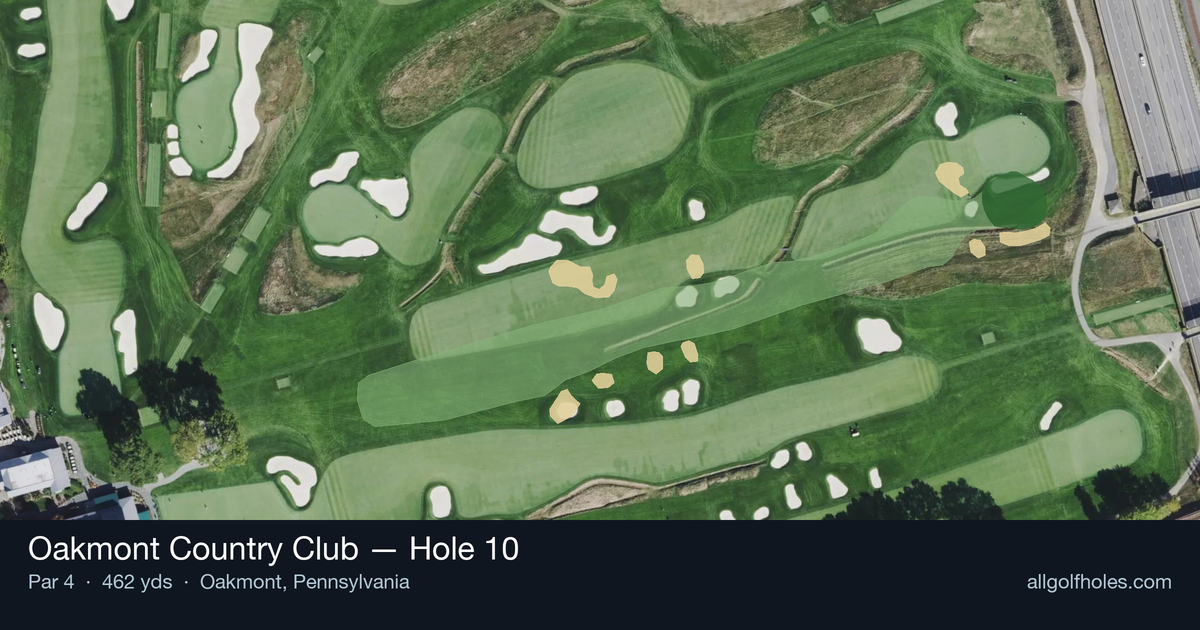
Aerial source not provided
Green size: 32 yds deep × 30 yds wide
Scorecard yardage is for Championship tees. The aerial shows its labeled reference position; distance rings measure to the green.
Championship tees · Par 4 · 462 yards
The plan for No. 10
The tenth hole at Oakmont Country Club epitomizes championship golf with its deceptively straightforward appearance masking genuine strategic complexity. This 462-yard par 4 demands precision from the championship tees, where even the slightest miscalculation can spell trouble on Oakmont's notoriously penal layout. The straight design places premium emphasis on distance control and accuracy, as the relatively small green requires a perfectly struck approach shot to find the putting surface. Without bunkers cluttering the immediate landscape, golfers might expect relief, but Oakmont's lightning-fast greens and subtle undulations provide challenge enough. The hole rewards aggressive, confident play while punishing the tentative, making it a true test of mental fortitude in Oakmont's unforgiving tradition.
Off the tee
The tee shot strategy centers on finding the optimal position for your approach while respecting Oakmont's unforgiving rough. Target the center-left portion of the fairway to open up the best angle to the small green. Driver is typically the play for most golfers given the hole's length, but accuracy cannot be sacrificed for distance. The key is committing to your target line and avoiding the thick rough that Oakmont is famous for - even a few yards offline can leave you with a severely compromised approach shot. Focus on a smooth, controlled swing rather than trying to overpower the hole.
Approach & recovery
With the green's small size, precision becomes paramount on the approach shot. The ideal approach comes from the center-left of the fairway, typically requiring a mid to long iron depending on your tee shot distance and conditions. Club selection should favor the center of the green rather than attacking pins, as Oakmont's greens are notoriously difficult to hold. Take one extra club and swing smoothly - the small target demands commitment to your line and distance control. Any approach shot that finds the rough around the green will present an extremely challenging up-and-down opportunity.
On the green
Oakmont's 10th green, like all greens here, will test your putting skills with subtle breaks and lightning-fast speeds. The small size means there's little room for error on approach shots, but it also means shorter putts if you do find the surface. Read putts conservatively and focus on speed control above all else. Lag putting is crucial - leaving yourself a short, straight putt for par should be the primary objective. Pin positions on this small green can dramatically affect the difficulty, with back pins being particularly challenging given the approach angle. ## RISK VS REWARD The primary risk/reward decision comes with tee shot club selection. While driver provides the best chance to reach the green in regulation, the penalty for missing the fairway is severe in Oakmont's rough. Conservative players might consider a fairway wood or long iron off the tee to ensure finding the short grass, though this makes the approach significantly longer and more difficult to the small green. The reward for aggressive, accurate play is substantial - a well-positioned drive leaves a manageable approach to set up birdie opportunities. ## DIFFERENT SKILL LEVELS **Low Handicappers:** Attack with driver off the tee, targeting the center-left fairway position. Be aggressive with approach club selection, taking enough club to reach the back of the green. Focus on controlling spin and trajectory to hold the small target. Trust your putting on the fast greens and look for birdie opportunities. **High Handicappers:** Consider a more conservative tee shot with 3-wood or hybrid to ensure finding the fairway. On the approach, aim for the center of the green regardless of pin position, taking an extra club for safety. Focus on two-putting from wherever you land on the green, as avoiding three-putts on Oakmont's surfaces is crucial for maintaining momentum in your round.
Watch for
- Crossing center
Hole 10 Green Complex
Mapped green boundary
Green size: 5,925 sq ft
Course coverage
Tournament and creator videos about Oakmont Country Club — shared course coverage, not hole-specific clips.
Featured by these creators
Creator videos about this course
YouTube creators who filmed or featured Oakmont Country Club. · Stats as of Oct 12, 2026 · 6d ago
The World's Hardest Golf Course: Oakmont Country Club
Deep Dive: Oakmont Country Club | Designing Golf
The Architecture of Oakmont Country Club | 2025 U.S. Open Preview
How did Hole 10 play?
How did this hole play today?
Frequently asked questions
Yardage reference: Championship tees · 462 yards.
What's the best strategy off the tee?
↓
For this 462-yard par 4, most players will hit driver to set up a comfortable approach.
How difficult is hole 10?
↓
This hole is a moderate challenge for most golfers. Key challenges include: long par 4.
How big is the green on hole 10?
↓
The green is medium-sized with moderate targets. Pay attention to pin placement when selecting your approach club.
What's a good score on hole 10?
↓
This hole is one of the tougher holes where par feels like birdie. A challenging par 4. Accept that bogey happens and avoid big numbers.