Hole 4 at Oakmont Country Club
- Par
- 5
- Yardage
- 609 yds
- Stroke index
- 13
- Hazards
- 14 bunkers
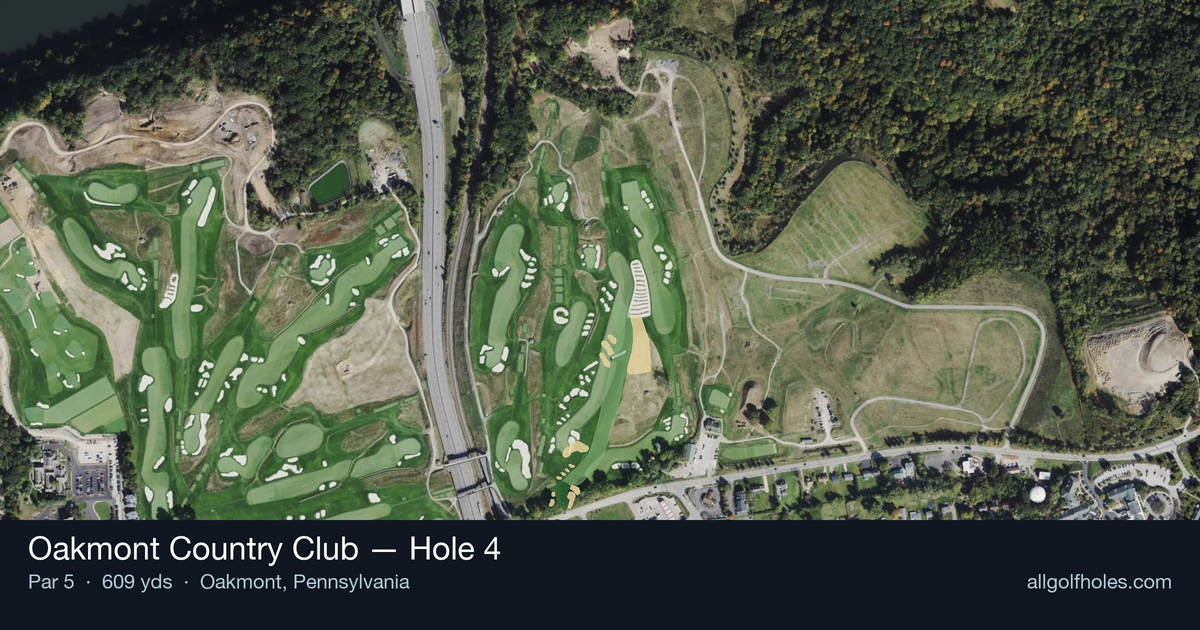
Aerial source not provided
Green size: 52 yds deep × 28 yds wide
Scorecard yardage is for Championship tees. The aerial shows its labeled reference position; distance rings measure to the green.
Championship tees · Par 5 · 609 yards
The plan for No. 4
The fourth hole at Oakmont Country Club presents a deceptively challenging par 5 that embodies the course's reputation for demanding precision. Stretching 609 yards in a straight line toward the distant green, this hole appears straightforward but requires three carefully executed shots to reach the small, unforgiving putting surface. The absence of major hazards might suggest an easy birdie opportunity, yet Oakmont's notoriously firm conditions and lightning-fast greens transform this into a true test of distance control and accuracy. Players must resist the temptation to be overly aggressive, as the compact green complex punishes wayward approach shots with difficult recovery situations that can quickly turn a potential birdie into bogey or worse.
Off the tee
Focus on finding the fairway with your most reliable driver or 3-wood, aiming for the center of the landing zone. Given Oakmont's reputation for firm fairways, expect significant roll once your ball hits the ground. The absence of major hazards means you can be aggressive with distance, but accuracy remains paramount - missing the fairway at Oakmont typically means difficult lies and challenging recovery shots. Target the middle of the fairway and let the firm conditions help maximize your distance.
Approach & recovery
For most players, this becomes a strategic layup shot to set up the best possible angle for your third shot. Position your second shot in the 100-150 yard range, favoring the center or slightly right side of the fairway for the optimal approach angle. Avoid getting too aggressive with distance if it compromises your accuracy - a well-positioned layup shot is far more valuable than an extra 20 yards in the rough. The key is leaving yourself a comfortable wedge distance to the small green.
On the green
The small green size demands precision on your approach shot, as there's little margin for error. Oakmont's greens are legendary for their speed and subtle breaks, so focus on hitting your approach to the center of the green regardless of pin position. Once on the putting surface, take time to read the slope carefully - even seemingly straight putts can have surprising movement. Lag putting becomes crucial given the green's speed, with two-putting being an excellent result. ## RISK VS REWARD The primary risk/reward decision comes on the second shot: attempting to get closer to the green versus playing a conservative layup. Given the small green and Oakmont's challenging conditions, the conservative approach typically yields better results. Long hitters might be tempted to go for the green in two, but the small target and firm conditions make this a low-percentage play for most golfers. The smart play is to accept the three-shot strategy and focus on executing each shot precisely. ## DIFFERENT SKILL LEVELS **High Handicap Players:** Play this as a definitive three-shot hole. Use your most accurate club off the tee, even if it's a 3-wood or hybrid. Focus on two solid shots to reach comfortable wedge distance, then aim for the center of the green regardless of pin position. Par is an excellent score here. **Low Handicap Players:** While still primarily a three-shot hole, better players can be more aggressive with their positioning shots. Consider going for the green in two only in ideal conditions with a favorable lie. Focus on precise distance control on the approach shot, as the small green demands exact yardages. Birdie opportunities come from excellent execution rather than aggressive strategy. The 13th handicap ranking suggests this hole plays easier than its length might indicate, likely due to the scoring opportunities available with smart course management and the absence of major hazards to inflate scores.
Watch for
- Crossing center
Hole 4 Green Complex
Mapped green boundary
Green size: 7,950 sq ft
Course coverage
Tournament and creator videos about Oakmont Country Club — shared course coverage, not hole-specific clips.
Featured by these creators
Creator videos about this course
YouTube creators who filmed or featured Oakmont Country Club. · Stats as of Oct 12, 2026 · 6d ago
The World's Hardest Golf Course: Oakmont Country Club
Deep Dive: Oakmont Country Club | Designing Golf
The Architecture of Oakmont Country Club | 2025 U.S. Open Preview
How did Hole 4 play?
How did this hole play today?
Frequently asked questions
Yardage reference: Championship tees · 609 yards.
Can this par 5 be reached in two?
↓
At 609 yards, A true three-shot hole for most players. Position your layup to leave a comfortable wedge distance.
How difficult is hole 4?
↓
This hole is a good scoring opportunity for most golfers. Key challenges include: long par 5, large green requiring good lag putting.
How big is the green on hole 4?
↓
The green is large and can play quite long. The green is deeper than wide, so club selection is crucial. Three-putt territory if you don't manage your approach distance well.
What's a good score on hole 4?
↓
This hole is a true three-shot hole where birdie requires execution. This longer par 5 demands patience. Two good shots set up the scoring opportunity.