Hole 8 at Aronimink Golf Club
- Par
- 3
- Yardage
- 237 yds
- Stroke index
- 15
- Hazards
- 2 bunkers · Water
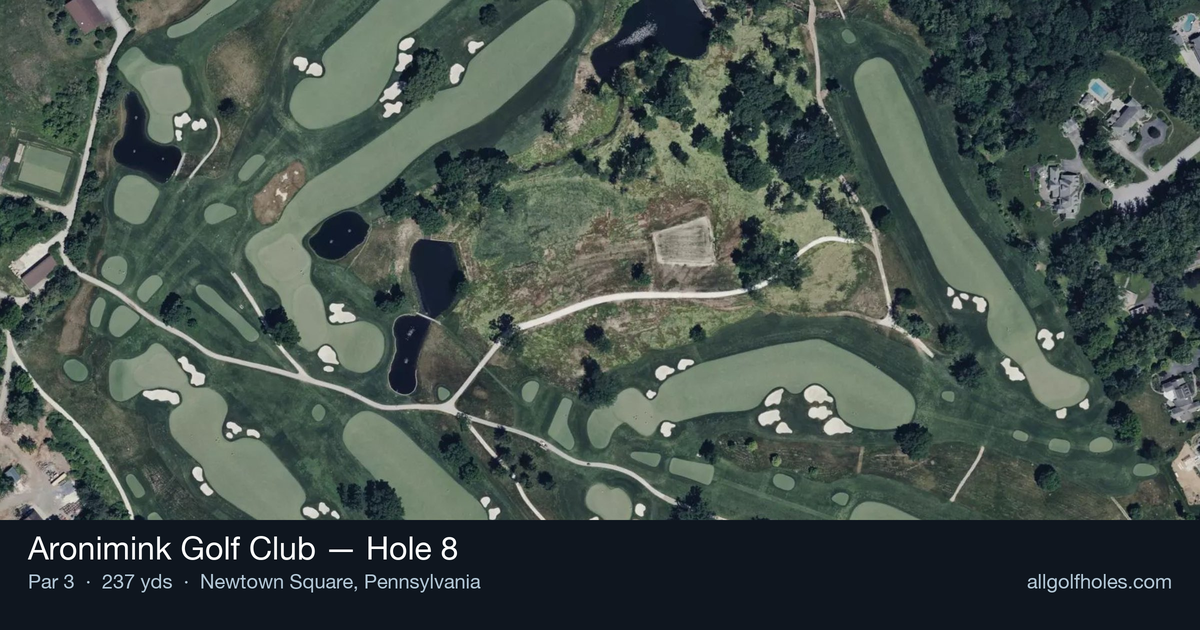
Aerial source not provided
Green size: 37 yds deep × 43 yds wide
Scorecard yardage is for Championship tees. The aerial shows its labeled reference position; distance rings measure to the green.
Championship tees · Par 3 · 237 yards
The plan for No. 8
Perhaps the most demanding par 3 at Aronimink Golf Club, the eighth hole presents a deceptive challenge that has tested professionals and amateurs alike. This downhill one-shotter plays 237 yards to a narrow, treacherous green bisected by a prominent mound that creates two distinct pin positions. The downhill nature can fool golfers into underclubbing, while the green's compact dimensions demand precise distance control. The central ridge effectively splits the putting surface, making club selection and target selection critical for avoiding three-putts. What appears straightforward from the tee becomes a test of accuracy and nerve, as even well-struck shots can find themselves on the wrong tier of this unforgiving green complex.
Off the tee
The downhill lie reduces the effective playing distance by approximately 15-20 yards, making club selection critical for success. Most players will find themselves between a long iron and hybrid, depending on pin position and wind conditions. The key is committing to your target line and avoiding the temptation to steer the ball, which often leads to missing the narrow putting surface entirely. Focus on a smooth, controlled swing that prioritizes accuracy over distance, as the elevation will provide the necessary carry.
Approach & recovery
Since this is a par 3, your tee shot serves as your approach to the green. The central mound dividing the green creates essentially two separate targets - choose your side based on pin position and stick with that decision. When the pin is on the front portion, a more aggressive line can yield birdie opportunities, but the margin for error is minimal. Back pin positions require patience and acceptance that the middle of the green is often the smartest play, even if it leaves a longer putt.
On the green
The large mound bisecting the green creates dramatic elevation changes and challenging putts when you're on the wrong tier. Reading the slope correctly is essential, as putts can easily run well past the hole if you misjudge the speed. When putting across the mound, expect significant break and plan for a two-putt strategy unless you have a clear read. The narrow width of the green means that approach shots landing on the correct level give you the best scoring opportunities. ## RISK VS REWARD The primary risk/reward decision centers on pin position and your confidence level with the required club. Aggressive plays toward tucked pins can yield birdie opportunities but carry significant penalty for misses on this narrow target. The reward for finding the correct tier near the pin is substantial, as you'll have a reasonable birdie chance. However, the penalty for missing the green or landing on the wrong tier often results in bogey or worse, making conservative center-green targets often the wisest choice. ## DIFFERENT SKILL LEVELS **High-handicap players** should focus exclusively on the center of the green regardless of pin position, using whatever club gives them confidence to carry the distance with the downhill lie factored in. Don't get drawn into pin-hunting on this demanding hole - par is an excellent score. **Low-handicap players** can be more aggressive with pin positions, particularly when the flag is accessible on their preferred side of the green. However, even skilled players should respect this hole's difficulty and avoid forcing shots to extremely challenging pin positions. The key is recognizing when to attack and when to play for the center of the green, understanding that even tour professionals treat this as one of the course's most challenging holes.
Watch for
- Course conditioning and mapped hazards may affect line selection; confirm from the aerial.
Hole 8 Green Complex
Mapped green boundary
Green size: 7,553 sq ft
Course coverage
Tournament and creator videos about Aronimink Golf Club — shared course coverage, not hole-specific clips.
Featured by these creators
Creator videos about this course
YouTube creators who filmed or featured Aronimink Golf Club. · Stats as of Oct 12, 2026 · 5d ago
2026 PGA Championship Preview: Who Will Win at Aronimink Golf Club? | The Fried Egg Golf Podcast
How did Hole 8 play?
How did this hole play today?
Frequently asked questions
Yardage reference: Championship tees · 237 yards.
What club should I use on this par 3?
↓
At 237 yards, most golfers will need a fairway wood or hybrid to reach this green. Adjust for elevation, wind, and pin position.
How difficult is hole 8?
↓
This hole is one of the tougher holes on the course for most golfers. Key challenges include: long par 3, water in play, large green requiring good lag putting.
What hazards should I watch out for on hole 8?
↓
Key hazards include: 2 greenside bunkers; water at 160.0 yards. Plan your shots to avoid these trouble spots.
How big is the green on hole 8?
↓
The green is large and can play quite long. The green is deeper than wide, so club selection is crucial. Three-putt territory if you don't manage your approach distance well.
What's a good score on hole 8?
↓
This hole is a challenging par where bogey is acceptable. This longer par 3 will test your long iron or hybrid game. Par is a good score.