Hole 5 at Aronimink Golf Club
- Par
- 3
- Yardage
- 176 yds
- Stroke index
- 17
- Hazards
- 3 bunkers
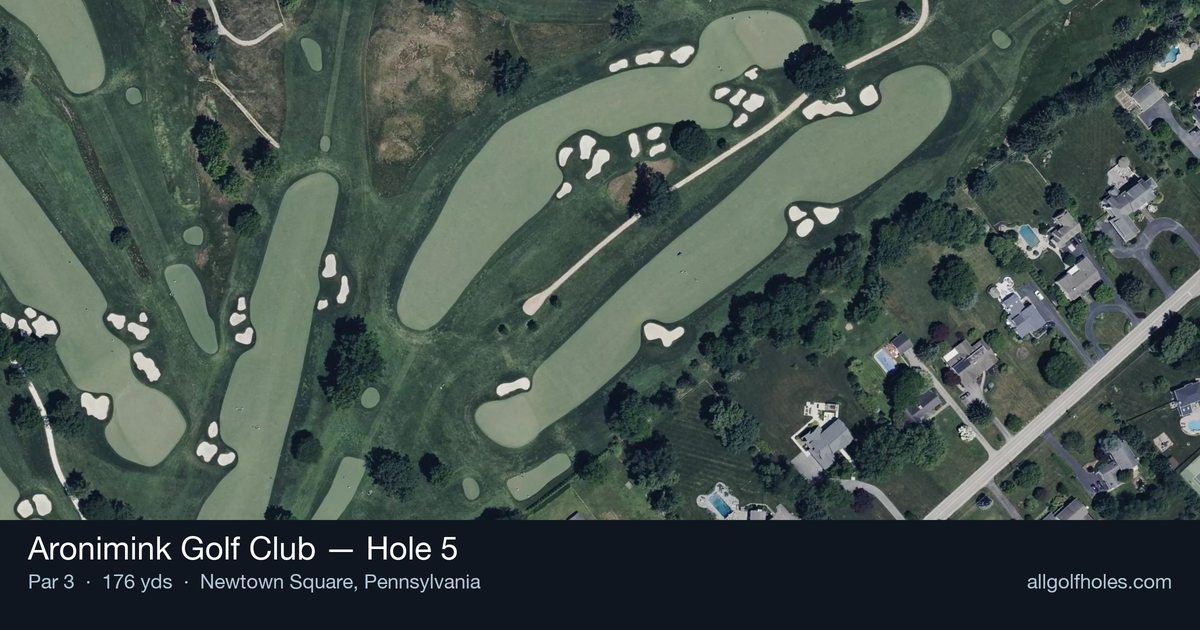
Aerial source not provided
Green size: 33 yds deep × 33 yds wide
Scorecard yardage is for Championship tees. The aerial shows its labeled reference position; distance rings measure to the green.
Championship tees · Par 3 · 176 yards
The plan for No. 5
Aronimink Golf Club hole 5 serves as the course's first par 3 and presents a deceptively challenging test of precision at 176 yards. This beautiful one-shotter showcases Donald Ross's masterful design philosophy with its striking visual presentation and strategic complexity. The hole features a generous punchbowl-style green that appears inviting from the tee, but four menacing bunkers form a defensive ring short of the putting surface, creating a classic risk-reward scenario. The green's bowl-like contours can help funnel well-struck shots toward the pin, but any tee shot that comes up short faces the prospect of finding deep sand. As Aronimink's shortest hole, it demands nothing less than a committed, accurate strike to avoid the bunker complex and find the putting surface on this quintessential Ross design.
Off the tee
Club selection is paramount on this hole, with most players requiring a mid to short iron depending on conditions and pin position. The target line should favor the center of the green, as the punchbowl design will help funnel well-struck shots toward the flag. The primary risk to avoid is coming up short - those four bunkers create a formidable barrier that severely penalizes under-clubbing. Take one extra club and commit to a smooth, controlled swing rather than trying to force a shorter iron.
Approach & recovery
Since this is a par 3, your tee shot is your approach. The preferred strategy is to aim for the heart of the green and let the natural contours work in your favor. The punchbowl design means shots landing on the correct tier will feed toward the center, making distance control more critical than precise directional accuracy. Avoid the temptation to fire directly at tucked pins - the small green size means even center-green shots will leave reasonable birdie putts.
On the green
The punchbowl nature of this green creates subtle but important breaks that flow toward the center. Most putts will have some element of break toward the middle of the green, so read accordingly. Pin positions on the edges can create challenging two-putts, making lag putting skills essential. The key is getting your first putt to the correct level - uphill putts are generally more manageable than those coming back down the slope. ## RISK VS REWARD The primary risk/reward decision centers on club selection and target choice. The reward for aggressive play toward tight pins is minimal given the small green size, while the penalty for missing short into those bunkers is severe. The smart play is always to ensure you carry the bunkers with room to spare, even if it means a longer putt. Par is an excellent score here, and bogey-avoidance should be the primary objective. ## DIFFERENT SKILL LEVELS **High-handicap players** should focus entirely on clearing the front bunkers, taking plenty of club and aiming for the center of the green regardless of pin position. Don't attempt to work the ball or make precise distance calculations - simply ensure you have enough club to reach the putting surface comfortably. **Low-handicap players** can be more nuanced with their target selection but should still respect the bunker defense. Consider wind conditions more carefully and perhaps aim for specific quadrants of the green based on pin position, but never at the expense of carrying those front hazards. This hole rewards patience and course management over aggressive play. The 5th hole perfectly embodies Ross's philosophy of testing exceptional iron play - it's a scoring opportunity for those who execute properly, but it quickly punishes indecision or poor club selection.
Watch for
- Course conditioning and mapped hazards may affect line selection; confirm from the aerial.
Hole 5 Green Complex
Mapped green boundary
Green size: 6,039 sq ft
Course and tournament history
Historical context for the course and venue. Each entry identifies the event or course it describes.
1962 · Gary Player
The finishing hole is a 436-yard (399 m) uphill par four, requires a precise tee shot and the approach shot is to a winding and sloped green with a numerous challenging pin locations.
Source →
Course coverage
Tournament and creator videos about Aronimink Golf Club — shared course coverage, not hole-specific clips.
Featured by these creators
Creator videos about this course
YouTube creators who filmed or featured Aronimink Golf Club. · Stats as of Oct 12, 2026 · 5d ago
2026 PGA Championship Preview: Who Will Win at Aronimink Golf Club? | The Fried Egg Golf Podcast
How did Hole 5 play?
How did this hole play today?
Frequently asked questions
Yardage reference: Championship tees · 176 yards.
What club should I use on this par 3?
↓
At 176 yards, most golfers will need a mid-iron (7-iron to 8-iron) to reach this green. Adjust for elevation, wind, and pin position.
How difficult is hole 5?
↓
This hole is a good scoring opportunity for most golfers.
What hazards should I watch out for on hole 5?
↓
Key hazards include: 3 greenside bunkers. Plan your shots to avoid these trouble spots.
How big is the green on hole 5?
↓
The green is fairly large with multiple pin positions. Lag putting becomes important on longer putts.
What's a good score on hole 5?
↓
This hole is a solid par with birdie chances for precise approach shots. Making par is a good result here. Focus on hitting the green and avoiding three-putts.