Hole 10 at Aronimink Golf Club
- Par
- 4
- Yardage
- 454 yds
- Stroke index
- 4
- Hazards
- 1 bunker · Water
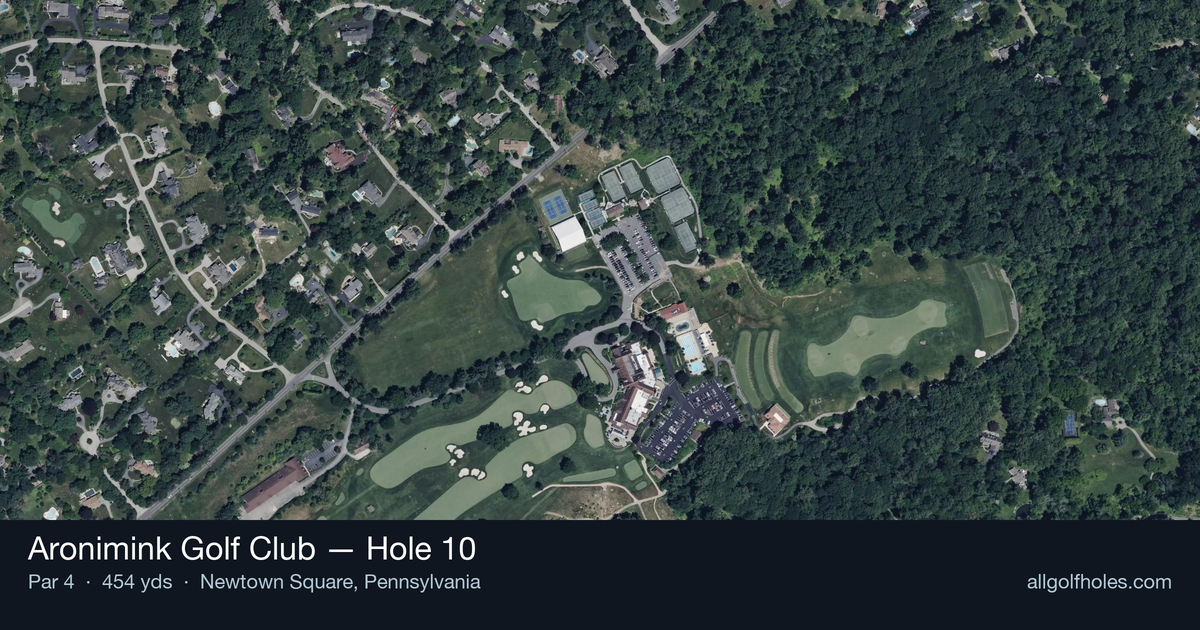
Aerial source not provided
Green size: 32 yds deep × 35 yds wide
Scorecard yardage is for Championship tees. The aerial shows its labeled reference position; distance rings measure to the green.
Championship tees · Par 4 · 454 yards
The plan for No. 10
The turn for home at Aronimink Golf Club begins with hole 10, a demanding 454-yard par 4 that epitomizes Donald Ross's philosophy of testing exceptional long-iron play. This straight-away hole presents a deceptively challenging tee shot to a generous fairway, but the real test comes with the approach to a small, elevated green complex. True to Ross's design principles, the hole demands precision over power, requiring golfers to navigate the subtle contours and strategic bunkering that define classic Golden Age architecture. The compact green rewards accurate iron play while punishing wayward approaches, making this opening hole of the back nine a perfect example of why Aronimink has hosted multiple major championships and remains one of Pennsylvania's premier golf tests.
Off the tee
The tee shot strategy centers on finding the optimal position in the fairway for your approach angle. With driver being the likely club choice for most players, focus on hitting the center-left portion of the fairway to open up the best angle to the small green. The straight layout allows for an aggressive tee shot, but accuracy remains crucial—missing the fairway will leave you with a difficult recovery shot to such a small target. Choose your target line based on pin position, as being on the correct side of the fairway will provide better access to tucked pins.
Approach & recovery
The approach shot is where this hole truly tests your long-iron play, staying true to Ross's original design intent. Expect to hit anywhere from a mid-iron to long-iron depending on your tee shot distance and conditions. The small green size makes distance control absolutely critical—being short or long will leave challenging up-and-downs. Focus on hitting to the center of the green when the pin is in a difficult position, as two-putting from the middle is far better than scrambling from the fringe or rough. Pay close attention to wind conditions, as they can significantly affect club selection on this longer approach.
On the green
The small green demands respect and conservative putting strategy. Without knowing the specific contours, focus on getting your first putt below the hole when possible, as uphill putts are generally more makeable. Speed control is crucial on smaller greens—going past the pin often leaves you with limited green to work with coming back. Read the green carefully during your approach, as you'll have the best view of the overall slope and grain direction from that angle. ## RISK VS REWARD This hole offers a more subtle risk/reward proposition than holes with obvious hazards. The main decision point comes with tee shot aggression—while driver gives you the shortest approach, it also increases the chance of missing the fairway. The reward for hitting a quality drive and approach is a legitimate birdie opportunity, but the penalty for poor execution is typically bogey or worse due to the demanding nature of the small green. ## DIFFERENT SKILL LEVELS **High Handicappers:** Focus on keeping the ball in play off the tee, even if it means using a 3-wood or hybrid for better accuracy. Accept that this will be a longer approach shot and aim for the center of the green regardless of pin position. Two-putting for par is an excellent result on this challenging hole. **Low Handicappers:** This hole rewards aggressive, precise play. Attack with driver when conditions allow, but be prepared to execute a demanding long-iron approach. Consider pin position when planning your tee shot angle, and don't be afraid to fire at pins when you have a good lie and favorable conditions. This is a hole where good players can separate themselves with quality ball-striking. The 10th at Aronimink exemplifies why Donald Ross designs have stood the test of time—it's a hole that rewards good shots and punishes poor ones, with the small green serving as the ultimate arbiter of success.
Watch for
- Course conditioning and mapped hazards may affect line selection; confirm from the aerial.
Hole 10 Green Complex
Mapped green boundary
Green size: 7,106 sq ft
Course coverage
Tournament and creator videos about Aronimink Golf Club — shared course coverage, not hole-specific clips.
Featured by these creators
Creator videos about this course
YouTube creators who filmed or featured Aronimink Golf Club. · Stats as of Oct 12, 2026 · 5d ago
2026 PGA Championship Preview: Who Will Win at Aronimink Golf Club? | The Fried Egg Golf Podcast
How did Hole 10 play?
How did this hole play today?
Frequently asked questions
Yardage reference: Championship tees · 454 yards.
What's the best strategy off the tee?
↓
For this 454-yard par 4, most players will hit driver to set up a comfortable approach.
How difficult is hole 10?
↓
This hole is one of the tougher holes on the course for most golfers. Key challenges include: long par 4, water in play, large green requiring good lag putting.
What hazards should I watch out for on hole 10?
↓
Key hazards include: water at 401.4 yards. Plan your shots to avoid these trouble spots.
How big is the green on hole 10?
↓
The green is fairly large with multiple pin positions. Lag putting becomes important on longer putts.
What's a good score on hole 10?
↓
This hole is one of the tougher holes where par feels like birdie. A challenging par 4. Accept that bogey happens and avoid big numbers.