Hole 11 at Tobacco Road Golf Club
- Par
- 5
- Yardage
- 531 yds
- Stroke index
- 10
- Hazards
- 3 bunkers
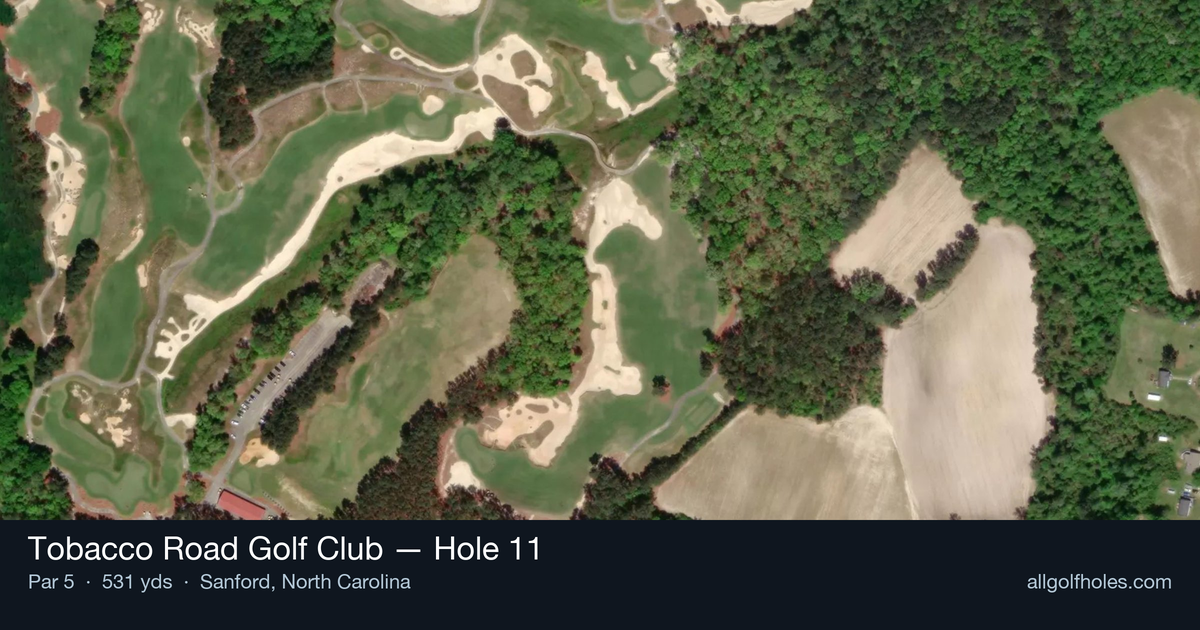
Aerial source not provided
Green size: 33 yds deep × 40 yds wide
Scorecard yardage is for Pro tees. The aerial shows its labeled reference position; distance rings measure to the green.
Pro tees · Par 5 · 531 yards
The plan for No. 11
The 11th hole at Tobacco Road Golf Club exemplifies Mike Strantz's architectural genius through deceptive simplicity that masks strategic complexity. This straight 531-yard par 5 presents what appears to be a straightforward test, but Strantz's meticulous design philosophy reveals itself in the subtle contours and visual illusions that define the hole. The generous fairway encourages aggressive tee shots, yet the small green demands precision on the approach, creating a classic risk-reward scenario. Without major hazards to intimidate, golfers must rely on course management and shot placement rather than power alone. As one of the reviewer favorites on Tobacco Road's front nine, this hole showcases Strantz's ability to create memorable golf through thoughtful routing and strategic design rather than dramatic flourishes.
Off the tee
The tee shot strategy centers on positioning for your second shot rather than maximum distance. Driver is the obvious choice for most players, but the target line should favor the center-right portion of the fairway to open up the best angle to the small green. Avoid the temptation to blast driver down the left side, as this can leave you blocked out or facing a more difficult approach angle. For players who struggle with driver accuracy, a 3-wood or hybrid off the tee makes perfect sense here - you'll still have a reasonable chance at reaching in two while significantly reducing the risk of finding Strantz's strategically placed trouble areas. The key is finding the fairway and leaving yourself with a clean lie for your approach.
Approach & recovery
The approach shot is where this hole's true character emerges. The small green demands precision, making club selection and target line crucial. If going for the green in two, expect to hit anything from a long iron to a fairway wood depending on your tee shot position and pin location. The smart play often involves laying up to your favorite wedge distance, particularly when the pin is tucked or conditions are challenging. A layup to around 100-120 yards leaves you with full control over spin and trajectory into the small target. When the pin is accessible and you're feeling confident, the green-in-two attempt can yield eagle opportunities, but commit fully to the shot - tentative swings into small greens rarely end well.
On the green
Tobacco Road's greens are notorious for their subtle breaks and firm conditions, and the 11th is no exception. The small putting surface means every putt matters, so take time to read the green carefully. Approach putts from below the hole when possible, as downhill putts on Strantz's greens can quickly get away from you. Pin position dramatically affects your approach strategy - when the flag is tucked, aim for the center of the green and take your chances with a longer putt rather than risking a miss that leaves you scrambling. The firm conditions typical of sandhills golf mean your approach shots need to land short and release to the pin. ## RISK VS REWARD This hole presents a classic risk/reward scenario that changes based on your position in the round and your confidence level. The reward for reaching in two is significant - eagles are possible, and birdies become highly probable with a good approach. However, the risk of missing the small green and facing a difficult up-and-down can quickly turn a scoring opportunity into a card-wrecker. The conservative play of laying up and attacking with a wedge often proves to be the higher percentage route to birdie, especially for mid-to-high handicap players. The key is making an honest assessment of your ball-striking ability and current form before committing to the aggressive line. ## DIFFERENT SKILL LEVELS **Low Handicap Players:** Should view this as a birdie hole where course management trumps aggression. Going for the green in two is viable when conditions and lie permit, but the layup option often yields better scoring results. Focus on precise distance control and reading the approach correctly. **Mid Handicap Players:** The layup strategy typically produces the best results. Use the tee shot to set up your favorite wedge distance, then attack the pin with confidence. This approach removes the pressure of hitting a perfect long approach into a small target. **High Handicap Players:** Play this hole in three comfortable shots. Driver or 3-wood off the tee, then advance the ball to wedge range, leaving yourself with the best chance to get up and down for par or make birdie with a good wedge shot. Don't let the par-5 designation tempt you into overly aggressive play that leads to big numbers. The 11th hole rewards patience and precision over power, embodying the strategic principles that made Mike Strantz one of golf's most respected architects. Play within your abilities, and this hole can provide a crucial scoring opportunity in your round at Tobacco Road.
Watch for
- Course conditioning and mapped hazards may affect line selection; confirm from the aerial.
Hole 11 Green Complex
Mapped green boundary
Green size: 4,864 sq ft
Course coverage
Tournament and creator videos about Tobacco Road Golf Club — shared course coverage, not hole-specific clips.
Featured by these creators
Creator videos about this course
YouTube creators who filmed or featured Tobacco Road Golf Club. · Stats as of Oct 12, 2026 · 6d ago
A first look at all 12 holes of Tobacco Road’s brand new Par 3 course, The Matchbox. @Chevrolet #Ad
D.J. Pie gets rich at Tobacco Road
How did Hole 11 play?
How did this hole play today?
Frequently asked questions
Yardage reference: Pro tees · 531 yards.
Can this par 5 be reached in two?
↓
At 531 yards, A true three-shot hole for most players. Position your layup to leave a comfortable wedge distance.
How difficult is hole 11?
↓
This hole is a good scoring opportunity for most golfers.
How big is the green on hole 11?
↓
The green is medium-sized with moderate targets. Pay attention to pin placement when selecting your approach club.
Which side of the fairway is safer on hole 11?
↓
Aim for the right side of the fairway when possible. Missing left brings more trouble into play.
What's a good score on hole 11?
↓
This hole is a solid birdie opportunity with smart layup strategy. Most golfers can reach in three. Position your layup to leave a comfortable wedge.