Hole 17 at Tobacco Road Golf Club
- Par
- 3
- Yardage
- 142 yds
- Stroke index
- 18
- Hazards
- 1 bunker
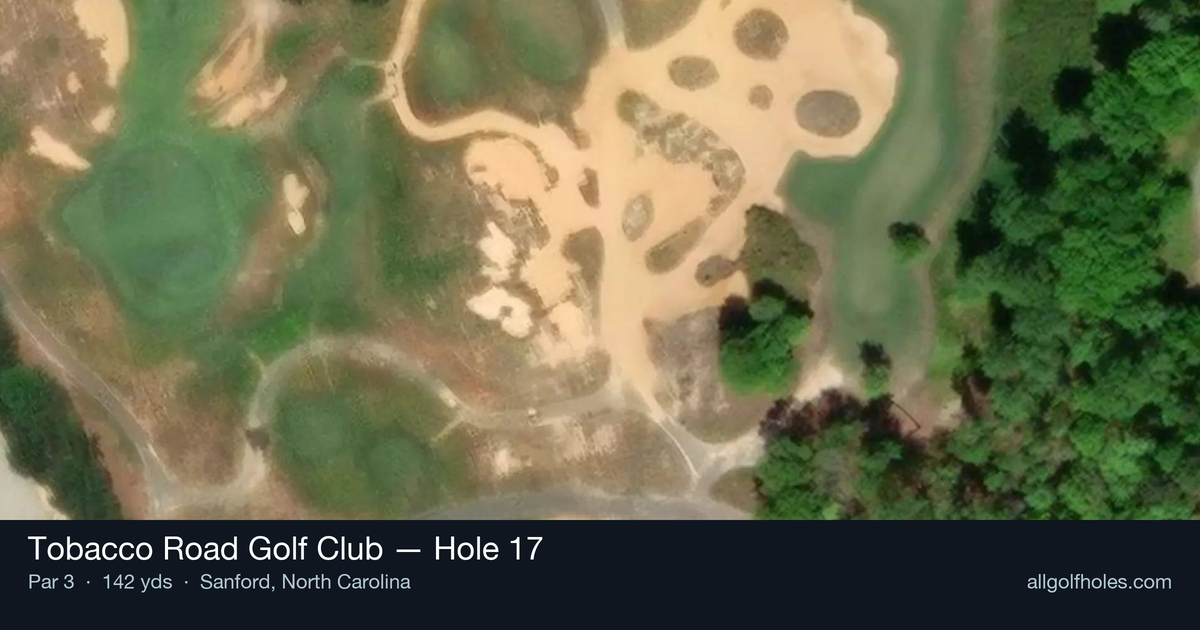
Aerial source not provided
Green size: 61 yds deep × 75 yds wide
Scorecard yardage is for Pro tees. The aerial shows its labeled reference position; distance rings measure to the green.
Pro tees · Par 3 · 142 yards
The plan for No. 17
The penultimate hole at Tobacco Road Golf Club delivers a deceptively challenging finale to one of golf's most audacious designs. This 142-yard par 3 embodies the course's philosophy of forcing critical decisions, where precision trumps power on the tee shot. The small green demands pinpoint accuracy, leaving little margin for error despite the modest yardage. True to Tobacco Road's reputation for creativity over distance, the hole's straightforward layout masks subtle complexities that can quickly punish wayward shots. As golfers prepare for the closing stretch, this short iron test serves as a final reminder of the course's ability to create memorable moments through strategic design rather than sheer length.
Off the tee
Club selection is paramount on this short iron par 3. Most players will be looking at a 7-iron to 9-iron depending on conditions, but the key is choosing a club that allows you to make a smooth, controlled swing. Take one extra club and swing with confidence rather than forcing a shot with less club. Target the center of the green regardless of pin position—the small green size makes this a "hit the green and take your chances" approach shot. Focus on a smooth tempo and solid contact rather than trying to get cute with pin-seeking. The straight layout means your primary concern is distance control, not direction.
Approach & recovery
Since this is a par 3, your tee shot IS your approach shot. The small green demands precision, so commit fully to your club selection. A well-struck shot to the center of the green will always leave a reasonable putt, while trying to get too aggressive with pin positions on a small target often leads to trouble. Pay attention to wind conditions, as they can significantly affect club selection on shorter holes. When in doubt, favor the middle of the green—even a 30-foot putt is better than a difficult recovery shot.
On the green
With a small green, most putts will be relatively short, but don't underestimate the subtleties of the putting surface. Tobacco Road's greens are known for their character, so take time to read the slope carefully. Look for the general flow of the green and any subtle breaks that might not be immediately obvious. Focus on speed control—on smaller greens, pace is often more important than line since you have less room for error. A putt that's on line but too firm can easily roll off the back or sides of a compact putting surface. ## RISK VS REWARD The risk/reward calculation here is relatively simple: the reward of an aggressive shot at a tucked pin is a potential birdie, but the risk of missing the small green entirely can lead to a difficult up-and-down. Given the 18th handicap rating, this hole is designed to be a scoring opportunity if played intelligently. The smart play is always center of the green, taking your birdie chances when they come naturally rather than forcing them. Remember Tobacco Road's design philosophy—even the "easier" holes can bite if you don't show them proper respect. ## DIFFERENT SKILL LEVELS **High-Handicap Players:** Play this hole conservatively with a club that ensures solid contact. Aim for the center of the green and don't worry about pin positions. A two-putt par is an excellent score that maintains momentum heading to the final hole. Focus on smooth tempo and avoiding the temptation to guide the ball—make a committed swing. **Low-Handicap Players:** While you can be more aggressive with pin hunting, the small green still demands respect. Consider pin position only after ensuring you can hit the green first. This is an excellent birdie opportunity if played with the right balance of aggression and intelligence. Use your short iron precision to attack when the pin is accessible, but always have a bailout plan to the fat part of the green. The 17th hole at Tobacco Road offers a brief respite in terms of length and complexity, but maintaining focus and executing proper course management principles will ensure you capitalize on this scoring opportunity before tackling the challenging finishing hole.
Watch for
- Course conditioning and mapped hazards may affect line selection; confirm from the aerial.
Hole 17 Green Complex
Mapped green boundary
Green size: 9,280 sq ft
Course coverage
Tournament and creator videos about Tobacco Road Golf Club — shared course coverage, not hole-specific clips.
Featured by these creators
Creator videos about this course
YouTube creators who filmed or featured Tobacco Road Golf Club. · Stats as of Oct 12, 2026 · 6d ago
A first look at all 12 holes of Tobacco Road’s brand new Par 3 course, The Matchbox. @Chevrolet #Ad
D.J. Pie gets rich at Tobacco Road
How did Hole 17 play?
How did this hole play today?
Frequently asked questions
Yardage reference: Pro tees · 142 yards.
What club should I use on this par 3?
↓
At 142 yards, most golfers will need a short iron (9-iron to PW) to reach this green. Adjust for elevation, wind, and pin position.
How difficult is hole 17?
↓
This hole is a good scoring opportunity for most golfers. Key challenges include: large green requiring good lag putting.
What hazards should I watch out for on hole 17?
↓
Key hazards include: 1 greenside bunker. Plan your shots to avoid these trouble spots.
How big is the green on hole 17?
↓
The green is large and can play quite long. The green is deeper than wide, so club selection is crucial. Three-putt territory if you don't manage your approach distance well.
What's a good score on hole 17?
↓
This hole is a legitimate birdie opportunity for accurate iron players. Most golfers should target par, with birdie chances if you hit the green in regulation.