Hole 12 at Tobacco Road Golf Club
- Par
- 4
- Yardage
- 419 yds
- Stroke index
- 14
- Hazards
- 4 bunkers
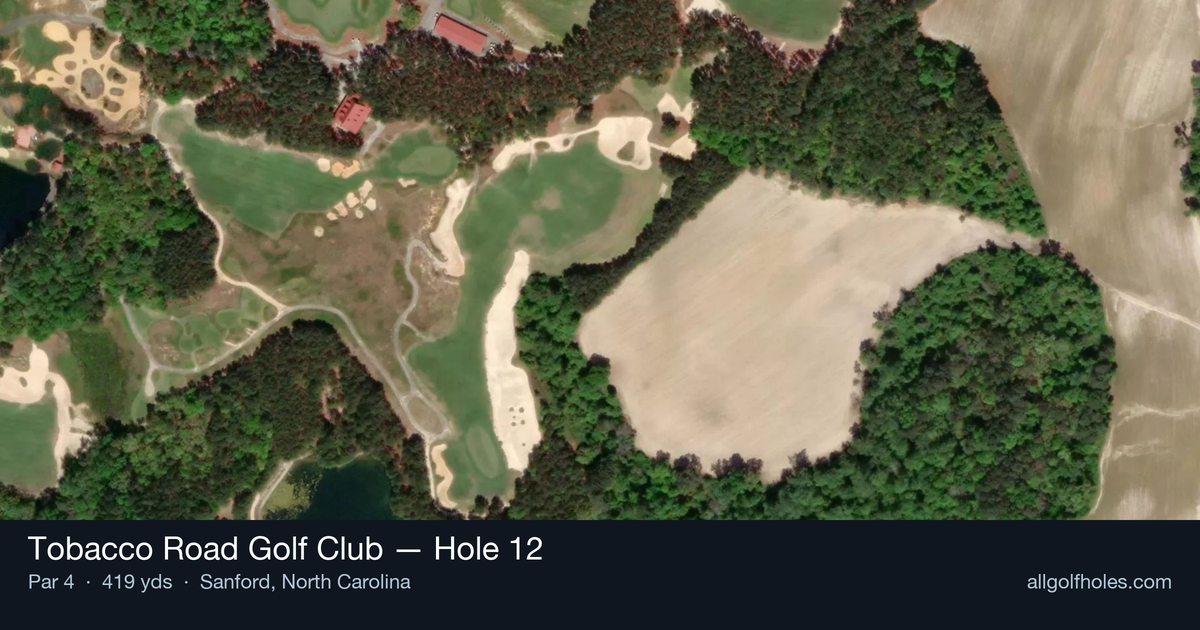
Aerial source not provided
Green size: 36 yds deep × 46 yds wide
Scorecard yardage is for Pro tees. The aerial shows its labeled reference position; distance rings measure to the green.
Pro tees · Par 4 · 419 yards
The plan for No. 12
Tobacco Road Golf Club hole 12 exemplifies Mike Strantz's unconventional design philosophy with a deceptively straightforward par 4 that plays 419 yards through the former sand quarry landscape. This straight hole presents golfers with a generous fairway off the tee, but the approach shot reveals the architect's trademark creativity. The small green complex demands precision, as missing the target leaves challenging recovery shots from the surrounding sandy terrain that defines this North Carolina gem. While appearing less dramatic than some of Tobacco Road's blind shot spectacles, the 12th hole requires thoughtful club selection and accurate iron play to navigate successfully. The putting surface's compact dimensions make distance control paramount, rewarding golfers who can dial in their approach shots with confidence.
Off the tee
Your tee shot strategy should focus on finding the ideal position in the landing zone, typically around the 250-yard mark for most players. Given the straight layout, driver is often the play for longer hitters who can comfortably reach the optimal approach distance. However, don't overlook the value of a controlled 3-wood or hybrid if you're between clubs - accuracy trumps distance on this hole. The target line should favor the center of the fairway, allowing for the natural shape of your preferred shot. With no major hazards to navigate, this is an excellent opportunity to commit to your stock tee shot and build confidence for the remainder of your round.
Approach & recovery
The approach shot is where this hole reveals its true character. The small green demands precision with your club selection and target line. Depending on your tee shot position, you'll likely face a mid-iron to short-iron approach, making this an excellent scoring opportunity for players who execute properly. Focus on the center of the green initially, as the small target leaves little margin for error. Pin hunting should be reserved for when you're feeling confident with your iron play and have a comfortable yardage. The compact green size means that even a well-struck shot slightly off-line can find trouble around the putting surface.
On the green
The small green at the 12th requires careful attention to speed control and line. While specific break patterns aren't detailed, typical Mike Strantz greens feature subtle undulations that can be deceptive. Take extra time to read your putts, as the smaller surface means you'll face a variety of distances and angles throughout your round. Position your approach shots below the hole when possible, as uphill putts on smaller greens tend to be more manageable than downhill attempts where speed control becomes critical. ## RISK VS REWARD This hole presents a more straightforward risk/reward calculation compared to Tobacco Road's more dramatic holes. The primary reward comes from aggressive pin-seeking on your approach shot when conditions and your ball-striking confidence align. The risk lies in missing the small green and facing a challenging up-and-down. Conservative play - aiming for the center of the green regardless of pin position - virtually guarantees a two-putt par opportunity, while aggressive approach shots can yield birdie chances for confident iron players. ## DIFFERENT SKILL LEVELS **High Handicappers:** Focus on finding the fairway with whatever club gives you confidence off the tee, even if it's a hybrid or long iron. On your approach, aim for the largest part of the green and accept a two-putt par as an excellent result. This hole offers a great chance to avoid big numbers. **Low Handicappers:** This is a clear birdie opportunity that should be attacked intelligently. Use driver to get as close as possible to your preferred approach yardage, then be aggressive with your iron play when you have a comfortable number. The small green rewards precise distance control, so trust your yardages and commit to your club selection. The 12th hole exemplifies the more strategic, less visually intimidating side of Tobacco Road's design philosophy, making it an essential scoring hole in your round management strategy.
Watch for
- Course conditioning and mapped hazards may affect line selection; confirm from the aerial.
Hole 12 Green Complex
Mapped green boundary
Green size: 8,033 sq ft
Course coverage
Tournament and creator videos about Tobacco Road Golf Club — shared course coverage, not hole-specific clips.
Featured by these creators
Creator videos about this course
YouTube creators who filmed or featured Tobacco Road Golf Club. · Stats as of Oct 12, 2026 · 5d ago
A first look at all 12 holes of Tobacco Road’s brand new Par 3 course, The Matchbox. @Chevrolet #Ad
D.J. Pie gets rich at Tobacco Road
How did Hole 12 play?
How did this hole play today?
Frequently asked questions
Yardage reference: Pro tees · 419 yards.
What's the best strategy off the tee?
↓
For this 419-yard par 4, most players will hit driver to set up a comfortable approach.
How difficult is hole 12?
↓
This hole is a moderate challenge for most golfers. Key challenges include: heavily bunkered, large green requiring good lag putting.
How big is the green on hole 12?
↓
The green is large and can play quite long. The green is deeper than wide, so club selection is crucial. Three-putt territory if you don't manage your approach distance well.