Hole 7 at Tobacco Road Golf Club
- Par
- 4
- Yardage
- 411 yds
- Stroke index
- 7
- Hazards
- 6 bunkers
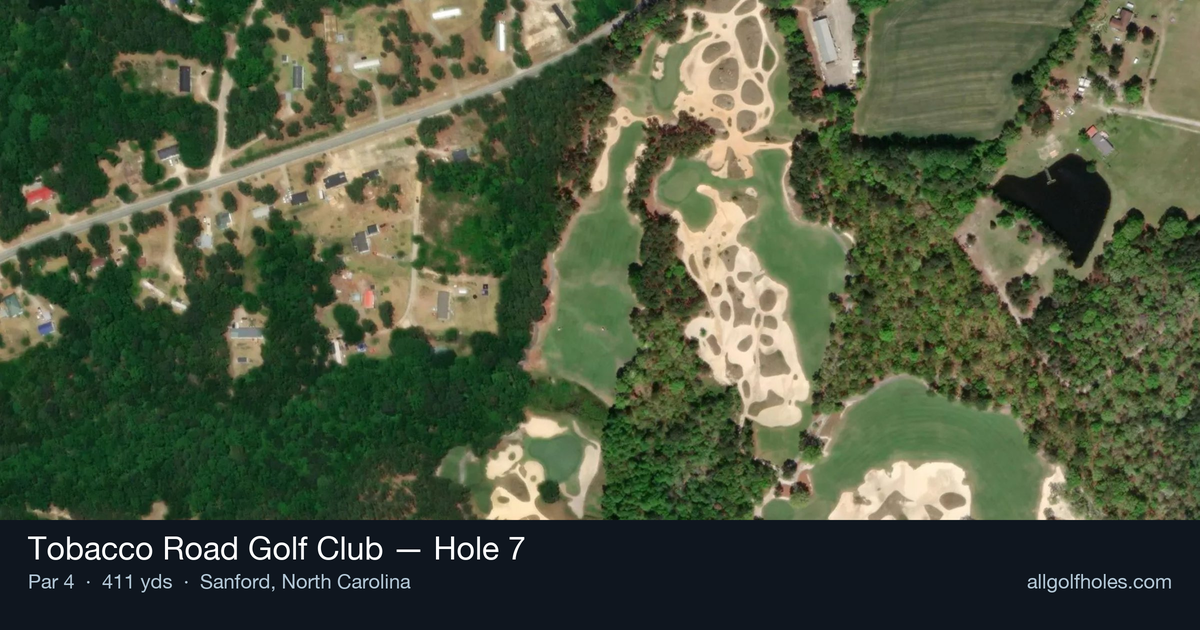
Aerial source not provided
Green size: 48 yds deep × 49 yds wide
Scorecard yardage is for Pro tees. The aerial shows its labeled reference position; distance rings measure to the green.
Pro tees · Par 4 · 411 yards
The plan for No. 7
The seventh hole at Tobacco Road Golf Club exemplifies Mike Strantz's bold architectural vision carved from the old sand quarry landscape. This 411-yard par 4 presents a deceptively straightforward challenge that embodies the course's "rock and roll thrill ride" reputation. The tee shot demands precision placement on a generous fairway framed by the signature golden love grass and rolling Sandhills terrain. With no significant hazards to navigate, golfers might expect a breather, but the small green complex requires a calculated approach shot that tests distance control and accuracy. The putting surface's compact dimensions amplify the premium on approach precision, making this hole a subtle test of execution rather than power. True to Tobacco Road's polarizing character, this hole rewards strategic thinking over aggressive play, creating memorable moments through its understated yet demanding design.
Off the tee
The tee shot strategy centers on finding the optimal distance and angle for your approach. Most players should resist the urge to bomb driver and instead focus on placing the ball in the ideal landing zone. A well-struck 3-wood or hybrid can leave you with a comfortable mid-iron approach, while aggressive drivers may find themselves with an awkward yardage or poor angle to the small target. The target line should favor the center of the fairway, giving you the most options for your approach shot. Pay attention to pin position when selecting your tee club - a back pin might call for a more aggressive tee shot to get closer, while a front pin rewards laying back to ensure a full swing with your approach club.
Approach & recovery
The approach shot is where this hole reveals its teeth. The small green demands precision, and club selection becomes critical. Depending on conditions and pin position, you'll likely be hitting anything from a wedge to a mid-iron. The key is committing to your yardage and swinging confidently. Focus on the center of the green unless you're highly confident in your iron play. The small target leaves little margin for error, and even slightly off-line shots can find trouble. Take one more club than you think you need and make a smooth, controlled swing rather than trying to muscle a shorter iron.
On the green
The small green at the 7th demands respect with your putter. While specific break patterns aren't detailed, expect subtle undulations typical of Strantz's design philosophy. Speed control becomes paramount on a smaller surface where running putts past the hole can leave difficult comeback attempts. Focus on getting your first putt close rather than being overly aggressive. The size of the green means that even from the fringe, you're dealing with a relatively short putt. Take time to read the green carefully and commit to your line. ## RISK VS REWARD Unlike some of Tobacco Road's more dramatic risk/reward holes, the 7th presents a more subtle strategic challenge. The primary risk/reward decision comes with tee shot aggression - how close can you get to the green while maintaining control and a good angle? Conservative players can lay back with a 3-wood or long iron, ensuring they stay in play and have a full swing for their approach. More aggressive players might try to get closer with driver, but must be prepared for the consequences if they miss their target line. ## DIFFERENT SKILL LEVELS **High Handicappers:** Focus on keeping the ball in play off the tee with a fairway wood or hybrid. Don't worry about distance - prioritize accuracy and a comfortable approach yardage. Aim for the center of the green regardless of pin position, and be satisfied with a two-putt par. **Mid Handicappers:** Can be slightly more aggressive off the tee but should still prioritize position over distance. Work on approach shot precision, as this hole rewards accurate iron play. Start attacking pins only when you're confident in your distance control. **Low Handicappers:** Can use driver more aggressively while still respecting the strategic demands. Should look to attack favorable pin positions but have the course management skills to play conservatively when conditions or their game dictates. This hole can be a birdie opportunity with precise execution. The 7th hole at Tobacco Road may not have the dramatic flair of the course's most famous holes, but it embodies the strategic golf that makes this Mike Strantz design so memorable. Success here comes from smart club selection, precise execution, and the patience to play within your abilities.
Watch for
- Course conditioning and mapped hazards may affect line selection; confirm from the aerial.
Hole 7 Green Complex
Mapped green boundary
Green size: 10,115 sq ft
Course coverage
Tournament and creator videos about Tobacco Road Golf Club — shared course coverage, not hole-specific clips.
Featured by these creators
Creator videos about this course
YouTube creators who filmed or featured Tobacco Road Golf Club. · Stats as of Oct 12, 2026 · 6d ago
A first look at all 12 holes of Tobacco Road’s brand new Par 3 course, The Matchbox. @Chevrolet #Ad
D.J. Pie gets rich at Tobacco Road
How did Hole 7 play?
How did this hole play today?
Frequently asked questions
Yardage reference: Pro tees · 411 yards.
What's the best strategy off the tee?
↓
For this 411-yard par 4, most players will hit driver to set up a comfortable approach.
How difficult is hole 7?
↓
This hole is a moderate challenge for most golfers. Key challenges include: heavily bunkered, large green requiring good lag putting.
How big is the green on hole 7?
↓
The green is large and can play quite long. Three-putt territory if you don't manage your approach distance well.