Hole 5 at Pinehurst Resort #7
- Par
- 3
- Yardage
- 205 yds
- Stroke index
- 17
- Hazards
- 2 bunkers
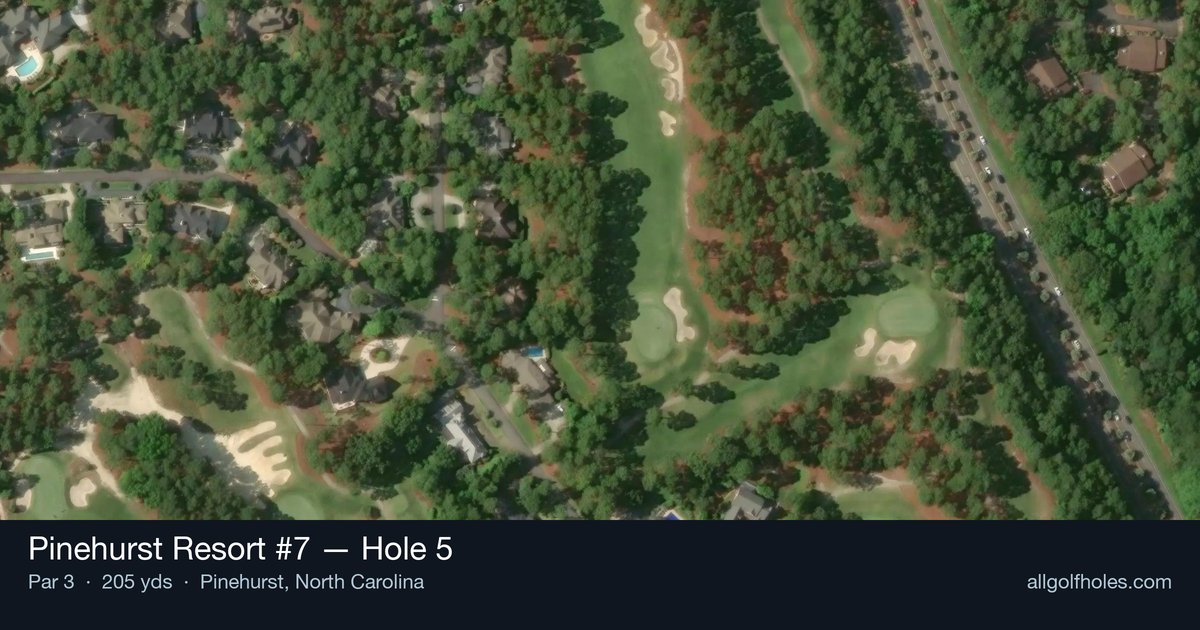
Aerial source not provided
Green size: 36 yds deep × 25 yds wide
Scorecard yardage is for Championship tees. The aerial shows its labeled reference position; distance rings measure to the green.
Championship tees · Par 3 · 205 yards
The plan for No. 5
The fifth hole at Pinehurst Resort #7 presents a deceptively challenging par 3 that epitomizes Rees Jones' thoughtful design philosophy. At 205 yards, this tee shot demands precision over the dramatic, hilly terrain that defines this 1986 layout. The small green sits nestled among the towering North Carolina pines, creating an intimate target that requires careful club selection and unwavering accuracy. What makes this hole particularly memorable is how it showcases the course's natural Carolina Sandhills character, with the green complex perched strategically within the rolling landscape. The relatively high handicap rating of 17 might suggest ease, but the combination of distance, small target, and the unforgiving nature of missing this compact green makes it a true test of iron play and course management.
Off the tee
Club selection is paramount on this 205-yard one-shotter. Most golfers will be looking at anything from a 5-iron to a 7-iron depending on wind conditions and pin position. The key is choosing a club that allows you to swing with confidence and control rather than forcing a shot. Take one more club if there's any doubt, as the small green demands accuracy over aggression. Focus on a smooth, balanced swing with good tempo, aiming for the center of the green regardless of pin position.
Approach & recovery
Since this is a par 3, your tee shot is your approach shot. The small green size means there's little margin for error, making target selection crucial. When the pin is tucked near an edge, resist the temptation to get aggressive - the center of the green is always your friend on a small target. Pay attention to wind conditions, as they can significantly affect club selection on this length of shot. A controlled draw or fade can help you work the ball toward certain pin positions, but only attempt these shots if they're comfortable parts of your game.
On the green
The small green likely features subtle breaks that can be tricky to read. Take time to study your putt from multiple angles, as even seemingly straight putts can have movement you don't initially see. With the green's compact size, distance control becomes just as important as line - you don't want to leave yourself long comeback putts. Focus on getting your first putt close to the hole, as two-putting should be your primary objective from anywhere on this green. ## RISK VS REWARD This hole offers a classic risk/reward scenario in club selection. The reward for being aggressive with a shorter iron is a closer approach to certain pin positions, but the risk is coming up short or losing control of distance. The safer play is taking enough club to ensure you reach the green, even if it means being on the back edge with some pin positions. Given the handicap rating of 17, this hole is designed to reward smart, conservative play over heroic attempts. ## DIFFERENT SKILL LEVELS **High-handicap players** should focus entirely on finding the green with their tee shot. Choose a club that you're confident will carry the full distance, and aim for the center of the green regardless of pin position. A bogey here isn't devastating, but finding the green gives you a legitimate chance at par. **Low-handicap players** can be more aggressive with pin hunting, especially when their iron play is sharp. Consider working the ball toward tucked pins, but only when you're swinging well and conditions are favorable. The small target still demands respect, so even skilled players should have a clear commitment to their chosen target and club selection. The key to conquering this hole lies in honest self-assessment of your iron play and current form, combined with smart course management that prioritizes finding the green over chasing pins.
Watch for
- Course conditioning and mapped hazards may affect line selection; confirm from the aerial.
Hole 5 Green Complex
Mapped green boundary
Green size: 4,554 sq ft
How did Hole 5 play?
How did this hole play today?
Frequently asked questions
Yardage reference: Championship tees · 205 yards.
What club should I use on this par 3?
↓
At 205 yards, most golfers will need a long iron or hybrid (5-iron to 6-iron) to reach this green. Adjust for elevation, wind, and pin position.
What hazards should I watch out for on hole 5?
↓
Key hazards include: 2 greenside bunkers. Plan your shots to avoid these trouble spots.
How big is the green on hole 5?
↓
The green is medium-sized with moderate targets. The green is wider than it is deep, rewarding shots that find the correct tier. Pay attention to pin placement when selecting your approach club.