Hole 14 at Bethpage State Park (Black Course)
- Par
- 3
- Yardage
- 161 yds
- Hazards
- 2 bunkers
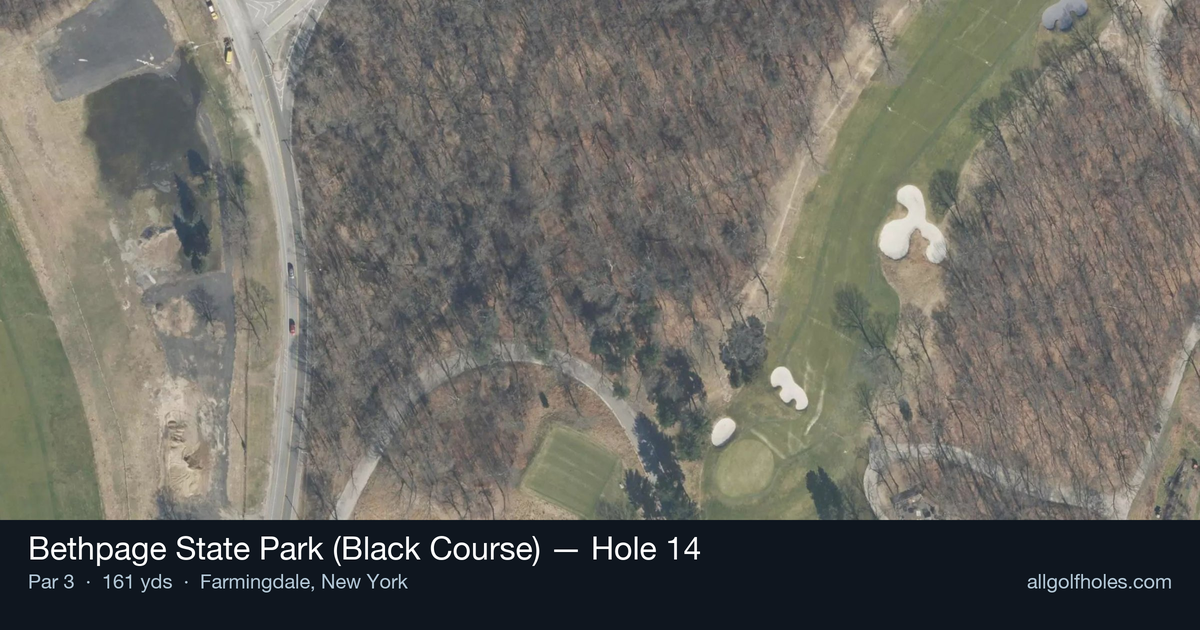
Aerial source not provided
Green size: 45 yds deep × 38 yds wide
Scorecard yardage is for Championship tees. The aerial shows its labeled reference position; distance rings measure to the green.
Championship tees · Par 3 · 161 yards
The plan for No. 14
Dubbed the "easiest hole" on the legendary Bethpage Black Course, this deceptively simple par 3 at 161 yards offers a welcome respite amid one of golf's most punishing championship venues. The tee shot plays to a compact green guarded by strategic bunkers fronting the putting surface and along the left side. The green's distinctive tongue feature creates a narrow slot in the front left, transforming what appears straightforward into a precision challenge when pins are tucked in this demanding location. While shorter than Bethpage's notorious long holes, the 14th demands accurate club selection and committed execution. Smart golfers aim for the center of the green, avoiding the temptation to attack tight pin positions that have frustrated major championship competitors on this storied Long Island layout.
Off the tee
Club selection is critical on this short iron shot. Depending on conditions and pin position, expect to hit anything from a 7-iron to a 9-iron. The primary hazards to avoid are the bunker fronting the green and the left-side bunker that guards the more challenging pin positions. When the pin is in the front left "tongue" area - the most difficult location according to course insiders - favor the center or right side of the green. This narrow slot represents the hole's primary defense, and attacking it directly significantly increases your risk of finding the left bunker. For most other pin positions, aim for the center of the green and let your natural shot shape work toward the flag.
Approach & recovery
Since this is a par 3, your tee shot is your approach shot. Focus on committing fully to your club selection - the small green size means there's little margin for error with distance control. Take one extra club if you're between distances, as the front bunker will punish any shot that comes up short. Pay careful attention to wind conditions, as they can significantly affect club selection on this shorter hole. The elevated nature of many Bethpage Black greens means wind effects can be more pronounced than they appear from the tee.
On the green
The small green requires precise putting and careful green reading. While specific break patterns aren't detailed, expect subtle undulations that can be tricky to read. The "tongue" feature in the front left creates an interesting contour that can affect putts from various angles. Focus on getting your first putt close rather than being overly aggressive, especially from longer distances. Two-putting from anywhere on this small green should be your primary objective, as three-putts can quickly turn your scoring opportunity into a bogey. ## RISK VS REWARD The risk/reward calculation here is relatively straightforward: this is your chance to gain a stroke on the field. The reward of attacking pins and going for birdie is significant, given the overall difficulty of Bethpage Black. However, the risks - primarily the bunkers and potential for short-siding yourself - can quickly turn opportunity into disaster. The smart play is controlled aggression: take enough club, aim for safe areas of the green when pins are tucked, and rely on solid putting to convert birdie chances. ## DIFFERENT SKILL LEVELS **High Handicappers:** Focus entirely on finding the green and avoiding bunkers. Aim for the center of the green regardless of pin position, take one extra club to ensure you clear the front bunker, and be satisfied with par. This hole can provide crucial momentum and confidence for the challenging finishing stretch. **Low Handicappers:** You can be more aggressive with pin hunting, especially when the flag isn't in the treacherous front-left position. Use your distance control skills to attack pins in safer locations, but respect the difficulty of the front-left tongue. This is a hole where your short game skills should shine - expect to have several birdie opportunities here throughout multiple rounds. **Mid Handicappers:** Strike a balance between aggression and safety. When the pin is accessible, go for it with proper club selection. When it's tucked in difficult positions, play to the fat part of the green and rely on putting. This hole often separates good rounds from great ones at your skill level.
Watch for
- 2 mapped bunkers influence club selection and recovery options on this hole.
Hole 14 Green Complex
Mapped green boundary
Green size: 8,307 sq ft
How did Hole 14 play?
How did this hole play today?
Frequently asked questions
Yardage reference: Championship tees · 161 yards.
What club should I use on this par 3?
↓
At 161 yards, most golfers will need a mid-iron (7-iron to 8-iron) to reach this green. Adjust for elevation, wind, and pin position.
How difficult is hole 14?
↓
This hole is a good scoring opportunity for most golfers. Key challenges include: large green requiring good lag putting.
What hazards should I watch out for on hole 14?
↓
Key hazards include: 2 greenside bunkers. Plan your shots to avoid these trouble spots.
How big is the green on hole 14?
↓
The green is large and can play quite long. Three-putt territory if you don't manage your approach distance well.
What's a good score on hole 14?
↓
This hole is a solid par with birdie chances for precise approach shots. Making par is a good result here. Focus on hitting the green and avoiding three-putts.