Hole 7 at Wolf Creek Golf Course
- Par
- 4
- Yardage
- 302 yds
- Stroke index
- 13
- Hazards
- 5 bunkers · Water
Aerial source not provided
Green size: 19 yds deep × 35 yds wide
Scorecard yardage is for Championship tees. The aerial shows its labeled reference position; distance rings measure to the green.
Championship tees · Par 4 · 302 yards
The plan for No. 7
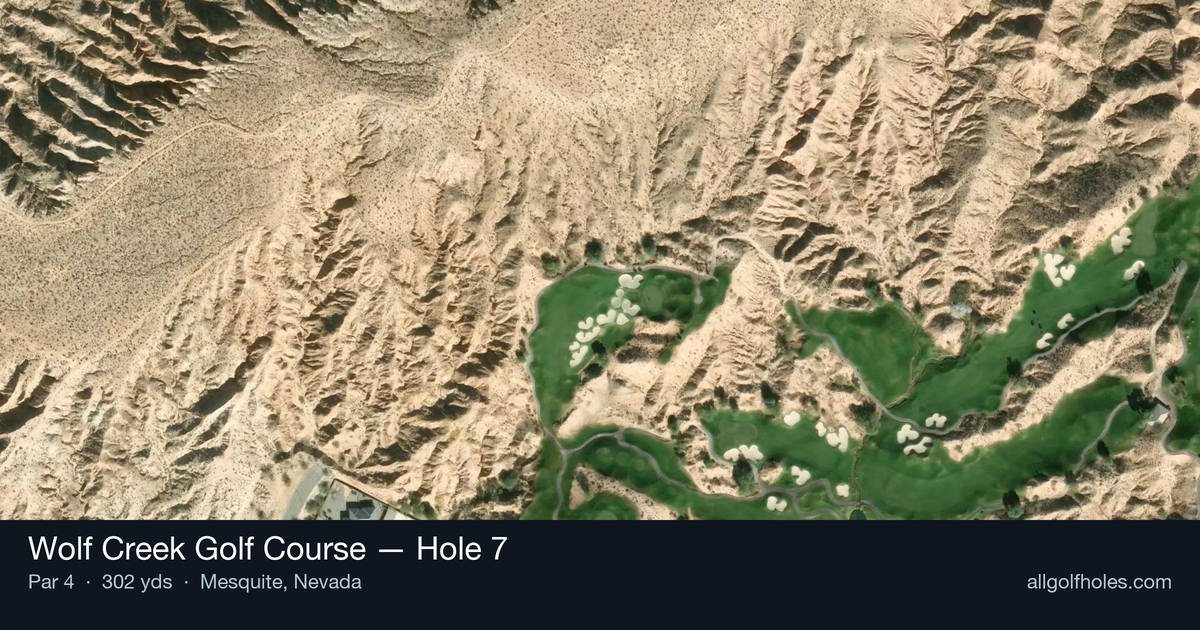
Wolf Creek Golf Course hole 7 presents a tantalizing short par 4 that epitomizes risk-reward golf in the dramatic Nevada desert landscape. At just 302 yards, this deceptively strategic hole tempts aggressive players to attack the pin while punishing wayward shots with the course's signature deep bunkers and challenging terrain. The straight layout features Wolf Creek's characteristic wood-lined fairway framed by striking red rock formations, creating one of those "one of a kind canvas" moments the course is renowned for. The small green complex demands precision on approach shots, as even well-struck wedges can find trouble around this compact target. This hole perfectly captures Wolf Creek's philosophy of demanding every shot in the bag, where course management trumps pure distance in taming The Wolf.
Off the tee
The tee shot strategy hinges on your comfort level with risk/reward scenarios. Longer hitters face the tempting option of driving the green or getting very close, potentially setting up an eagle putt or simple up-and-down for birdie. However, Wolf Creek's penchant for deep bunkers and challenging green complexes means this aggressive play comes with significant consequences for missed shots. For most players, the smart play involves laying up with a mid-iron or hybrid to the optimal approach distance - typically leaving yourself with a comfortable wedge or short iron to the green. This conservative approach ensures you stay in the fairway and maintain control of your ball flight into the small green. Consider the pin position when selecting your layup distance, as different approach angles may be more favorable depending on where the flag is located.
Approach & recovery
The approach shot to Wolf Creek's small green demands precision and proper club selection. With the green's compact size, distance control becomes paramount - being long or short can leave difficult recovery shots. Study the pin position carefully, as the small target makes missing on the correct side crucial. Wind conditions in the Nevada desert can significantly impact your approach, so factor in any crosswinds or headwinds when selecting your club. The bent grass green complex typical of Wolf Creek suggests the surface will hold well-struck shots, but approach from the proper angle to give yourself the best chance at a makeable birdie putt.
On the green
Wolf Creek's sweeping bent grass green complexes are known for their subtlety and challenge. Despite the small size, expect multiple tiers or subtle breaks that can complicate putting. Take time to read the green from multiple angles, paying particular attention to the overall slope and any ridge lines that might influence ball roll. The desert setting can create faster green speeds, especially later in the day as moisture evaporates. Lag putting becomes essential on longer putts, as running past the hole on this small green can leave difficult comeback putts from the fringe or rough. ## RISK VS REWARD This hole epitomizes Wolf Creek's philosophy of offering high-risk, high-reward opportunities. The aggressive line of driving the green or getting very close offers legitimate eagle and easy birdie chances for players with the skill and confidence to execute under pressure. However, the consequences of missing your target can be severe, potentially leading to bogey or worse. The conservative approach of laying up and playing for birdie with a wedge approach removes much of the risk while still providing excellent scoring opportunities. This strategy aligns with Wolf Creek's reputation for rewarding smart course management and punishing overly aggressive play. ## DIFFERENT SKILL LEVELS **Low Handicap Players:** Consider the aggressive play if you're hitting driver well and feeling confident. Your ability to control trajectory and spin gives you the best chance to successfully attack this hole. Even if you lay up, your short iron accuracy should provide multiple birdie opportunities. **High Handicap Players:** The conservative approach strongly favors your game. Lay up to your most comfortable wedge distance and focus on hitting the green rather than attacking pins. A solid par here keeps momentum going, while avoiding the big numbers that can derail your round. Remember that at Wolf Creek, par is often a very good score. The key to success on this hole lies in honest self-assessment and sticking to your chosen strategy. Whether you decide to attack or play conservatively, commit fully to your plan and execute with confidence.
Watch for
- Course conditioning and mapped hazards may affect line selection; confirm from the aerial.
Hole 7 Green Complex
Mapped green boundary
Green size: 3,489 sq ft
How did Hole 7 play?
How did this hole play today?
Frequently asked questions
Yardage reference: Championship tees · 302 yards.
What's the best strategy off the tee?
↓
For this 302-yard par 4, most players will hit 3-wood or driver to set up a comfortable approach.
How difficult is hole 7?
↓
This hole is one of the tougher holes on the course for most golfers. Key challenges include: water in play, heavily bunkered, small green.
How big is the green on hole 7?
↓
The green is small and requires precision. Expect challenging pin positions with limited room for error.
What's a good score on hole 7?
↓
This hole is a birdie opportunity if you find the fairway. This shorter par 4 rewards accuracy off the tee with a short iron approach.