Hole 12 at Wolf Creek Golf Course
- Par
- 5
- Yardage
- 560 yds
- Stroke index
- 8
- Hazards
- 1 bunker · Water
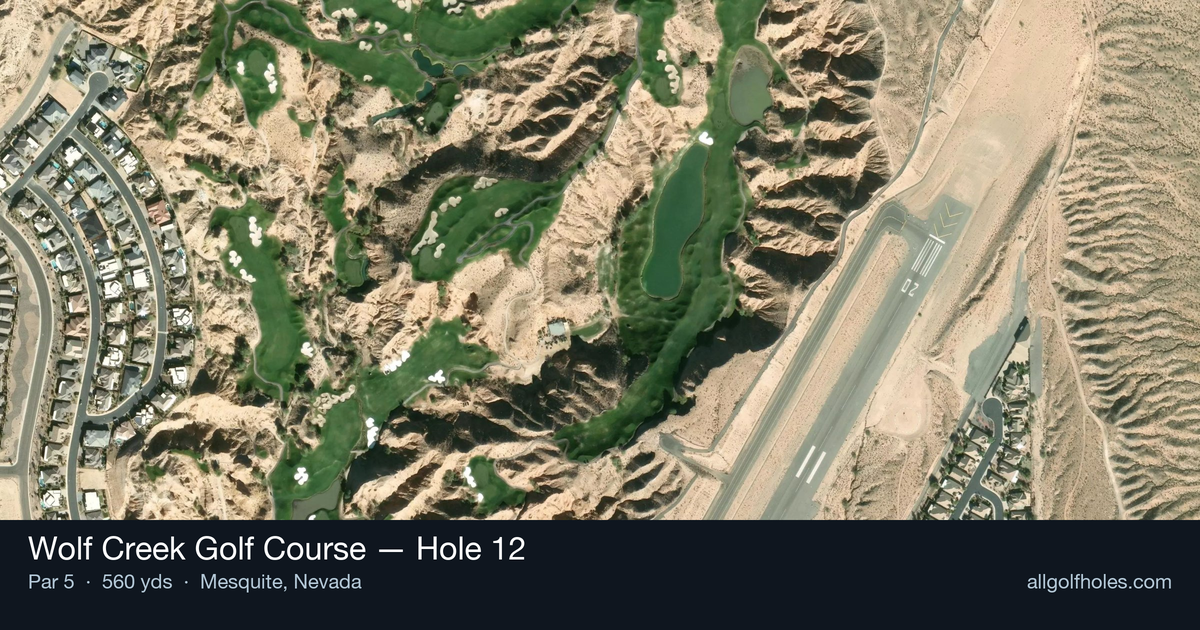
Aerial source not provided
Green size: 50 yds deep × 26 yds wide
Scorecard yardage is for Championship tees. The aerial shows its labeled reference position; distance rings measure to the green.
Championship tees · Par 5 · 560 yards
The plan for No. 12
Wolf Creek Golf Course hole 12 stands as the course's designated signature hole, a commanding 560-yard par 5 that exemplifies the dramatic desert golf experience that defines this Mesquite masterpiece. This straight-away par 5 presents golfers with a strategic three-shot challenge through the rugged Nevada landscape, where the absence of traditional water hazards allows the natural desert terrain to create its own formidable obstacles. The tee shot demands accuracy to find the generous fairway, while the approach shots require careful club selection to navigate the undulating terrain leading to a compact green complex. With its mid-range handicap rating, this hole rewards aggressive play while punishing wayward shots, embodying Wolf Creek's reputation for spectacular visual golf that prioritizes beauty alongside strategic challenge in the high desert.
Off the tee
Your tee shot strategy should focus on finding the optimal position in the landing zone rather than maximum distance. Given Wolf Creek's reputation for dramatic elevation changes and strategic bunkering, aim for the center-right portion of the fairway to set up the best angle for your second shot. A well-struck driver or strong 3-wood will put you in prime position, but course management trumps pure distance here. The straight layout means you can be aggressive with your target line, but maintain control to avoid any hidden trouble that Wolf Creek is famous for incorporating into their design.
Approach & recovery
Your second shot presents the hole's key strategic decision. Longer hitters may be tempted to go for the green in two, but the small green size makes this a high-risk proposition. Most players should lay up to their preferred wedge distance, positioning the ball in the center of the fairway for the best angle to attack the pin. If you do decide to go for it, ensure you have a clean lie and favorable conditions - the small target requires precision that's difficult to achieve from 200+ yards out.
On the green
The small green complex demands pinpoint accuracy on your approach shot. Focus on hitting to the center of the green and letting your putting do the work, as missing this small target will likely result in a difficult up-and-down. The green's compact size means most putts will be relatively straight, but pay attention to any subtle breaks that Wolf Creek's designers may have incorporated. Lag putting becomes crucial here - getting your first putt close is more important than being aggressive with longer attempts. ## RISK VS REWARD This hole epitomizes Wolf Creek's risk/reward philosophy. The birdie opportunity is genuine for those who execute three quality shots, but the small green punishes overly aggressive play. The decision point comes on your second shot - going for the green offers eagle potential but risks missing the small target entirely. The conservative play of laying up almost guarantees a birdie chance with a wedge in your hands, making this often the smarter choice for most handicap levels. ## DIFFERENT SKILL LEVELS **Low Handicappers:** Can be more aggressive with their second shot decision, especially with favorable pin positions. Focus on precision over power and consider going for the green only with perfect lies and conditions. Your short iron accuracy gives you confidence to attack pins once you're in wedge range. **High Handicappers:** Play this as a three-shot hole without exception. Focus on keeping the ball in play off the tee, advancing it safely on your second shot to comfortable wedge distance, then hitting to the center of the green. This strategy virtually guarantees avoiding big numbers while still providing birdie opportunities. The 12th hole at Wolf Creek rewards smart golf strategy and punishes ego-driven decisions, making it a perfect example of how course management can turn a challenging hole into a genuine scoring opportunity.
Watch for
- Course conditioning and mapped hazards may affect line selection; confirm from the aerial.
Hole 12 Green Complex
Mapped green boundary
Green size: 4,939 sq ft
How did Hole 12 play?
How did this hole play today?
Frequently asked questions
Yardage reference: Championship tees · 560 yards.
Can this par 5 be reached in two?
↓
At 560 yards, A true three-shot hole for most players. Position your layup to leave a comfortable wedge distance.
How difficult is hole 12?
↓
This hole is a moderate challenge for most golfers. Key challenges include: long par 5, water in play.
What hazards should I watch out for on hole 12?
↓
Key hazards include: 1 greenside bunker; water at 567.9 yards. Plan your shots to avoid these trouble spots.
How big is the green on hole 12?
↓
The green is medium-sized with moderate targets. The green is deeper than wide, so club selection is crucial. Pay attention to pin placement when selecting your approach club.
What's a good score on hole 12?
↓
This hole is a true three-shot hole where birdie requires execution. This longer par 5 demands patience. Two good shots set up the scoring opportunity.