Hole 1 at Wolf Creek Golf Course
- Par
- 5
- Yardage
- 579 yds
- Stroke index
- 9
- Hazards
- 10 bunkers · Water
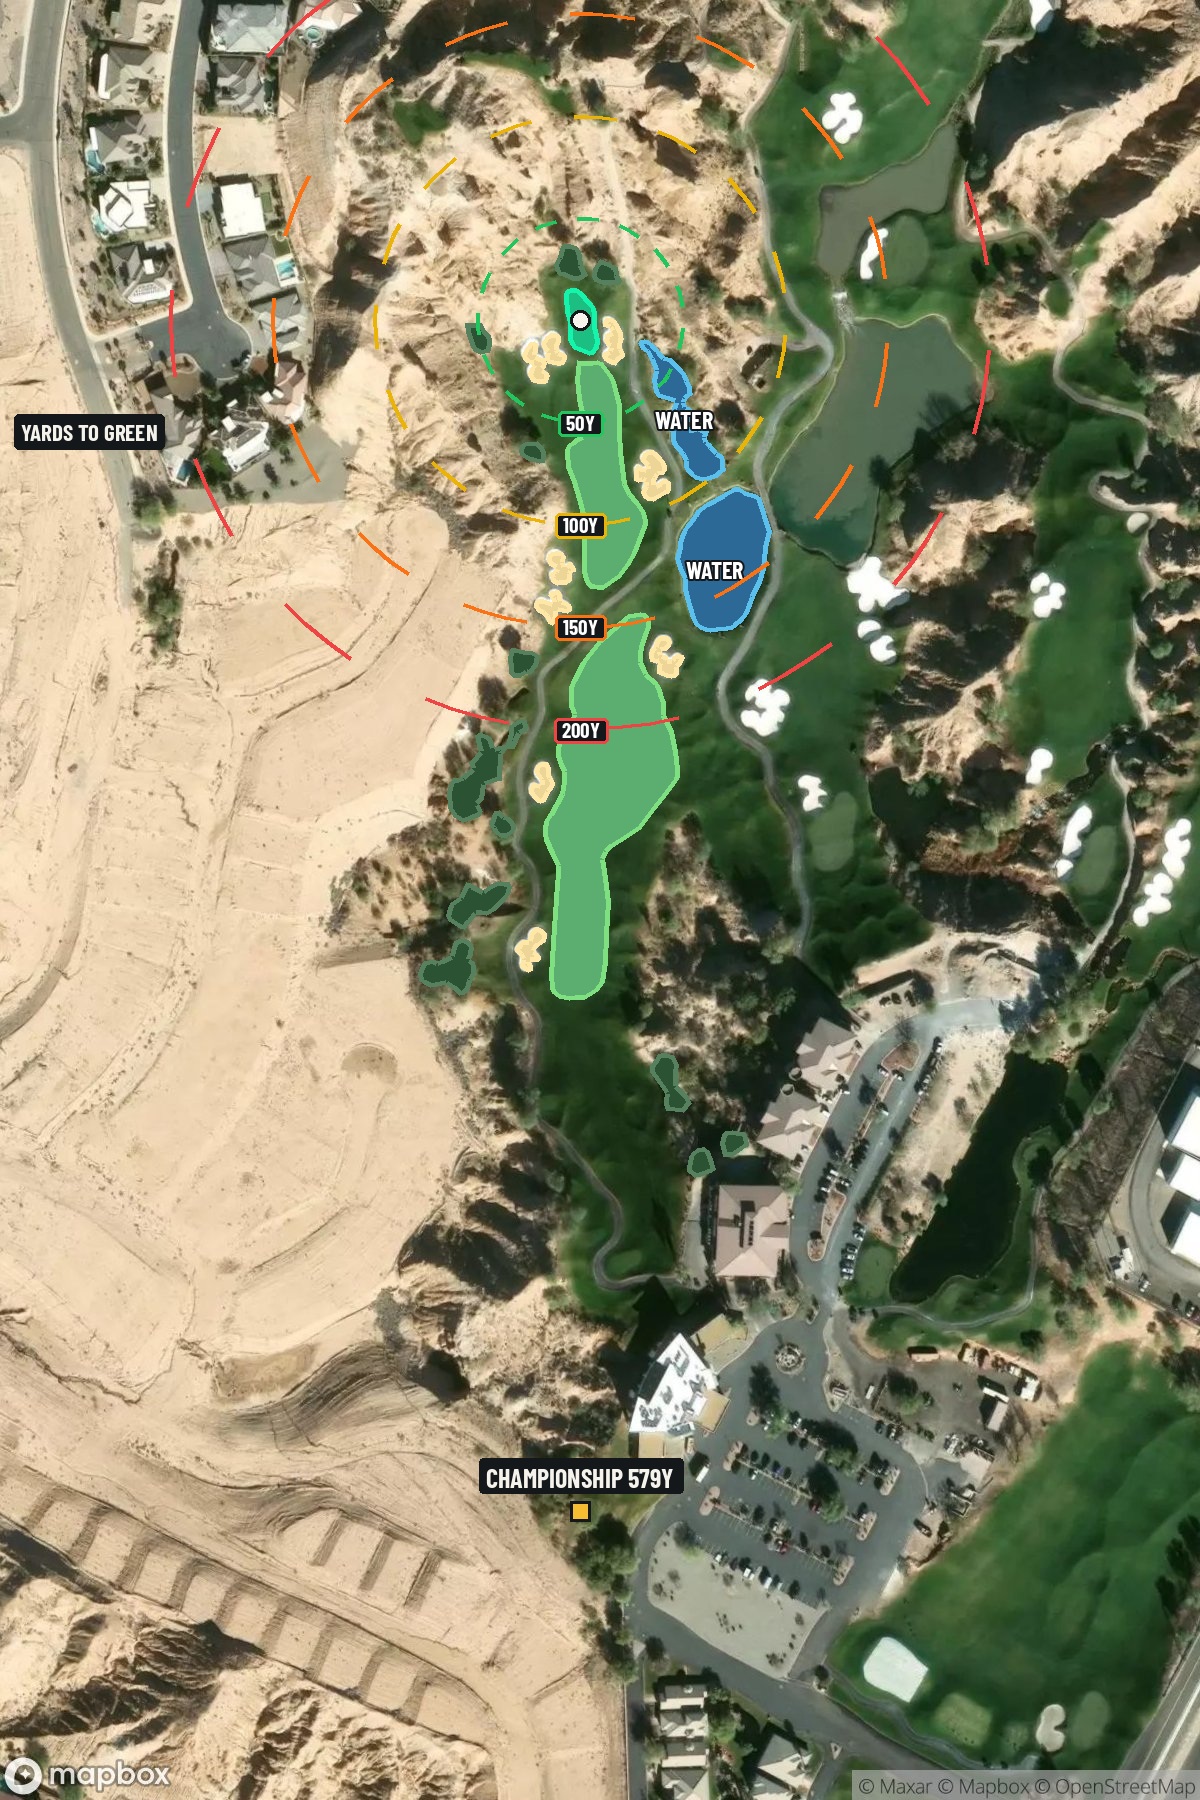 Hole 1 map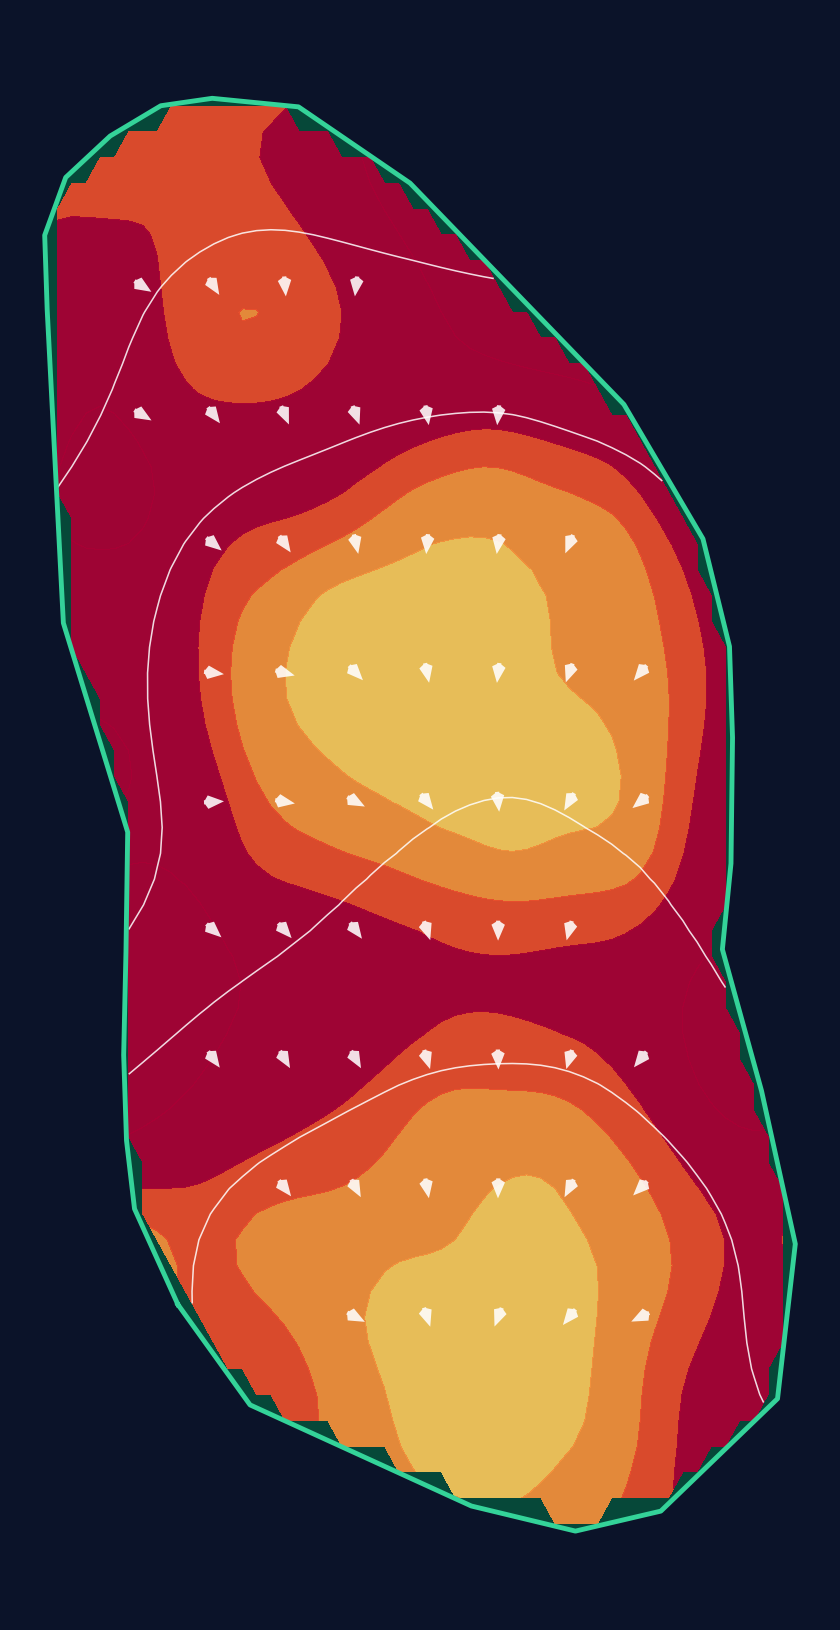
17 yd wide × 33 yd deep · 4.6 ft total elevation range
Light = gentler slope · Red = steeper slope
White lines: 1 foot of elevation. Arrows: downhill. General terrain, not a pin read.
Approach from bottom
Contour source
USGS 1 Meter 12 x22y409 NV_ClarkCounty_2018_C19 · collection 2018
Map source & reference
Mapbox Satellite composite · capture date not provided. Green at the top; the labeled map reference is below.
Scorecard yardage is for Championship tees. The aerial shows its labeled reference position; distance rings measure to the green.
Championship tees · Par 5 · 579 yards
The plan for No. 1
Wolf Creek Golf Course hole 1 sets the tone for one of Nevada's most visually stunning golf experiences with this 579-yard par 5 opener. From the elevated tee, golfers are greeted by Wolf Creek's signature "one of a kind canvas" - a striped emerald fairway that flows straight toward a compact green complex. The wood-lined fairway provides a generous landing area for the tee shot, but the hole's true character emerges in the approach phases where precise positioning becomes crucial. With no major hazards to navigate, this opening hole allows players to ease into their round while still demanding solid execution on each shot. The small green requires accurate iron play, making this a strategic three-shot hole that rewards patience and course management over aggressive play.
Off the tee
The tee shot strategy centers on finding the center of the fairway while positioning yourself for the most favorable second shot angle. Given Wolf Creek's wood-lined fairways and forced carries, accuracy takes precedence over distance. A controlled driver or strong 3-wood aimed at the center-left portion of the fairway provides the safest route while avoiding the deep bunkers mentioned in the course's design philosophy. The target line should favor the side that offers the clearest approach to the green, typically allowing for a slight draw to maximize roll in the desert conditions. Avoid the temptation to blast driver if conditions are firm - a well-positioned tee shot sets up better scoring opportunities than an aggressive swing that finds trouble.
Approach & recovery
Your second shot becomes the crucial positioning play on this par 5. From a good drive, most players will face a layup decision rather than attempting to reach the small green in two. The optimal approach strategy involves laying up to your most comfortable wedge distance while staying in the center of the fairway. Target an area that leaves you with a full swing rather than an awkward half-shot into the small green. Be mindful of the bunker placement that characterizes Wolf Creek's design - these deep hazards can turn a routine layup into a difficult recovery shot. For stronger players who can reach in two, the small green size demands pinpoint accuracy, making the layup the percentage play for most handicap levels.
On the green
The small green at Wolf Creek's first hole requires precise distance control and careful green reading. Bent grass greens in the desert environment can play faster than expected, especially during afternoon rounds. Focus on getting your approach shot below the hole when possible, as uphill putts on small greens are more manageable than downhill sliders. The green's compact size means that pin position significantly affects your approach strategy - when the pin is tucked behind bunkers or near edges, aim for the center of the green and take your two-putt par. Lag putting becomes crucial here, as three-putting on a small surface can quickly derail your round's momentum. ## RISK VS REWARD The primary risk-reward decision occurs on the second shot - attempting to reach the green in two versus laying up for a comfortable wedge. The small green size and surrounding hazards make going for it in two a low-percentage play for most golfers. The reward of a potential eagle must be weighed against the significant risk of finding bunkers or worse, leading to bogey or double-bogey. The smarter play focuses on the reward of a routine birdie opportunity by laying up to your favorite distance. This conservative approach aligns with Wolf Creek's demand for strategic thinking over aggressive shot-making. ## DIFFERENT SKILL LEVELS **High Handicappers:** Play this hole as a three-shot par 5 without exception. Use a fairway wood or hybrid off the tee for accuracy, then advance the ball with another fairway wood or long iron, setting up a short iron into the green. Focus on keeping the ball in play and avoiding the deep bunkers that can lead to big numbers. **Low Handicappers:** While you may have the distance to reach in two, the small green size makes this a strategic decision based on pin position and conditions. When the pin is accessible, a well-struck long iron or fairway wood can set up eagle opportunities. However, don't hesitate to lay up when the pin is tucked or conditions are firm - birdie is an excellent score on any Wolf Creek hole. The first hole at Wolf Creek immediately establishes the course's championship pedigree, rewarding thoughtful play while punishing overly aggressive strategies. Success here builds confidence for the challenges ahead.
Watch for
- Course conditioning and mapped hazards may affect line selection; confirm from the aerial.
Hole 1 Green Complex & Slope
USGS 3DEP terrain analysis
Green size: 3,101 sq ft
How did Hole 1 play?
How did this hole play today?
Frequently asked questions
Yardage reference: Championship tees · 579 yards.
Can this par 5 be reached in two?
↓
At 579 yards, A true three-shot hole for most players. Position your layup to leave a comfortable wedge distance.
How difficult is hole 1?
↓
This hole is one of the tougher holes on the course for most golfers. Key challenges include: long par 5, water in play, heavily bunkered, small green.
How big is the green on hole 1?
↓
The green is small and requires precision. The green is deeper than wide, so club selection is crucial. Expect challenging pin positions with limited room for error.
What's a good score on hole 1?
↓
This hole is a true three-shot hole where birdie requires execution. This longer par 5 demands patience. Two good shots set up the scoring opportunity.