Hole 3 at Wolf Creek Golf Course
- Par
- 3
- Yardage
- 227 yds
- Stroke index
- 7
- Hazards
- 3 bunkers
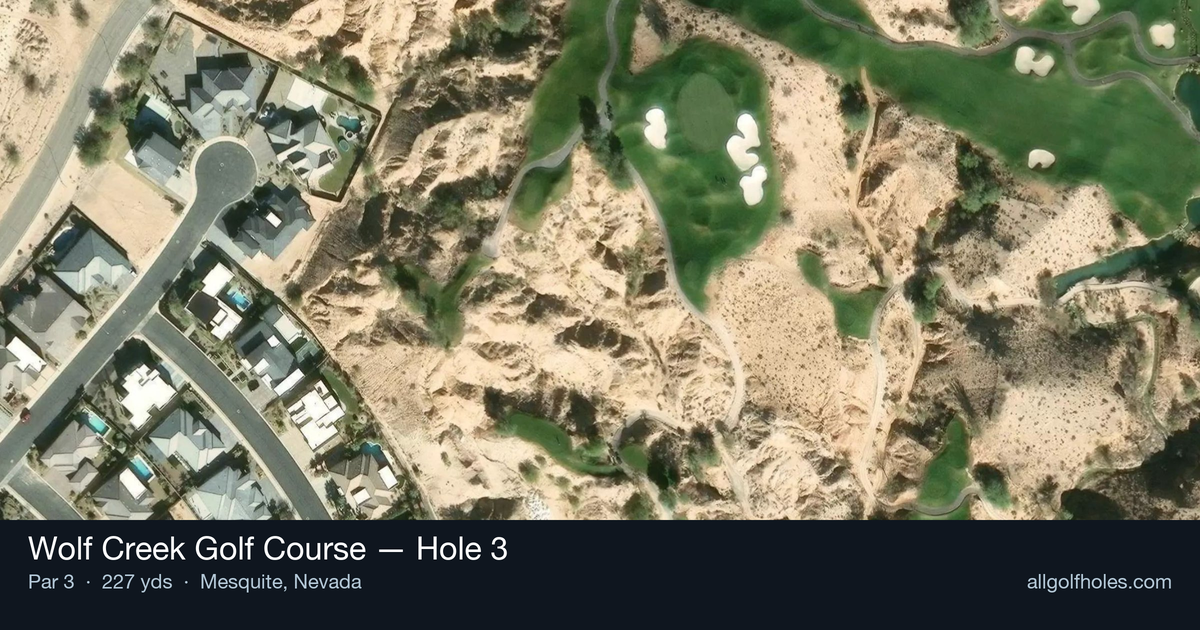
Aerial source not provided
Green size: 31 yds deep × 26 yds wide
Scorecard yardage is for Championship tees. The aerial shows its labeled reference position; distance rings measure to the green.
Championship tees · Par 3 · 227 yards
The plan for No. 3
Wolf Creek Golf Course hole 3 presents a demanding uphill par 3 that plays significantly longer than its 227-yard distance suggests. This elevated tee shot requires precise club selection and a high, soft trajectory to successfully navigate the challenging terrain and reach the small, well-protected green. The dramatic elevation change creates a visually intimidating shot that demands both power and finesse, as anything short will struggle to hold the putting surface. Set against Wolf Creek's stunning desert landscape with panoramic mountain views, this hole epitomizes the course's reputation for memorable, strategic golf. The combination of elevation, distance, and the requirement for a perfectly struck iron makes this one of the most challenging and rewarding par 3s in the Las Vegas area, where precision trumps power every time.
Off the tee
The elevation gain is the critical factor in club selection here - expect to play at least two clubs more than the yardage would normally require. A high, soft shot is essential to hold the small green, making this a perfect opportunity to take an extra club and make a smooth, controlled swing. Aim for the center of the green regardless of pin position, as the small target leaves little margin for error. The uphill nature means you can be aggressive with your line since shots will naturally sit down quickly upon landing.
Approach & recovery
Since this is a par 3, your tee shot is your approach. Focus on trajectory over distance - a high ball flight will help you clear any elevation and land softly on the green. Take one more club than you think you need, then take another. The mountain air and uphill climb will rob significant distance from your shot. Commit fully to your club selection and make a confident swing rather than trying to force a shorter iron.
On the green
Any shot that finds the putting surface should be considered a victory on this hole. The small green means you're likely facing a reasonable putt regardless of where you land. Focus on speed control, as uphill putts on mountain courses can be tricky to judge. The elevated green may create subtle breaks that aren't immediately apparent, so take time to read the slope from below the hole. ## RISK VS REWARD The primary risk here isn't hazards but rather coming up short due to underestimating the elevation change. The reward for taking enough club and committing to the shot is a legitimate birdie opportunity on what can be a very difficult hole. There's no real aggressive line to take - success comes from smart club selection and execution rather than bold shot-making. ## DIFFERENT SKILL LEVELS **High Handicappers:** Take at least three extra clubs and focus on making solid contact. Aim for the center of the green and don't worry about pin hunting. A bogey here is a good score if you're struggling with distance control. **Low Handicappers:** Use the elevation to your advantage by being aggressive with your target line, knowing the ball will sit down quickly. Still take extra club, but you can be more precise with pin positions once you've dialed in the correct yardage for the conditions. The key insight from experienced players is clear: this hole plays much longer than it appears, and a high, soft shot is absolutely critical for success. Embrace the elevation challenge and trust your club selection for the best scoring opportunity.
Watch for
- Course conditioning and mapped hazards may affect line selection; confirm from the aerial.
Hole 3 Green Complex
Mapped green boundary
Green size: 4,677 sq ft
How did Hole 3 play?
How did this hole play today?
Frequently asked questions
Yardage reference: Championship tees · 227 yards.
What club should I use on this par 3?
↓
At 227 yards, most golfers will need a fairway wood or hybrid to reach this green. Adjust for elevation, wind, and pin position.
How difficult is hole 3?
↓
This hole is a moderate challenge for most golfers. Key challenges include: long par 3.
What hazards should I watch out for on hole 3?
↓
Key hazards include: 3 greenside bunkers. Plan your shots to avoid these trouble spots.
How big is the green on hole 3?
↓
The green is medium-sized with moderate targets. Pay attention to pin placement when selecting your approach club.
What's a good score on hole 3?
↓
This hole is a challenging par where bogey is acceptable. This longer par 3 will test your long iron or hybrid game. Par is a good score.