Hole 4 at Wolf Creek Golf Course
- Par
- 4
- Yardage
- 383 yds
- Stroke index
- 15
- Hazards
- 9 bunkers
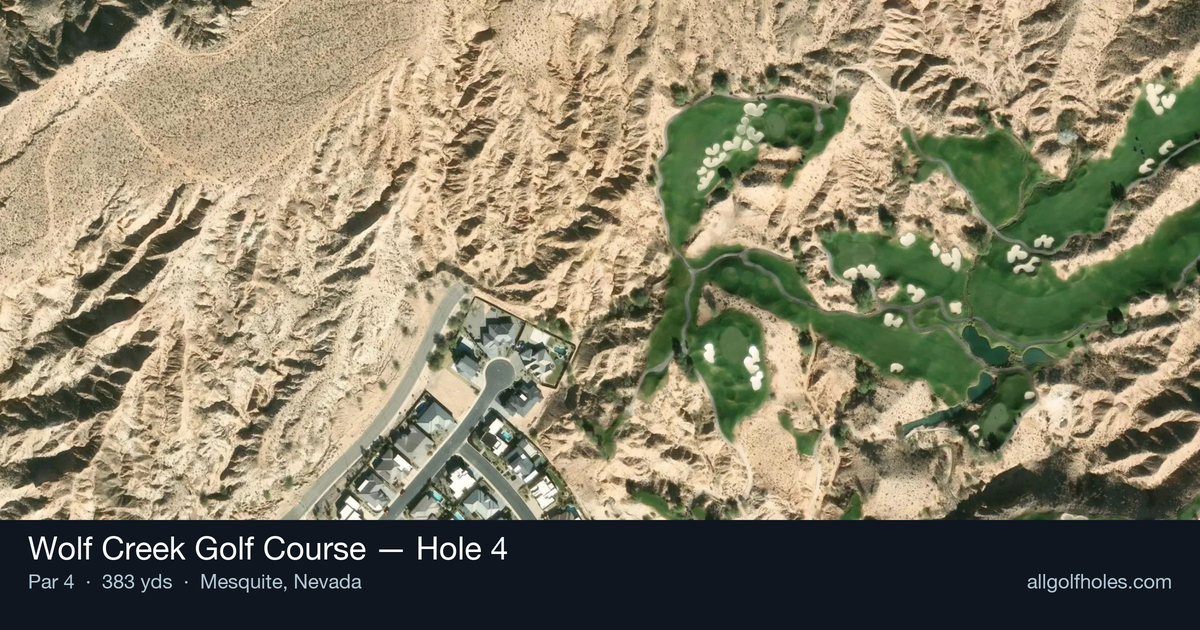
Aerial source not provided
Green size: 22 yds deep × 21 yds wide
Scorecard yardage is for Championship tees. The aerial shows its labeled reference position; distance rings measure to the green.
Championship tees · Par 4 · 383 yards
The plan for No. 4
Wolf Creek Golf Course hole 4 presents a deceptively challenging 383-yard par 4 that demands precision over power. From the elevated tee, golfers face a strategic dilemma: while driver distance is tempting, the smart play requires restraint to avoid running through the fairway into desert wasteland or strategically placed bunkers. The approach shot climbs uphill to a small, elevated green with severe back-to-front slope, defended by bunkers guarding both sides of the entrance. This unforgiving green complex punishes aggressive pins, rewarding those who play to the center and trust their putting. The dramatic desert landscape backdrop creates Wolf Creek's signature visual canvas, making this hole both beautiful and memorably challenging for golfers of all skill levels.
Off the tee
The tee shot strategy centers on carrying the water while avoiding the fairway bunkers and desert beyond. For most golfers, driver may be too much club, potentially running through the fairway into trouble. Consider a 3-wood or hybrid that ensures water clearance while staying in the optimal landing zone. Target the center-left portion of the fairway to provide the best angle for the uphill approach shot. The key is committing to a conservative club that guarantees you'll be hitting your approach from the short grass.
Approach & recovery
The approach plays significantly uphill to an elevated green with severe back-to-front slope, making distance control crucial. Bunkers guard both sides of the green entrance, so accuracy is essential. Take at least one extra club to account for the uphill lie and elevation change. Aim for the center of the green regardless of pin position - the back-to-front slope makes anything long extremely difficult to manage. A mid-iron to long-iron approach shot, depending on your tee shot position, should focus on carrying those front bunkers while avoiding the back portion of the green.
On the green
The severely back-to-front sloped green creates challenging putting conditions, especially from above the hole. Any putt from the back portion will be lightning fast and difficult to control. Focus on leaving approach shots below or level with the pin. When putting, be extremely cautious with pace on downhill putts - it's better to leave these short than risk racing past the hole and down the slope. Uphill putts can be more aggressive, but read the break carefully as the slope will affect ball movement significantly. ## RISK VS REWARD The primary risk/reward decision comes on the tee shot. While driver might reach an ideal position for a shorter approach, the risk of finding bunkers or desert areas makes this a poor percentage play for most golfers. The reward for a well-positioned conservative tee shot is a manageable uphill approach with a clear shot to the green. Playing smart off the tee sets up a legitimate birdie opportunity, while being too aggressive can easily lead to bogey or worse. ## DIFFERENT SKILL LEVELS **High-handicap players** should prioritize keeping the ball in play above all else. Use a club that comfortably clears the water - even if it means a longer approach shot. Focus on hitting the center of the green with the approach, accepting par as an excellent score. Avoid any heroic shots and play within your comfort zone. **Low-handicap players** can be more precise with their target line off the tee, potentially using a controlled driver or strong 3-wood to optimize approach distance. These players can also attack specific pin positions more aggressively, but should still respect the severe green slope and avoid leaving themselves with difficult downhill putts. The key is balancing aggression with the hole's inherent challenges. This hole rewards patience and precision over power, making it a true test of golf strategy and course management skills that define Wolf Creek's championship layout.
Watch for
- Course conditioning and mapped hazards may affect line selection; confirm from the aerial.
Hole 4 Green Complex
Mapped green boundary
Green size: 2,393 sq ft
How did Hole 4 play?
How did this hole play today?
Frequently asked questions
Yardage reference: Championship tees · 383 yards.
What's the best strategy off the tee?
↓
For this 383-yard par 4, most players will hit driver to set up a comfortable approach.
How difficult is hole 4?
↓
This hole is a moderate challenge for most golfers. Key challenges include: heavily bunkered, small green.
How big is the green on hole 4?
↓
The green is small and requires precision. Expect challenging pin positions with limited room for error.
What's a good score on hole 4?
↓
This hole is a medium-length test where par is a solid result. A straightforward par 4 where course management pays off.