Hole 2 at Wolf Creek Golf Course
- Par
- 4
- Yardage
- 445 yds
- Stroke index
- 1
- Hazards
- 4 bunkers
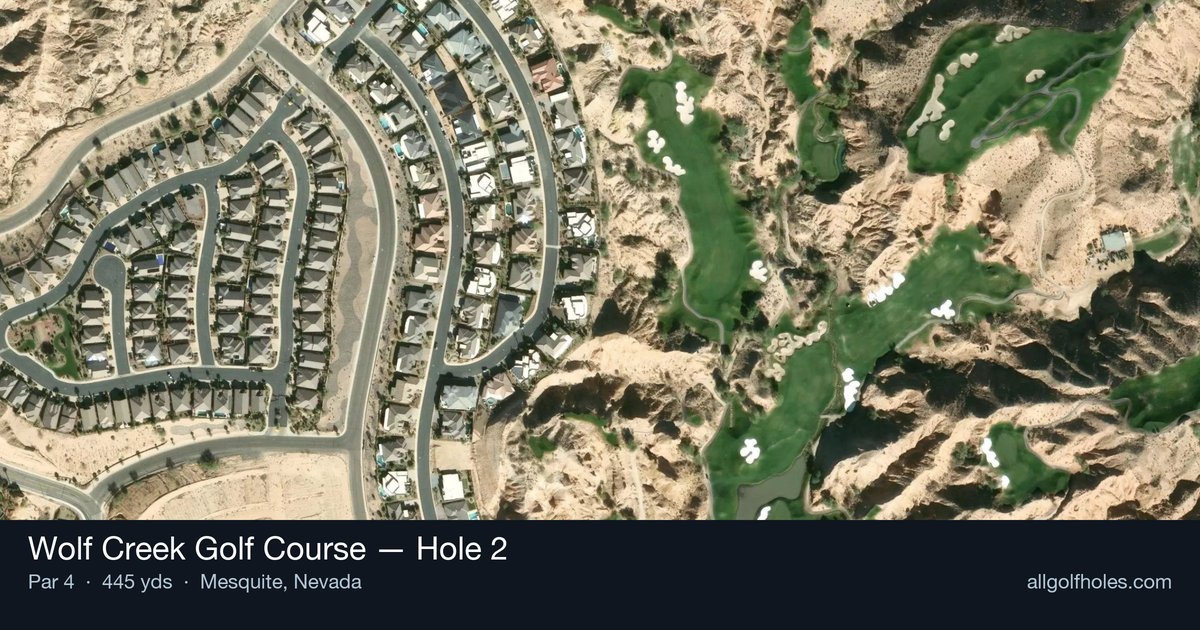
Aerial source not provided
Green size: 32 yds deep × 31 yds wide
Scorecard yardage is for Championship tees. The aerial shows its labeled reference position; distance rings measure to the green.
Championship tees · Par 4 · 445 yards
The plan for No. 2
Wolf Creek Golf Course hole 2 commands immediate respect as the course's number one handicap, perched dramatically eleven stories above the fairway on a towering ridge that carts cannot access. This 445-yard par 4 presents one of golf's most spectacular and intimidating tee shots, with players gazing down at a striped emerald canvas framed by brilliant white sand bunkers far below. The elevated perspective creates a visual masterpiece but complicates club selection and aiming strategy. Despite the dramatic elevation advantage, the small green demands precision on the approach shot, making distance control critical. This architectural marvel epitomizes Wolf Creek's philosophy that every hole deserves signature status, combining breathtaking desert vistas with demanding shot-making requirements that challenge golfers of every skill level.
Off the tee
The elevated tee shot requires careful club selection adjustment due to the significant elevation drop - expect your ball to carry considerably farther than the yardage suggests. The dramatic height can create vertigo and make target identification challenging, so take extra time to identify your aiming point before committing to the shot. Focus on the center of the fairway rather than trying to cut corners or gain extra distance. The visual confusion from the height makes it tempting to swing harder, but smooth tempo and solid contact are more important than distance. Consider taking one less club than normal due to the elevation advantage, and prioritize keeping the ball in play over maximizing distance.
Approach & recovery
After navigating the dramatic tee shot, the approach shot to the small green becomes the scoring opportunity. The elevated position of your tee shot means you'll likely have a shorter approach than the total yardage suggests, typically requiring a mid-iron to short-iron depending on your tee shot success. Target the center of the small green rather than attacking pins, as the green's compact size leaves little margin for error. The elevation changes throughout the hole can affect depth perception, so trust your yardages and club selection rather than visual estimates. Take one extra club if you're between distances to ensure you clear any front trouble and give yourself a reasonable putting distance.
On the green
The small green size makes two-putting the primary objective rather than hunting birdies. Focus on lag putting to the center of the green, leaving yourself manageable second putts. The dramatic nature of the hole often leaves players either pumped up or deflated, so take time to read putts carefully and maintain your normal putting routine. Pin positions on small greens can dramatically affect approach strategy, but with this hole's difficulty rating, simply finding the putting surface should be considered a victory. Practice putting before your round to get a feel for the green speeds, as the elevation changes throughout the course can affect how greens play. ## RISK VS REWARD This hole offers little reward for aggressive play and severe punishment for mistakes. The risk/reward calculation heavily favors conservative strategy - the #1 handicap rating exists for good reason. The reward for a perfect aggressive shot might save one stroke, but the penalty for a miss can easily cost two or three strokes. The elevation and visual drama can tempt players into hero shots, but the smart play is accepting that par is an excellent score here. Save your aggressive plays for easier holes where the risk/reward ratio is more favorable. ## DIFFERENT SKILL LEVELS **High-Handicap Players**: Focus entirely on course management and keeping the ball in play. Take an extra club off the tee to ensure solid contact rather than trying to maximize distance. Aim for the center of everything - fairway and green - and accept that bogey is a reasonable score on this challenging hole. **Low-Handicap Players**: While you have more shot-making ability, this hole still demands respect. Use the elevation to your advantage with club selection, but don't let the drama affect your fundamentals. Consider the hole a test of mental discipline as much as physical skill. Even scratch golfers should view par as a good score here. The key for all skill levels is not letting the hole's visual drama and reputation affect your normal pre-shot routine and decision-making process. Trust your abilities, play within yourself, and remember that this hole's difficulty makes par a scoring opportunity rather than an expectation.
Watch for
- Course conditioning and mapped hazards may affect line selection; confirm from the aerial.
Hole 2 Green Complex
Mapped green boundary
Green size: 4,591 sq ft
How did Hole 2 play?
How did this hole play today?
Frequently asked questions
Yardage reference: Championship tees · 445 yards.
What's the best strategy off the tee?
↓
For this 445-yard par 4, most players will hit driver to set up a comfortable approach.
How difficult is hole 2?
↓
This hole is a moderate challenge for most golfers. Key challenges include: heavily bunkered.
How big is the green on hole 2?
↓
The green is medium-sized with moderate targets. Pay attention to pin placement when selecting your approach club.
Which side of the fairway is safer on hole 2?
↓
Aim for the left side of the fairway when possible. Missing right brings more trouble into play.
What's a good score on hole 2?
↓
This hole is a demanding hole where bogey is not unusual. This longer par 4 will test most golfers. Focus on position over distance.