Hole 11 at Wolf Creek Golf Course
- Par
- 3
- Yardage
- 215 yds
- Stroke index
- 16
- Hazards
- 2 bunkers
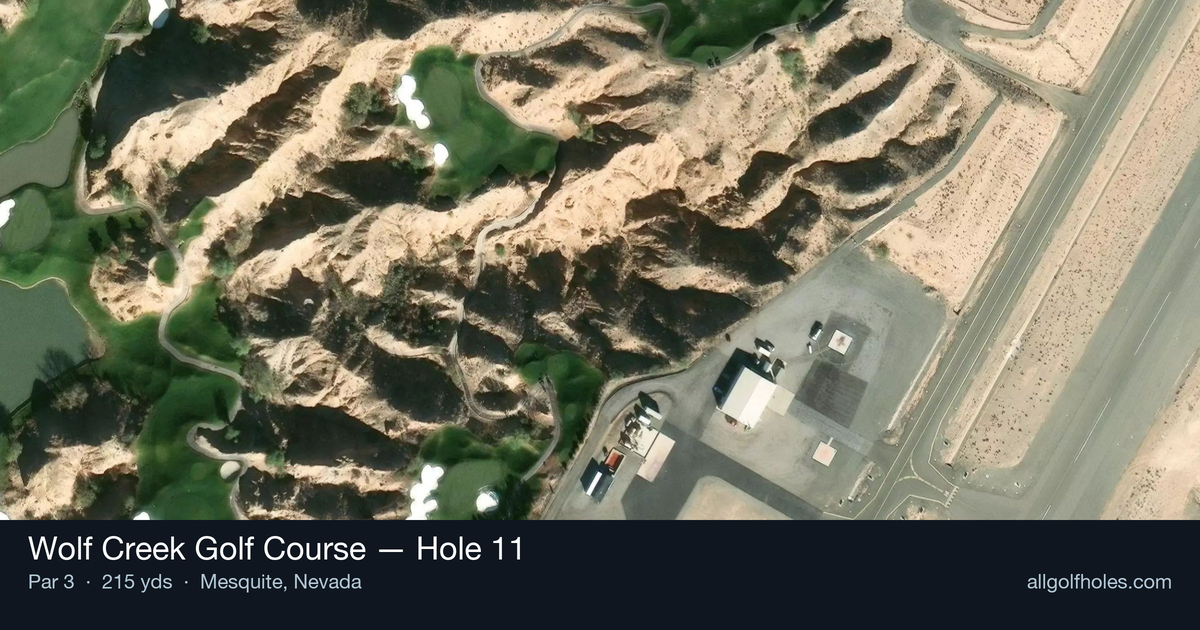
Aerial source not provided
Green size: 30 yds deep × 20 yds wide
Scorecard yardage is for Championship tees. The aerial shows its labeled reference position; distance rings measure to the green.
Championship tees · Par 3 · 215 yards
The plan for No. 11
The 11th hole at Wolf Creek Golf Course presents a deceptive par 3 challenge that embodies the course's reputation for visual drama amid Nevada's rugged desert landscape. At 215 yards, this straight shot demands precision with a mid to long iron, as the small green offers little margin for error. The absence of major hazards might suggest simplicity, but Wolf Creek's signature elevation changes and the compact target create their own strategic complexities. The tee shot requires golfers to commit fully to their club selection and trust their distance control. Set against the backdrop of wandering canyons that define this miraculous desert course, the 11th exemplifies Wolf Creek's ability to challenge every aspect of your game while delivering the stunning scenery that makes each hole memorable.
Off the tee
Club selection is paramount on this 215-yard one-shotter. In Mesquite's high desert conditions, the ball typically carries farther than at sea level, so consider taking one club less than the yardage suggests. A smooth swing with a mid-iron to long-iron (depending on conditions and your typical distances) will serve you better than forcing a shorter club. Target the center of the green regardless of pin position - the small green size leaves little margin for error. Focus on a balanced, controlled swing rather than trying to overpower the shot. The straight layout means you can commit to your line without worrying about doglegs or hidden trouble.
Approach & recovery
Since this is a par 3, your tee shot is your approach. The key is picking the right landing spot on the small green. Even with a favorable pin position, aiming for the fat part of the green gives you the best chance for a makeable putt. Pay attention to wind conditions, which can be significant in the desert setting. A quartering wind can easily push your ball off the small target, so factor this into both club selection and aim point.
On the green
The small green means most putts will be relatively short, but don't underestimate the subtleties. Desert greens often have more break than they appear, especially late in the day when the grain becomes more pronounced. Take time to read the green from multiple angles - what looks straight from behind the ball may have significant movement. Lag putting becomes crucial here since three-putting from a short distance can quickly turn a scoring opportunity into a bogey. ## RISK VS REWARD This hole offers limited risk/reward scenarios due to its straightforward design. The main decision is whether to be aggressive toward a tucked pin or play conservatively to the center of the green. Given the small target and desert surroundings, the conservative approach typically yields better results. The biggest risk is short-siding yourself by missing on the wrong side of the pin. Always err toward the side that gives you more green to work with on your recovery shot. ## DIFFERENT SKILL LEVELS **High-Handicap Players:** Focus entirely on finding the green rather than attacking pins. Use one extra club and make a smooth, controlled swing. A bogey here isn't a disaster - avoid the big number by staying conservative. **Low-Handicap Players:** You can be more aggressive with pin positions, but respect the small green size. This is a hole where course management skills shine - know when to attack and when to take your par and move on. The handicap ranking of 16 suggests this should be a scoring opportunity, so don't let perfectionism lead to unnecessary risks. **Mid-Handicap Players:** Play to your strengths - if you're confident with a particular club from this distance, use it regardless of what the yardage "should" call for. The key is committing to your decision and executing with confidence. The 11th hole at Wolf Creek rewards patience and precision over power, making it a true test of your short game strategy and execution.
Watch for
- Course conditioning and mapped hazards may affect line selection; confirm from the aerial.
Hole 11 Green Complex
Mapped green boundary
Green size: 3,344 sq ft
How did Hole 11 play?
How did this hole play today?
Frequently asked questions
Yardage reference: Championship tees · 215 yards.
What club should I use on this par 3?
↓
At 215 yards, most golfers will need a fairway wood or hybrid to reach this green. Adjust for elevation, wind, and pin position.
How difficult is hole 11?
↓
This hole is a moderate challenge for most golfers. Key challenges include: long par 3, small green.
What hazards should I watch out for on hole 11?
↓
Key hazards include: 2 greenside bunkers. Plan your shots to avoid these trouble spots.
How big is the green on hole 11?
↓
The green is small and requires precision. The green is deeper than wide, so club selection is crucial. Expect challenging pin positions with limited room for error.
What's a good score on hole 11?
↓
This hole is a challenging par where bogey is acceptable. This longer par 3 will test your long iron or hybrid game. Par is a good score.