Hole 9 at Shadow Creek Golf Course
- Par
- 4
- Yardage
- 460 yds
- Stroke index
- 5
- Hazards
- 5 bunkers · Water
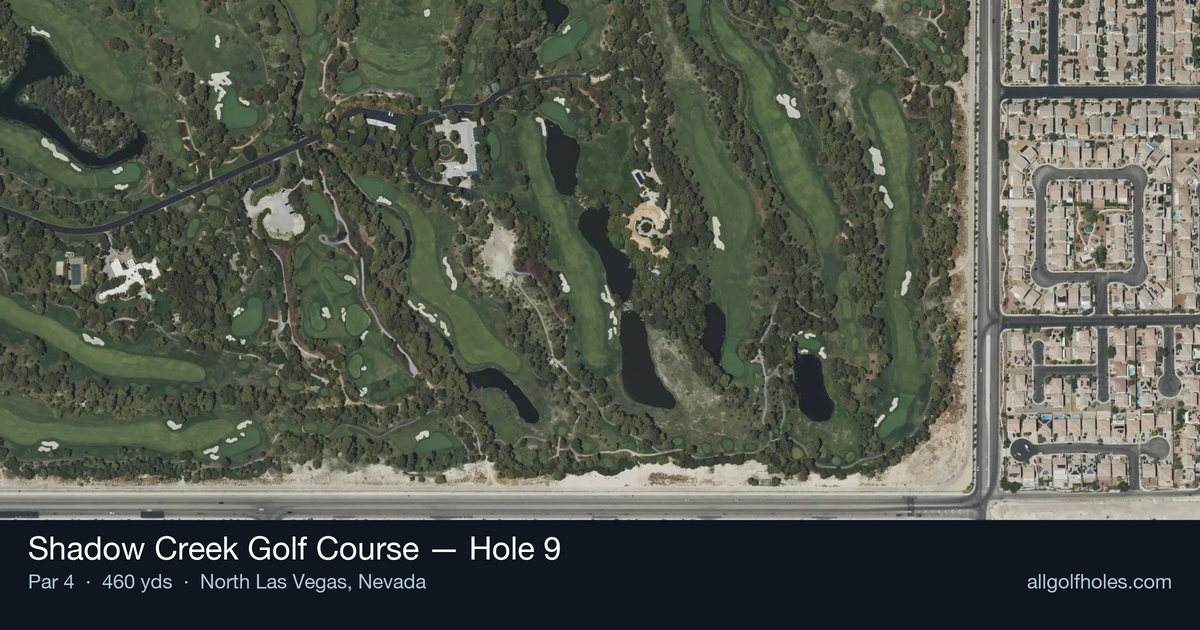
Aerial source not provided
Green size: 52 yds deep × 30 yds wide
Scorecard yardage is for Championship tees. The aerial shows its labeled reference position; distance rings measure to the green.
Championship tees · Par 4 · 460 yards
The plan for No. 9
Shadow Creek Golf Course hole 9 stands as a signature Tom Fazio masterpiece, epitomizing the architect's desert artistry with its mesmerizing blend of beauty and precision. This 460-yard par 4 flows straight and slightly downhill through a tight corridor, with a ribbon of water dancing down the left side throughout the hole's length. Large bunkers guard both sides of the narrow fairway, creating a gauntlet that demands accuracy from the tee shot. The downhill nature adds distance but requires careful club selection on the approach to the small green. With water lurking left and sand protecting the landing areas, this gorgeous hole rewards committed swings while punishing indecision, making it one of Shadow Creek's most memorable tests as golfers turn toward the back nine.
Off the tee
Your target line should favor the right-center of the fairway to provide maximum buffer from the water hazard. The slightly downhill nature of the hole will add distance to your drive, so club selection becomes crucial - many players can get away with a 3-wood or hybrid to ensure they stay in the fairway corridor. The tight landing zone means accuracy trumps distance here. Aim for the right side of the fairway bunkers as your reference point, giving yourself plenty of room to work with while avoiding the psychological pressure of the water on the left.
Approach & recovery
With the green being small and the hole playing downhill, expect your approach to play at least one club shorter than the yardage suggests. The key is attacking from the right side of the fairway, which provides the best angle to the green and keeps you away from any trouble. Take one extra club and swing smoothly - the downhill lie will help the ball carry. Focus on the center of the green regardless of pin position, as the small target leaves little margin for error when trying to get aggressive with pin hunting.
On the green
The small green size means every putt is crucial, and the desert setting can create tricky wind conditions that affect ball roll. Read putts carefully, as the grain and any subtle slopes will be magnified on this compact surface. Conservative lag putting to the center of the green is often the best strategy, especially on longer putts where three-putting becomes a real threat. ## RISK VS REWARD This hole offers limited risk/reward opportunities - it's primarily about solid course management. The main decision point is club selection off the tee: going with driver for a shorter approach versus playing it safe with a fairway wood. Given the tight fairway and water hazard, the conservative play typically yields better scoring opportunities. The real reward comes from successfully navigating the challenge and setting up a manageable approach shot. ## DIFFERENT SKILL LEVELS **High-Handicap Players:** Play this hole extremely conservatively. Use a 3-wood or hybrid off the tee, aiming for the right side of the fairway. Accept that you'll have a longer approach shot in exchange for staying in play. On the approach, take plenty of club and aim for the center of the green - don't chase pins. **Low-Handicap Players:** You can be more aggressive with driver off the tee, but still respect the water on the left. Your superior accuracy allows you to take advantage of the downhill nature for extra distance. On approach shots, you have the skill to attack certain pin positions, but still respect the small green size and prioritize finding the putting surface over getting close to every pin. The 9th hole rewards patience and precision over power, making it a true test of your course management skills and mental approach to the game.
Watch for
- Course conditioning and mapped hazards may affect line selection; confirm from the aerial.
Hole 9 Green Complex
Mapped green boundary
Green size: 6,788 sq ft
How did Hole 9 play?
How did this hole play today?
Frequently asked questions
Yardage reference: Championship tees · 460 yards.
What's the best strategy off the tee?
↓
For this 460-yard par 4, most players will hit driver to set up a comfortable approach.
How difficult is hole 9?
↓
This hole is one of the tougher holes on the course for most golfers. Key challenges include: long par 4, water in play, heavily bunkered.
How big is the green on hole 9?
↓
The green is fairly large with multiple pin positions. The green is wider than it is deep, rewarding shots that find the correct tier. Lag putting becomes important on longer putts.
What's a good score on hole 9?
↓
This hole is one of the tougher holes where par feels like birdie. A challenging par 4. Accept that bogey happens and avoid big numbers.