Hole 8 at Shadow Creek Golf Course
- Par
- 3
- Yardage
- 200 yds
- Stroke index
- 17
- Hazards
- 1 bunker
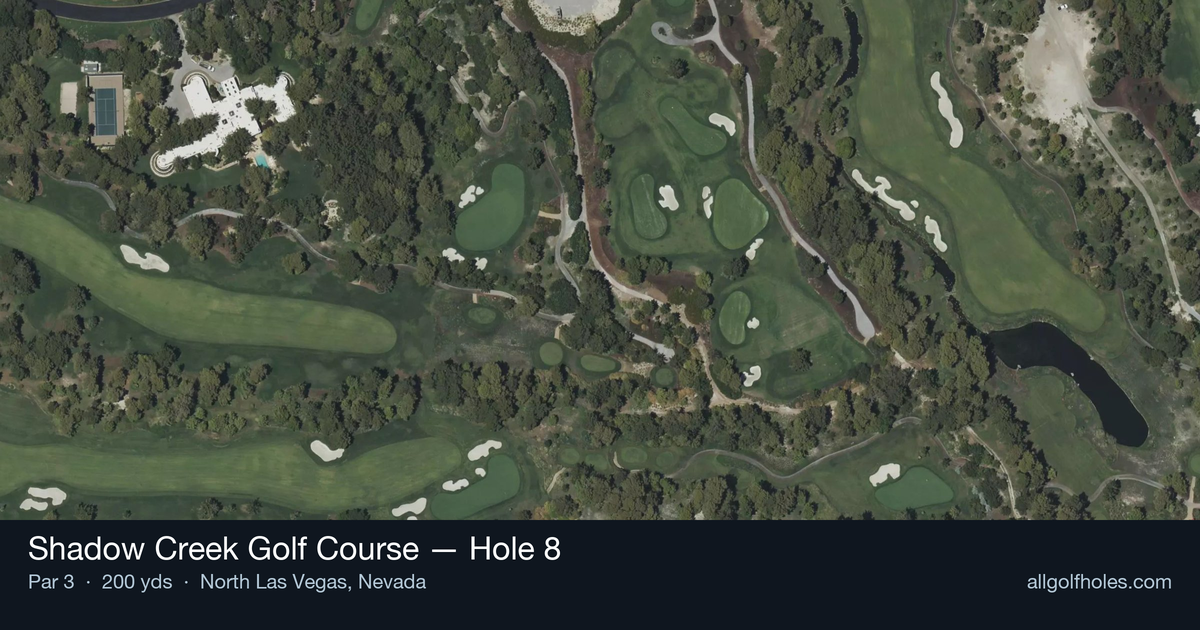
Aerial source not provided
Green size: 42 yds deep × 26 yds wide
Scorecard yardage is for Championship tees. The aerial shows its labeled reference position; distance rings measure to the green.
Championship tees · Par 3 · 200 yards
The plan for No. 8
Shadow Creek Golf Course hole 8 stands as a testament to Tom Fazio's architectural brilliance, presenting a downhill par 3 that demands both precision and confidence. At 200 yards, this beautiful one-shotter sits majestically within the desert oasis, framed by soaring mountains and lush surroundings that seem impossible in Nevada's landscape. The elevated tee shot plays to an undulating green complex protected by strategic bunkering, particularly short left where errant shots find trouble. What makes this hole memorable is its deceptive simplicity – the downhill nature can fool golfers into club selection errors, while the green's subtle contours require careful pin position analysis. This signature hole perfectly captures Shadow Creek's luxury golf experience, combining visual drama with strategic depth in true Fazio fashion.
Off the tee
Club selection is the primary strategic consideration, with the downhill nature typically requiring one to two clubs less than the yardage suggests. Most players will find themselves between a mid-iron and long-iron depending on pin position and wind conditions. The target line should favor the center of the green initially, adjusting based on pin placement. With no significant hazards mentioned, the primary risk comes from missing the small green entirely, making accuracy more important than aggressive pin-seeking. Take note of wind conditions in the desert environment, as they can significantly affect ball flight on this exposed hole.
Approach & recovery
Since this is a par 3, the tee shot IS the approach shot. The key is committing to your club selection and swinging with confidence. The undulating green surface means different sections will accept shots differently - some areas may be more receptive than others. Focus on a smooth tempo rather than trying to muscle the shot, as the elevation change can cause players to swing too hard. Aim for the fat part of the green and let the slope work the ball toward the pin when possible.
On the green
The large, undulating green presents the hole's greatest challenge once you've found the putting surface. Reading the slopes correctly becomes critical, as the significant undulation can create tricky two-putts even from relatively short distances. Pay attention to the overall slope and grain direction, which can be influenced by the desert environment and maintenance practices. Lag putting becomes essential when facing long putts across multiple tiers - getting close is more important than being aggressive with lengthy attempts. ## RISK VS REWARD The primary risk/reward decision centers on pin position aggression versus playing safe to the center of the green. When the pin is tucked in a difficult location, the smart play is targeting the middle of the green and relying on putting skills. However, when the pin is accessible, this hole offers a legitimate birdie opportunity for players who execute proper club selection and commit to their target line. The relatively high handicap rating (17) suggests this hole plays easier than others on the course, making it a potential scoring hole. ## DIFFERENT SKILL LEVELS **High-Handicap Players:** Focus entirely on finding the green with a conservative club selection. Aim for the center regardless of pin position and prioritize avoiding the short game areas around the green. Take one extra club to ensure you reach the putting surface, as coming up short is typically the worst miss. **Low-Handicap Players:** Can be more aggressive with pin position attacks, especially when the pin is in favorable locations. Use the undulation to your advantage by understanding how different areas of the green will feed balls toward certain sections. Consider wind and elevation effects more precisely to dial in exact yardages for optimal scoring opportunities. The 8th hole at Shadow Creek rewards patience and precision over power, making it a true test of iron play and green reading skills in Tom Fazio's desert masterpiece.
Watch for
- Course conditioning and mapped hazards may affect line selection; confirm from the aerial.
Hole 8 Green Complex
Mapped green boundary
Green size: 4,755 sq ft
How did Hole 8 play?
How did this hole play today?
Frequently asked questions
Yardage reference: Championship tees · 200 yards.
What club should I use on this par 3?
↓
At 200 yards, most golfers will need a long iron or hybrid (5-iron to 6-iron) to reach this green. Adjust for elevation, wind, and pin position.
How difficult is hole 8?
↓
This hole is a good scoring opportunity for most golfers.
What hazards should I watch out for on hole 8?
↓
Key hazards include: 1 greenside bunker. Plan your shots to avoid these trouble spots.
How big is the green on hole 8?
↓
The green is medium-sized with moderate targets. The green is wider than it is deep, rewarding shots that find the correct tier. Pay attention to pin placement when selecting your approach club.