Hole 10 at Shadow Creek Golf Course
- Par
- 4
- Yardage
- 437 yds
- Stroke index
- 12
- Hazards
- 3 bunkers
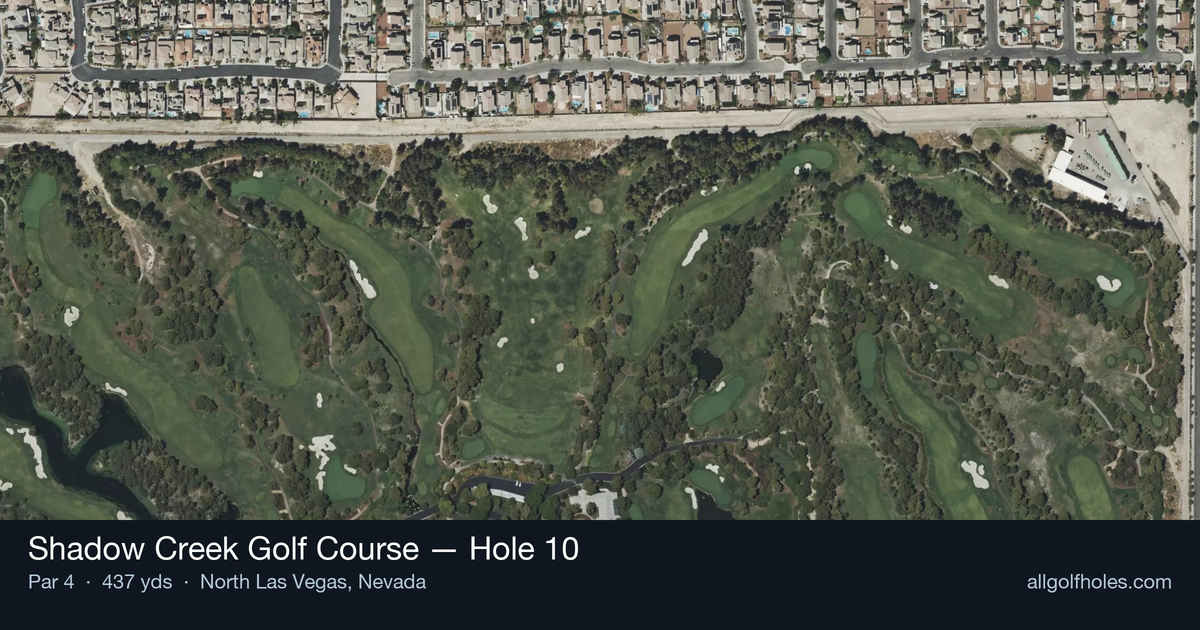
Aerial source not provided
Green size: 28 yds deep × 34 yds wide
Scorecard yardage is for Championship tees. The aerial shows its labeled reference position; distance rings measure to the green.
Championship tees · Par 4 · 437 yards
The plan for No. 10
Shadow Creek Golf Course hole 10 presents a deceptively straightforward par 4 that embodies Tom Fazio's masterful design philosophy in the Nevada desert. This 437-yard test demands precision over power, with the straight layout offering clear sight lines framed by the course's signature lush landscaping and towering mountain backdrop. The tee shot requires careful placement to set up the optimal approach angle to the small, well-protected green complex. Without significant hazards cluttering the fairway, golfers must rely on course management and accurate iron play to navigate this strategic challenge. The compact green rewards precise approach shots while punishing anything less than committed execution, making this hole a true test of fundamental golf skills amid Shadow Creek's world-class luxury experience.
Off the tee
Your tee shot strategy should focus on finding the optimal position in the fairway rather than maximum distance. With the straight layout, driver is certainly an option for longer hitters, but accuracy trumps distance here. Consider a 3-wood or hybrid if you struggle with driver consistency, as positioning yourself in the center of the fairway about 150-170 yards from the green provides the best angle for your approach shot. The target line should favor the center of the fairway, avoiding any tendency to aim for the edges. While there are no major hazards listed, Tom Fazio's design philosophy often includes subtle slopes and collection areas that can penalize wayward drives. Focus on a smooth, controlled swing that prioritizes finding the short grass.
Approach & recovery
The approach shot is where this hole reveals its true challenge. The small green demands precise club selection and committed execution. From your ideal tee shot position, you'll likely face a mid-iron to short-iron approach, depending on conditions and pin position. Club selection should err on the side of taking enough club, as coming up short of a small green often leaves difficult up-and-down opportunities. Pay attention to pin position - when the flag is tucked, aim for the center of the green and let your putting take over. The compact green size means there's little room for error, making distance control more important than trying to attack every pin.
On the green
With a small green, putting becomes a premium skill on this hole. Expect subtle breaks that reflect Fazio's sophisticated design approach, and be prepared for potential elevation changes that may not be immediately apparent. Focus on lag putting to the correct level if the green has tiers, and remember that two-putting from anywhere on this small surface should be your primary goal unless you have a genuinely makeable birdie putt. The green's compact size means most putts will be relatively short, so concentrate on reading the break accurately rather than worrying about distance control. ## RISK VS REWARD This hole offers a classic risk/reward scenario through club selection rather than obvious hazards. The reward comes from aggressive approach shots that attack pins, but the risk is missing the small green entirely. Smart players will recognize that the real scoring opportunity comes from consistently hitting the green in regulation and making putts, rather than trying to force birdies with overly aggressive play. The straight layout might tempt players to take driver and try to overpower the hole, but the premium on accuracy for the approach shot suggests that positioning trumps power on this particular hole. ## DIFFERENT SKILL LEVELS **High Handicappers:** Focus on getting your tee shot in play with whatever club gives you the most confidence. A hybrid or 5-wood might serve you better than driver. For your approach, take one extra club and aim for the center of the green regardless of pin position. Your goal should be avoiding big numbers by keeping the ball on the putting surface. **Low Handicappers:** You can be more aggressive with driver off the tee, but maintain precision. Your approach shot should consider pin position more carefully, but still respect the small green size. This is a hole where course management and execution matter more than raw power, making it an excellent scoring opportunity for players who can control their distance. The 10th hole at Shadow Creek exemplifies strategic golf design, where success comes from thoughtful planning and precise execution rather than overpowering the architecture. In the context of this world-class facility, it provides a welcome respite from more dramatic holes while still demanding your full attention and best golf.
Watch for
- Course conditioning and mapped hazards may affect line selection; confirm from the aerial.
Hole 10 Green Complex
Mapped green boundary
Green size: 3,983 sq ft
How did Hole 10 play?
How did this hole play today?
Frequently asked questions
Yardage reference: Championship tees · 437 yards.
What's the best strategy off the tee?
↓
For this 437-yard par 4, most players will hit driver to set up a comfortable approach.
How difficult is hole 10?
↓
This hole is a moderate challenge for most golfers. Key challenges include: small green.
How big is the green on hole 10?
↓
The green is small and requires precision. The green is wider than it is deep, rewarding shots that find the correct tier. Expect challenging pin positions with limited room for error.
What's a good score on hole 10?
↓
This hole is a demanding hole where bogey is not unusual. This longer par 4 will test most golfers. Focus on position over distance.