Hole 14 at Shadow Creek Golf Course
- Par
- 4
- Yardage
- 493 yds
- Stroke index
- 4
- Hazards
- 2 bunkers · Water
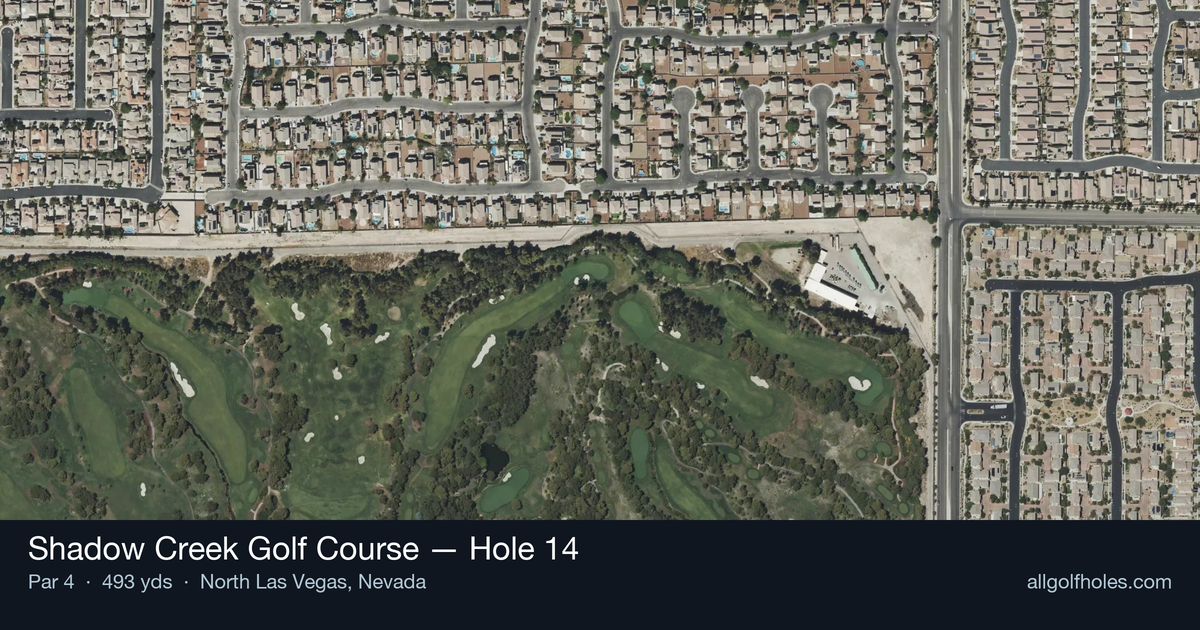
Aerial source not provided
Green size: 33 yds deep × 27 yds wide
Scorecard yardage is for Championship tees. The aerial shows its labeled reference position; distance rings measure to the green.
Championship tees · Par 4 · 493 yards
The plan for No. 14
Shadow Creek Golf Course hole 14 stands as a testament to Tom Fazio's desert artistry, presenting a formidable 493-yard par 4 that demands both power and precision. This straight-away challenge unfolds through Fazio's signature lush landscaping, where the contrast between manicured fairways and the surrounding Nevada desert creates a visually stunning corridor. The tee shot requires careful placement to set up an optimal approach to the small, well-protected green complex. With its handicap rating of 4, this hole exemplifies Shadow Creek's reputation where "every hole could make a signature statement at most golf courses throughout the world." The approach shot becomes the defining moment, as the compact green demands pinpoint accuracy from what's often a mid-to-long iron, making par a genuine accomplishment on this desert masterpiece.
Off the tee
Your tee shot strategy should prioritize finding the fairway over maximum distance. With 493 yards to navigate, most players will need two solid shots to reach this green in regulation. Focus on a smooth, controlled swing with your driver or strong 3-wood, aiming for the center of the fairway. The straight layout allows you to be aggressive with your target line, but don't sacrifice accuracy for extra yards. A good drive of 250-280 yards leaves you with a manageable approach shot, while a wayward tee shot into the desert or rough makes par extremely difficult.
Approach & recovery
The approach shot is where this hole truly shows its teeth. With the small green as your target, club selection becomes critical. Most players will face a long-iron or hybrid approach, requiring precise distance control and trajectory. Aim for the center of the green regardless of pin position - the small target leaves little room for error. Take one extra club and swing smoothly rather than forcing a shot. The key is committing to your club selection and making solid contact, as coming up short or flying the green both lead to difficult recovery shots.
On the green
Shadow Creek's 14th green, while small, likely features subtle breaks that can be tricky to read. With the green's compact size, lag putting becomes essential - getting your first putt close to the hole is more important than being aggressive. Study the grain and any slope carefully, as three-putts can quickly turn a good hole into a bogey or worse. When the pin is tucked, play to the fat part of the green and rely on your putting rather than risking a difficult up-and-down. ## RISK VS REWARD This hole offers limited risk/reward opportunities due to its straightforward design, but the main decision point comes with club selection on both shots. The temptation to try to drive it longer to shorten the approach must be weighed against finding the fairway. Similarly, on the approach, the small green target means the reward for aggressive pin-hunting is minimal compared to the risk of missing the green entirely. Smart course management favors the conservative approach on this demanding test. ## DIFFERENT SKILL LEVELS **High Handicappers:** Focus on two good shots rather than trying to overpower the hole. Use a 3-wood or hybrid off the tee if it keeps you in play, and don't hesitate to lay up short of the green if your approach shot isn't carrying far enough. Making bogey here is perfectly acceptable given the hole's difficulty. **Low Handicappers:** This is a hole where your length and precision should shine. Attack with driver off the tee, but ensure you're in the fairway. On approach, trust your yardages and commit to reaching the green in regulation. This is a legitimate birdie opportunity if you execute two quality shots, but respect the small target and don't force anything. The 14th at Shadow Creek embodies Tom Fazio's desert artistry - a hole that looks straightforward but demands your complete attention and best execution to score well.
Watch for
- Course conditioning and mapped hazards may affect line selection; confirm from the aerial.
Hole 14 Green Complex
Mapped green boundary
Green size: 4,416 sq ft
How did Hole 14 play?
How did this hole play today?
Frequently asked questions
Yardage reference: Championship tees · 493 yards.
What's the best strategy off the tee?
↓
For this 493-yard par 4, most players will hit driver to set up a comfortable approach.
How difficult is hole 14?
↓
This hole is one of the tougher holes on the course for most golfers. Key challenges include: long par 4, water in play, small green.
How big is the green on hole 14?
↓
The green is small and requires precision. Expect challenging pin positions with limited room for error.
What's a good score on hole 14?
↓
This hole is one of the tougher holes where par feels like birdie. A challenging par 4. Accept that bogey happens and avoid big numbers.