Hole 15 at Shadow Creek Golf Course
- Par
- 4
- Yardage
- 482 yds
- Stroke index
- 2
- Hazards
- 2 bunkers
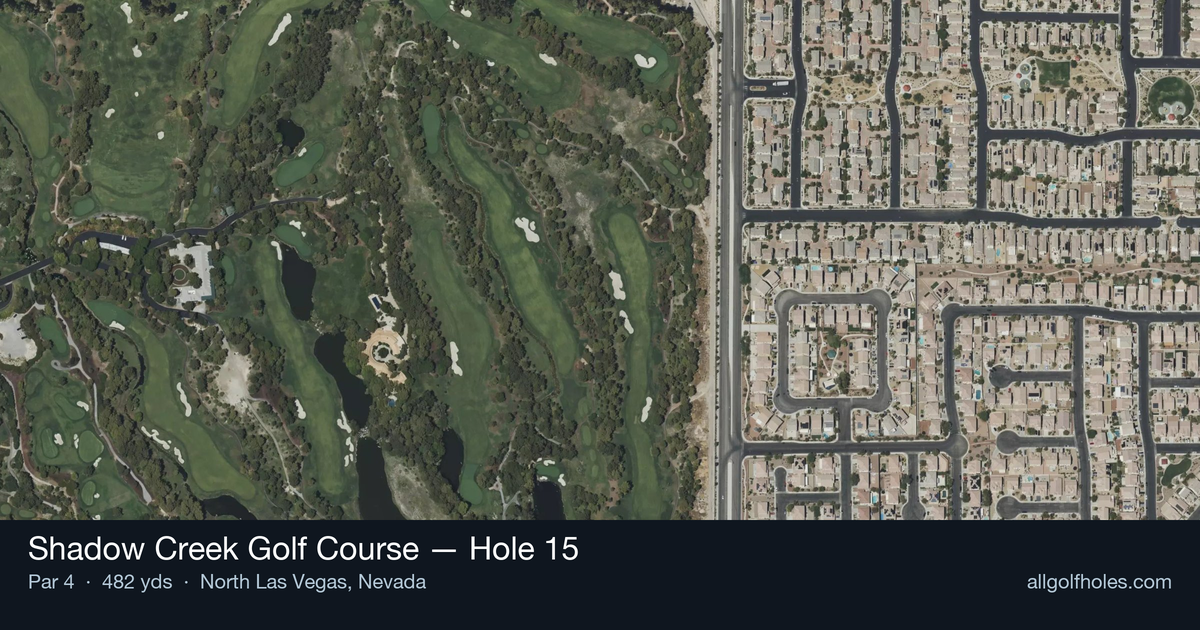
Aerial source not provided
Green size: 36 yds deep × 25 yds wide
Scorecard yardage is for Championship tees. The aerial shows its labeled reference position; distance rings measure to the green.
Championship tees · Par 4 · 482 yards
The plan for No. 15
Shadow Creek Golf Course hole 15 stands as one of Tom Fazio's most demanding par 4 tests, stretching 482 yards through the Nevada desert oasis. This straight, unforgiving layout requires precision from tee to green, with its second-hardest handicap rating demanding respect from every golfer. The tee shot must find the relatively narrow fairway corridor, framed by Fazio's signature lush landscaping that contrasts dramatically with the surrounding desert terrain. The approach shot to the small green complex becomes increasingly challenging as pin positions shrink available landing areas. With soaring mountains providing a stunning backdrop, this hole epitomizes Shadow Creek's unique character - a demanding golf test wrapped in spectacular desert beauty that has captivated players since 1989.
Off the tee
Your tee shot strategy should focus on maximizing distance while maintaining accuracy down the center of the fairway. With the hole's considerable length, you'll want to use driver unless conditions strongly suggest otherwise. The straight layout allows you to aim directly at your target line without worrying about dogleg positioning. Focus on a smooth, controlled swing that prioritizes finding the fairway over maximum distance - even a well-struck shot that finds the rough will leave you with a significantly more challenging approach to the small green.
Approach & recovery
The approach shot is where this hole truly shows its teeth. With a small green as your target, precision becomes paramount over power. Depending on your tee shot distance, you'll likely face a mid-iron to long-iron approach. Take extra time to factor in wind conditions, as the desert environment can create tricky gusts. Aim for the center of the green regardless of pin position - the small target makes going flag-hunting a dangerous proposition. A controlled shot to the middle of the green will always leave you with a reasonable putt, while missing the green entirely can lead to difficult up-and-down scenarios.
On the green
The small green demands respect with your putter. Focus on lag putting to ensure you don't leave yourself with lengthy comeback putts. Tom Fazio's greens typically feature subtle undulations that can be deceiving, so take time to read the slopes carefully. With limited green space, pin positions will significantly impact putting strategy - when the flag is tucked near an edge, prioritize getting your approach shot to the correct level rather than close to the hole. ## RISK VS REWARD This hole offers limited risk/reward opportunities due to its straightforward design and demanding length. The primary decision point comes on the approach shot - do you attack a tucked pin or play conservatively to the center? Given the small green size, the conservative play typically offers better scoring potential. The real reward comes from executing two solid shots and walking away with par on one of the course's most challenging holes. ## DIFFERENT SKILL LEVELS **Low-handicap players** should view this as a birdie opportunity if they can execute two quality shots. Consider aggressive lines and pin-seeking approaches, but only when conditions and lie quality support such tactics. This is a hole where your superior ball-striking ability can separate you from the field. **High-handicap players** should adopt a more conservative strategy focused on avoiding big numbers. Consider using a fairway wood or hybrid off the tee if accuracy is a concern, and always aim for the center of the green on your approach. Two-putting for par here represents excellent course management and should be celebrated as a victory against one of Shadow Creek's toughest tests. The key to mastering this hole lies in understanding that its difficulty comes not from dramatic hazards but from the precision required to hit two quality shots in succession - a hallmark of Tom Fazio's architectural philosophy.
Watch for
- Course conditioning and mapped hazards may affect line selection; confirm from the aerial.
Hole 15 Green Complex
Mapped green boundary
Green size: 4,738 sq ft
How did Hole 15 play?
How did this hole play today?
Frequently asked questions
Yardage reference: Championship tees · 482 yards.
What's the best strategy off the tee?
↓
For this 482-yard par 4, most players will hit driver to set up a comfortable approach.
How difficult is hole 15?
↓
This hole is a moderate challenge for most golfers. Key challenges include: long par 4.
How big is the green on hole 15?
↓
The green is medium-sized with moderate targets. The green is deeper than wide, so club selection is crucial. Pay attention to pin placement when selecting your approach club.
What's a good score on hole 15?
↓
This hole is one of the tougher holes where par feels like birdie. A challenging par 4. Accept that bogey happens and avoid big numbers.