Hole 13 at Shadow Creek Golf Course
- Par
- 3
- Yardage
- 257 yds
- Stroke index
- 8
- Hazards
- 1 bunker · Water
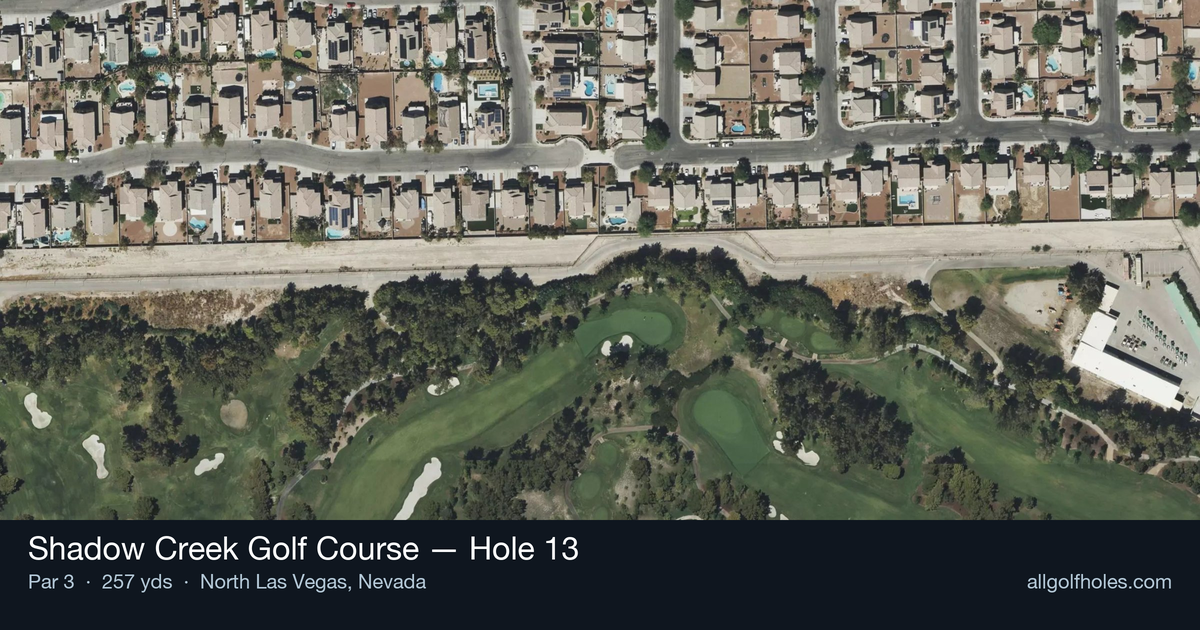
Aerial source not provided
Green size: 40 yds deep × 33 yds wide
Scorecard yardage is for Championship tees. The aerial shows its labeled reference position; distance rings measure to the green.
Championship tees · Par 3 · 257 yards
The plan for No. 13
Hailed as "the most attractive hole in the Vegas desert bar none," Shadow Creek Golf Course hole 13 stands as the signature par 3 among Tom Fazio's desert masterpiece. This stunning 257-yard downhill one-shotter presents golfers with a breathtaking tee shot over Shadow Creek itself, which winds menacingly in front of the green complex. The hole's beauty masks its bite - a treacherous false front guards the small green short, while the putting surface runs severely back-to-front, demanding precise distance control. With Steve Wynn's mansion providing an opulent backdrop, this demanding par 3 combines visual splendor with strategic complexity, earning its reputation as both the toughest and arguably best of Shadow Creek's excellent short holes.
Off the tee
The downhill nature of this hole can be deceiving for club selection - many golfers underestimate how much the elevation change affects distance. Take at least one club less than the yardage suggests, as the ball will carry significantly farther downhill. The target line should favor the center-back portion of the green to avoid the false front, even if it means risking the back fringe. The water hazard fronting the green demands a committed swing - any tentative shot risks finding Shadow Creek. Wind conditions in the desert can be tricky, so pay attention to flags and vegetation movement before making your final club selection.
Approach & recovery
Since this is a par 3, the tee shot is your approach shot. The key is avoiding the false front at all costs - shots landing short will either roll back into the water or leave you with an extremely difficult uphill chip. Aim for the back half of the green, as the severe back-to-front slope means even shots that go slightly long will funnel back toward the hole. The small green size demands accuracy, but don't let the water intimidate you into coming up short. A confident swing with proper club selection is essential.
On the green
The green's back-to-front slope creates challenging putting conditions, especially from above the hole. Putts from the back portion can easily run well past the cup if not struck with perfect pace. The quadrant design means different sections of the green will break differently, so read your putt carefully and pay attention to the overall slope. If you're putting from below the hole, be aggressive - uphill putts on this green are much more manageable than downhill ones. The false front means any putt that comes up short from distance will roll back significantly. ## RISK VS REWARD The primary risk/reward decision centers on pin position and how aggressively to attack it. When the pin is in the front portion near the false front, the smart play is to aim for the center-back of the green and accept a longer putt rather than risk the water hazard. Back pin positions offer more reward for aggressive play, as you can aim directly at the flag with less risk of the false front coming into play. The reward for finding the green in regulation is significant, as this hole's difficulty makes par a good score for most golfers. ## DIFFERENT SKILL LEVELS **High-handicap players** should focus entirely on avoiding the water hazard and false front. Club up and aim for the back center of the green every time, regardless of pin position. Accept that you'll have some long putts, but prioritize keeping the ball dry and on the putting surface. Take practice swings to ensure a confident, committed swing. **Low-handicap players** can be more aggressive with pin hunting, especially to back positions. They should still respect the false front but can take on front pins when conditions are right. These players can also better judge the wind conditions and make more precise club selections. The key is knowing when to be aggressive versus when to play safe based on their round situation and confidence level. This hole exemplifies Shadow Creek's philosophy of combining natural beauty with strategic challenge, making it a true test of both skill and course management in the spectacular Nevada desert setting.
Watch for
- Course conditioning and mapped hazards may affect line selection; confirm from the aerial.
Hole 13 Green Complex
Mapped green boundary
Green size: 6,061 sq ft
How did Hole 13 play?
How did this hole play today?
Frequently asked questions
Yardage reference: Championship tees · 257 yards.
What club should I use on this par 3?
↓
At 257 yards, most golfers will need a fairway wood or hybrid to reach this green. Adjust for elevation, wind, and pin position.
How difficult is hole 13?
↓
This hole is one of the tougher holes on the course for most golfers. Key challenges include: long par 3, water in play.
What hazards should I watch out for on hole 13?
↓
Key hazards include: 1 greenside bunker; water at 186.9 yards. Plan your shots to avoid these trouble spots.
How big is the green on hole 13?
↓
The green is fairly large with multiple pin positions. Lag putting becomes important on longer putts.
What's a good score on hole 13?
↓
This hole is a challenging par where bogey is acceptable. This longer par 3 will test your long iron or hybrid game. Par is a good score.