Hole 7 at Sea Island Golf Club (Seaside)
- Par
- 5
- Yardage
- 531 yds
- Stroke index
- 3
- Hazards
- 2 bunkers · Water
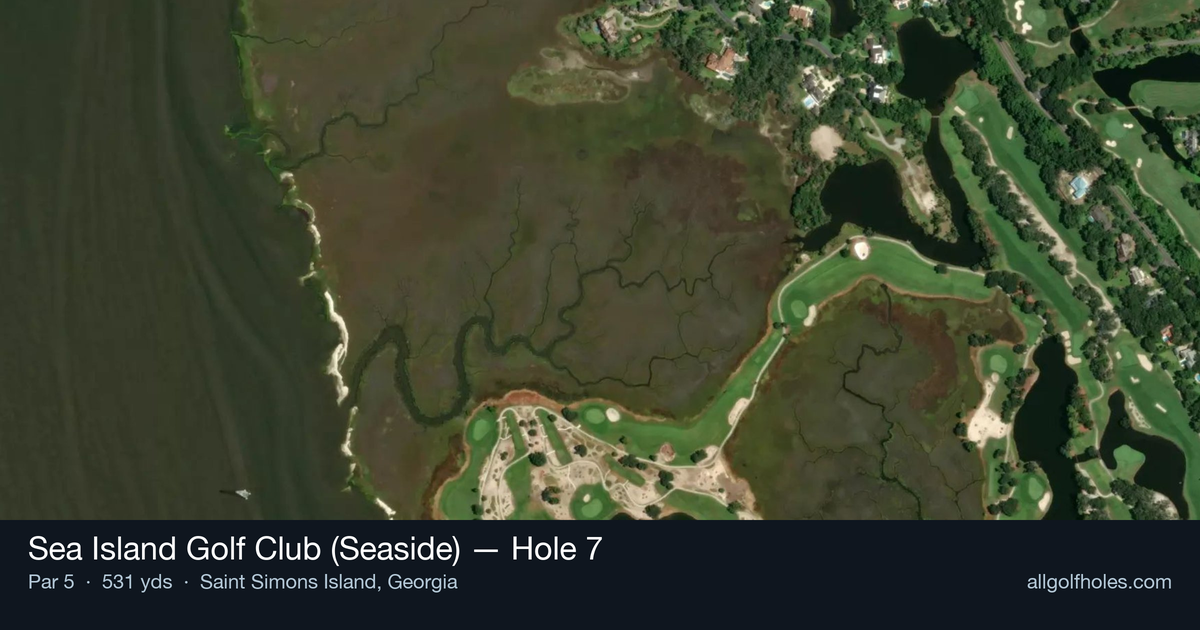
Aerial source not provided
Green size: 25 yds deep × 37 yds wide
Scorecard yardage is for Championship tees. The aerial shows its labeled reference position; distance rings measure to the green.
Championship tees · Par 5 · 531 yards
The plan for No. 7
The seventh hole at Sea Island Golf Club (Seaside) epitomizes the true spirit of links golf that once earned Bobby Jones' praise during his Grand Slam year. This 531-yard par 5 presents a deceptively straightforward layout where the coastal winds transform club selection into an art form. The generous fairway invites aggressive tee shots, but the ever-present Georgia sea breeze demands constant recalibration—what appears to be a comfortable 7-iron approach often becomes a gripping 5-iron battle against the elements. The compact green sits exposed to the wind's whims, requiring precise distance control and careful green reading. This is proper links golf at its finest, where strategic thinking and wind management separate the seasoned players from the hopeful, creating memorable moments on a hole that perfectly captures Seaside's coastal character and historical significance.
Off the tee
Your tee shot strategy must prioritize position over distance, especially given the wind's influence on ball flight. Focus on finding the center of the fairway with a controlled swing rather than attempting to overpower the hole. Driver remains the preferred choice for most players to maximize distance on this lengthy par 5, but consider a 3-wood if crosswinds are particularly strong. The target line should favor the center-left portion of the fairway, giving you the best angle for your second shot while avoiding any subtle slopes that might kick your ball offline.
Approach & recovery
The approach shots on this hole require careful club selection based on wind conditions - you may find yourself hitting a 5-iron where you'd normally use a 7-iron. For your second shot, lay up to a comfortable wedge distance unless you're confident about reaching the small green in two. The key is positioning yourself in the fairway's center, approximately 100-120 yards from the green, which provides the best angle and distance control for your third shot. When the wind is up, focus on keeping the ball low and letting it run toward the target.
On the green
The small green demands precision and excellent distance control on your approach. Putting strategy becomes critical here, as the coastal winds can affect even short putts. Read the grain carefully, as seaside grasses often have subtle breaks that aren't immediately apparent. Pin positions on this compact surface can dramatically change the difficulty of approach shots, so always aim for the center of the green unless you have a short iron in hand and favorable conditions. ## RISK VS REWARD The primary risk/reward decision comes on your second shot - attempting to reach the green in two versus laying up strategically. Given the small green size and potential wind conditions, the conservative play often yields better scoring opportunities. The reward for successfully reaching the green in regulation is significant, but the penalty for missing the small target can lead to difficult up-and-down situations. Most players benefit from treating this as a three-shot hole and focusing on hitting the green with their third shot. ## DIFFERENT SKILL LEVELS **High-handicap players** should embrace the three-shot strategy, using driver off the tee, then laying up with a mid-iron to their preferred wedge distance. Focus on keeping the ball in play and avoiding the temptation to force shots in windy conditions. **Low-handicap players** can be more aggressive with their second shots when conditions permit, but should still respect the wind and small green size. These players can take advantage of their superior distance control to attack different pin positions, but should always have a bailout plan when the wind picks up. The key to success on this historic hole is patience and adaptability - let the conditions dictate your strategy rather than forcing a predetermined game plan.
Watch for
- Course conditioning and mapped hazards may affect line selection; confirm from the aerial.
Hole 7 Green Complex
Mapped green boundary
Green size: 4,912 sq ft
How did Hole 7 play?
How did this hole play today?
Frequently asked questions
Yardage reference: Championship tees · 531 yards.
Can this par 5 be reached in two?
↓
At 531 yards, A true three-shot hole for most players. Position your layup to leave a comfortable wedge distance.
How difficult is hole 7?
↓
This hole is a moderate challenge for most golfers. Key challenges include: water in play.
What hazards should I watch out for on hole 7?
↓
Key hazards include: water at 239.1 yards. Plan your shots to avoid these trouble spots.
How big is the green on hole 7?
↓
The green is medium-sized with moderate targets. Pay attention to pin placement when selecting your approach club.
What's a good score on hole 7?
↓
This hole is a solid birdie opportunity with smart layup strategy. Most golfers can reach in three. Position your layup to leave a comfortable wedge.