Hole 2 at Sea Island Golf Club (Seaside)
- Par
- 4
- Yardage
- 398 yds
- Stroke index
- 9
- Hazards
- 2 bunkers · Water
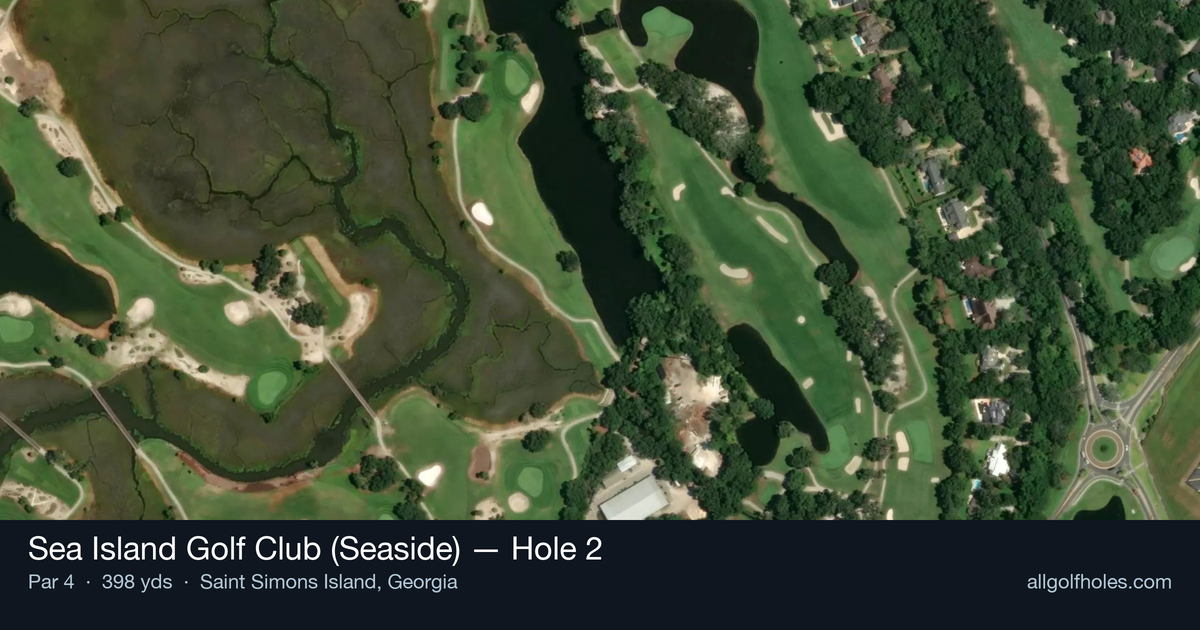
Aerial source not provided
Green size: 40 yds deep × 26 yds wide
Scorecard yardage is for Championship tees. The aerial shows its labeled reference position; distance rings measure to the green.
Championship tees · Par 4 · 398 yards
The plan for No. 2
The second hole at Sea Island Golf Club (Seaside) embodies the unpredictable nature of links golf that Bobby Jones praised during his legendary 1930 visit. This straight par 4 stretches 398 yards through coastal terrain where the ever-present Georgia wind transforms club selection from round to round. The tee shot demands precision to find the optimal angle for approaching the small, well-protected green. Without traditional hazards cluttering the landscape, this hole's true defense lies in the swirling coastal breezes that can turn a comfortable wedge into a demanding mid-iron approach. The compact green rewards accuracy over power, making course management essential. Here, golfers experience authentic links golf where reading wind patterns becomes as crucial as reading putts, creating a memorable test that changes personality with each round.
Off the tee
Your tee shot strategy must begin with a thorough wind evaluation. On calm days, a driver or 3-wood down the center of the fairway sets up an ideal approach distance. However, when the coastal breeze is up, consider taking extra club and swinging easier to maintain control. Target the center-left portion of the fairway to provide the best angle into the small green. The straight layout allows for aggressive driving, but prioritize finding the fairway over maximum distance. A well-positioned drive from the short grass will always trump extra yardage from the rough, especially when dealing with variable wind conditions.
Approach & recovery
The approach shot to this small green requires precision and smart club selection. With no hazards protecting the putting surface, your primary concern is wind compensation and distance control. When the wind is helping, take at least one club less and focus on a smooth tempo. Against the wind, don't hesitate to take two clubs more if conditions warrant. Aim for the center of the green regardless of pin position - the small target leaves little room for error. A controlled fade or draw can help hold shots in crosswinds, but avoid overly aggressive shot-shaping that might compound wind effects.
On the green
The small green at the 2nd hole demands respect with your putter. Coastal winds can affect even short putts, so pay attention to grain direction and any subtle breaks. Focus on getting your first putt close rather than being overly aggressive, as three-putts can quickly turn a scoring opportunity into a bogey. Read putts carefully, as the wind that affected your approach shots may also influence longer putts. Take your time and commit to your read - indecision on the greens often leads to poor results in windy conditions. ## RISK VS REWARD This hole offers a straightforward risk/reward proposition: aggressive play can yield birdies, but only with proper wind assessment. The reward comes from being bold enough to take enough club in headwinds or trust a shorter club when the wind is helping. The risk lies in misreading conditions and coming up short or flying the small green. Conservative players can safely play to the center of the green and walk away with par, while more aggressive golfers can attack pins when conditions allow. ## DIFFERENT SKILL LEVELS **High Handicappers:** Focus entirely on wind assessment and club selection. Take extra club when in doubt, aim for the center of the green, and don't worry about pin hunting. Your goal is finding the putting surface and avoiding big numbers. **Low Handicappers:** Use your course management skills to be more aggressive when conditions allow. You can attack certain pin positions, but still respect the small green size. Consider shot shape to help hold the green in crosswinds, and don't be afraid to be aggressive with your putting when you've hit quality approach shots. The key for all skill levels is patience and adaptability - this is proper links golf where conditions change throughout the round, and successful players adjust their strategy accordingly.
Watch for
- Course conditioning and mapped hazards may affect line selection; confirm from the aerial.
Hole 2 Green Complex
Mapped green boundary
Green size: 5,234 sq ft
How did Hole 2 play?
How did this hole play today?
Frequently asked questions
Yardage reference: Championship tees · 398 yards.
What's the best strategy off the tee?
↓
For this 398-yard par 4, most players will hit driver to set up a comfortable approach.
How difficult is hole 2?
↓
This hole is a moderate challenge for most golfers. Key challenges include: water in play.
How big is the green on hole 2?
↓
The green is medium-sized with moderate targets. The green is deeper than wide, so club selection is crucial. Pay attention to pin placement when selecting your approach club.
What's a good score on hole 2?
↓
This hole is a medium-length test where par is a solid result. A straightforward par 4 where course management pays off.