Hole 8 at Tiburon Golf Club (Black)
- Par
- 4
- Yardage
- 345 yds
- Stroke index
- 13
- Hazards
- Water
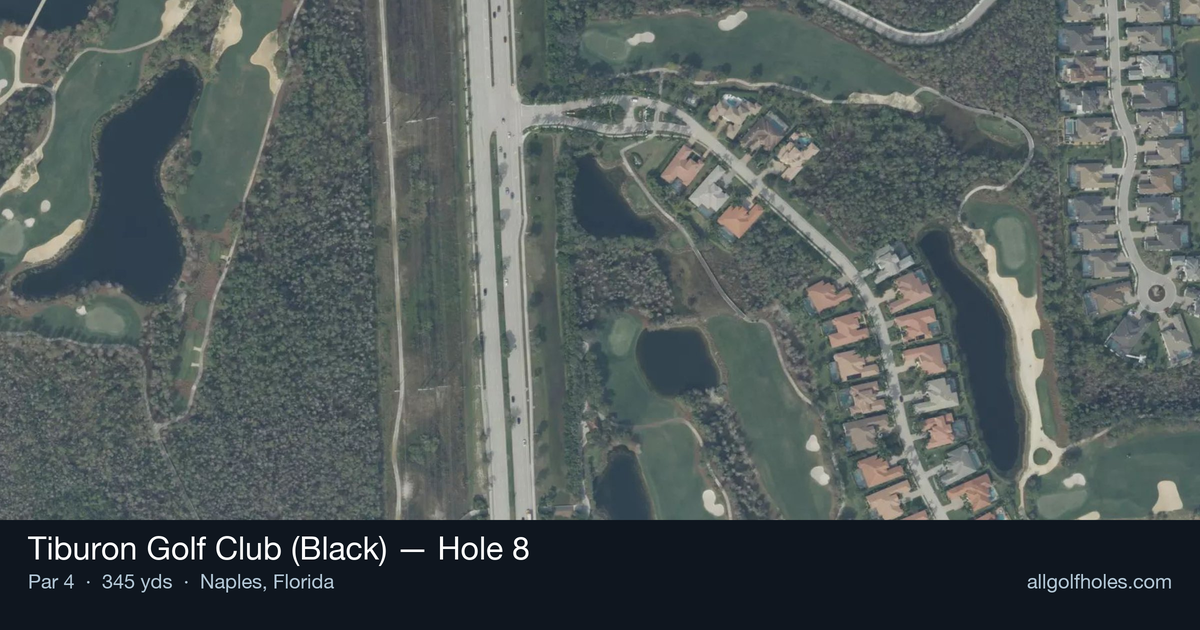
Aerial source not provided
Green size: 32 yds deep × 28 yds wide
Scorecard yardage is for Championship tees. The aerial shows its labeled reference position; distance rings measure to the green.
Championship tees · Par 4 · 345 yards
The plan for No. 8
The eighth hole at Tiburon Golf Club (Black) exemplifies Greg Norman's strategic design philosophy on this 345-yard par 4. Known as one of the more approachable holes on the Great White Shark's challenging Black Course, this straight layout rewards precision over power. The generous fairway invites an aggressive tee shot, but the small green demands surgical accuracy on the approach. Without significant hazards to intimidate, golfers can focus purely on execution and distance control. The compact putting surface requires careful club selection, as anything long or short leaves challenging recovery shots. This deceptively simple hole often plays harder than its handicap ranking suggests, making it a perfect example of Norman's ability to create strategic interest through subtle green complexes rather than obvious hazards.
Off the tee
The tee shot strategy revolves around positioning for the optimal approach angle rather than maximizing distance. With the hole measuring just 345 yards, most players can reach the green with a driver, but this aggressive play isn't always wise. A well-struck 3-wood or hybrid to the 250-yard mark leaves a comfortable wedge approach and keeps you in the short grass. The straight layout means your target line is relatively clear, but focus on the center-right portion of the fairway to set up the best angle into the small green. Avoid the temptation to swing out of your shoes - smooth tempo and accuracy will serve you better than extra distance here.
Approach & recovery
The approach shot is where this hole can bite back if you're not careful. The small green demands precision with your club selection and target line. From the optimal driving distance, you'll typically face a wedge or short iron, but club selection depends heavily on pin position and wind conditions. Aim for the center of the green regardless of pin placement - the small target leaves little margin for error. If the pin is tucked behind a bunker or on the edges, resist the urge to get too aggressive. A shot to the middle of the green, even 20-30 feet from the hole, gives you a legitimate birdie chance while avoiding the trouble that surrounds this putting surface.
On the green
The small green creates challenging putting scenarios where speed control becomes paramount. Three-putts can easily happen if you're not careful with your lag putting from longer distances. Read the green carefully, as subtle breaks can be deceiving on Norman's designs. Focus on getting your first putt within a comfortable two-putt range rather than being overly aggressive with the putter. When the pin is near the edges, uphill putts are generally safer than downhill, so factor this into your approach strategy. ## RISK VS REWARD This hole offers a clear risk/reward decision off the tee. Aggressive players may be tempted to drive the green or get very close, but the small target and surrounding hazards make this a high-risk proposition. The reward of a potential eagle or easy birdie must be weighed against the penalty for missing the green. The safer play - positioning your drive in the fairway for a controlled wedge approach - offers excellent birdie opportunities with much less risk. Most players will find better scoring results by playing conservatively and relying on their short game. ## DIFFERENT SKILL LEVELS **High Handicappers** should treat this as a two-shot hole and focus on keeping the ball in play. Use a 3-wood or hybrid off the tee to ensure you find the fairway, then play a comfortable approach shot to the center of the green. Don't worry about pin hunting - just get on the putting surface and take your par or better. **Low Handicappers** can be more aggressive with their approach strategy, but should still respect the small green. Consider the pin position carefully when deciding whether to attack or play safe. Your superior short game skills allow for more precise approaches, but even scratch players benefit from conservative club selection on this hole. **Mid Handicappers** should focus on course management above all else. This hole rewards smart play over heroic shots. Position your tee shot well, take enough club on your approach to clear any front trouble, and trust your putting to convert scoring opportunities. The key to success on Tiburon's 8th hole lies in recognizing that sometimes the shortest route to a good score is the most conservative one. Norman's design rewards patience and precision - qualities that serve golfers well throughout this challenging Black Course layout.
Watch for
- Course conditioning and mapped hazards may affect line selection; confirm from the aerial.
Hole 8 Green Complex
Mapped green boundary
Green size: 3,966 sq ft
How did Hole 8 play?
How did this hole play today?
Frequently asked questions
Yardage reference: Championship tees · 345 yards.
What's the best strategy off the tee?
↓
For this 345-yard par 4, most players will hit 3-wood or driver to set up a comfortable approach.
How difficult is hole 8?
↓
This hole is a moderate challenge for most golfers. Key challenges include: water in play, small green.
What hazards should I watch out for on hole 8?
↓
Key hazards include: water at 311.3 yards. Plan your shots to avoid these trouble spots.
How big is the green on hole 8?
↓
The green is small and requires precision. Expect challenging pin positions with limited room for error.
What's a good score on hole 8?
↓
This hole is a birdie opportunity if you find the fairway. This shorter par 4 rewards accuracy off the tee with a short iron approach.