Hole 7 at Tiburon Golf Club (Black)
- Par
- 3
- Yardage
- 160 yds
- Stroke index
- 17
- Hazards
- Water
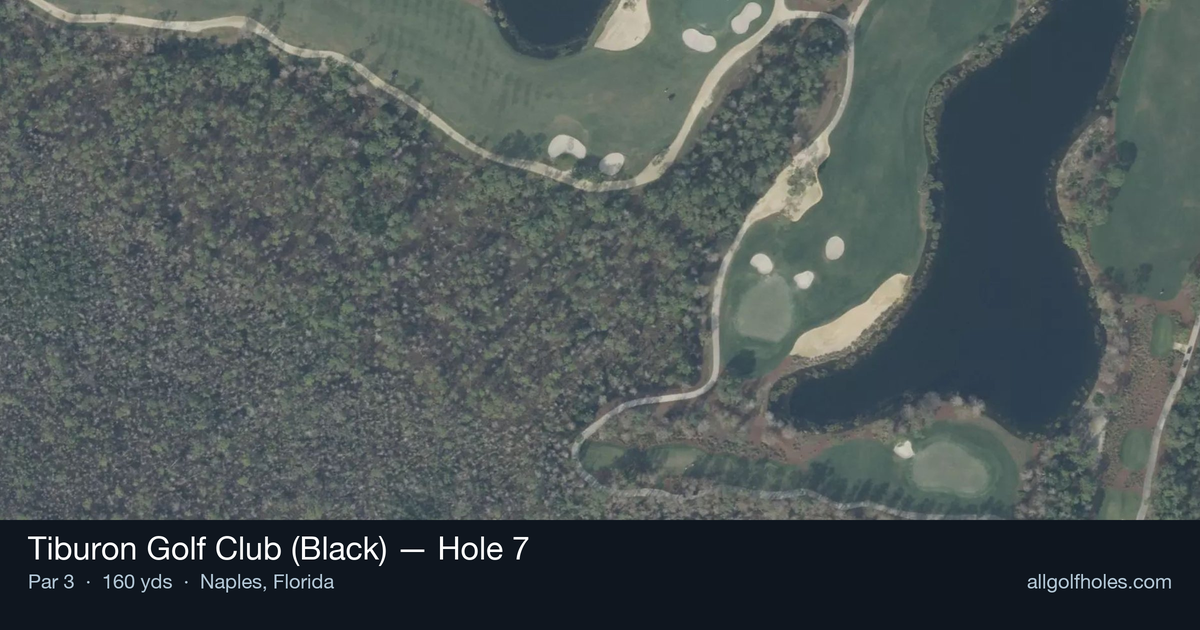
Aerial source not provided
Green size: 31 yds deep × 25 yds wide
Scorecard yardage is for Championship tees. The aerial shows its labeled reference position; distance rings measure to the green.
Championship tees · Par 3 · 160 yards
The plan for No. 7
The seventh hole at Tiburon Golf Club (Black) exemplifies Greg Norman's strategic design philosophy in a deceptively challenging par 3. At 160 yards, this tee shot demands precision over power, with the small green requiring exact club selection and committed execution. Norman's signature touch is evident in the subtle undulations that make distance control crucial on this seemingly straightforward hole. The compact green complex rewards accurate approach shots while punishing anything offline, creating a risk-reward scenario that separates confident ball-strikers from tentative players. Despite its modest length and absence of major hazards, this hole consistently tests even accomplished golfers, embodying the Great White Shark's philosophy that strategic design trumps brute length in creating memorable golf experiences.
Off the tee
Club selection is paramount on this mid-length par 3. Most golfers will find themselves between a 6-iron and 8-iron depending on wind conditions and pin position. The key is committing to your yardage and swinging with confidence rather than trying to guide the ball. Aim for the center of the green regardless of pin position - the small target makes chasing flags a risky proposition. Pay close attention to wind direction, as Naples' coastal breezes can significantly affect ball flight on this exposed hole.
Approach & recovery
Since this is a par 3, your tee shot is your approach shot. Focus on a smooth, controlled swing that prioritizes accuracy over distance. The straight layout means there's no preferred angle of attack, so concentrate on solid contact and proper trajectory. With the small green size, landing the ball softly becomes crucial - take one extra club if you're between selections and make a smooth swing rather than forcing a shorter iron.
On the green
The compact putting surface demands respect and precise distance control. While specific green contours aren't detailed, small greens typically feature subtle breaks that can be deceiving. Study the green carefully during your approach and take note of any slope from the tee box. Two-putting should be your primary goal unless you have a very makeable birdie opportunity. Lag putting becomes essential - leaving yourself outside 6 feet for par can turn a routine hole into a bogey quickly. ## RISK VS REWARD This hole presents a classic risk/reward scenario disguised as a simple par 3. The reward for aggressive pin-hunting is a potential birdie on a relatively easy hole, but the risk of missing the small green entirely can lead to difficult up-and-downs. The smart play is targeting the center of the green and relying on your putting to create birdie opportunities. Only attack tucked pins when you're feeling confident with your iron play and the wind conditions are favorable. ## DIFFERENT SKILL LEVELS **High-Handicap Players:** Focus entirely on finding the green with your tee shot. Ignore pin positions and aim for the largest part of the putting surface. Take an extra club to ensure you don't come up short, and prioritize a smooth, balanced swing. Getting on the green in regulation gives you two putts for par. **Low-Handicap Players:** You can be more aggressive with pin positions, especially when the flag is in the center portion of the green. Use the wind to your advantage and don't be afraid to take one less club when conditions allow for a more attacking approach. Your short game skills give you more margin for error if you do miss the green. The 7th hole at Tiburon's Black Course proves that Greg Norman understood how to create challenge through precision rather than intimidation. Success here comes from smart club selection, committed swings, and respecting the premium that small greens place on accuracy.
Watch for
- Course conditioning and mapped hazards may affect line selection; confirm from the aerial.
Hole 7 Green Complex
Mapped green boundary
Green size: 3,363 sq ft
How did Hole 7 play?
How did this hole play today?
Frequently asked questions
Yardage reference: Championship tees · 160 yards.
What club should I use on this par 3?
↓
At 160 yards, most golfers will need a mid-iron (7-iron to 8-iron) to reach this green. Adjust for elevation, wind, and pin position.
How difficult is hole 7?
↓
This hole is a moderate challenge for most golfers. Key challenges include: water in play, small green.
What hazards should I watch out for on hole 7?
↓
Key hazards include: water at 155.8 yards. Plan your shots to avoid these trouble spots.
How big is the green on hole 7?
↓
The green is small and requires precision. Expect challenging pin positions with limited room for error.
What's a good score on hole 7?
↓
This hole is a solid par with birdie chances for precise approach shots. Making par is a good result here. Focus on hitting the green and avoiding three-putts.