Hole 4 at Tiburon Golf Club (Black)
- Par
- 3
- Yardage
- 201 yds
- Stroke index
- 15
- Hazards
- 1 bunker · Water
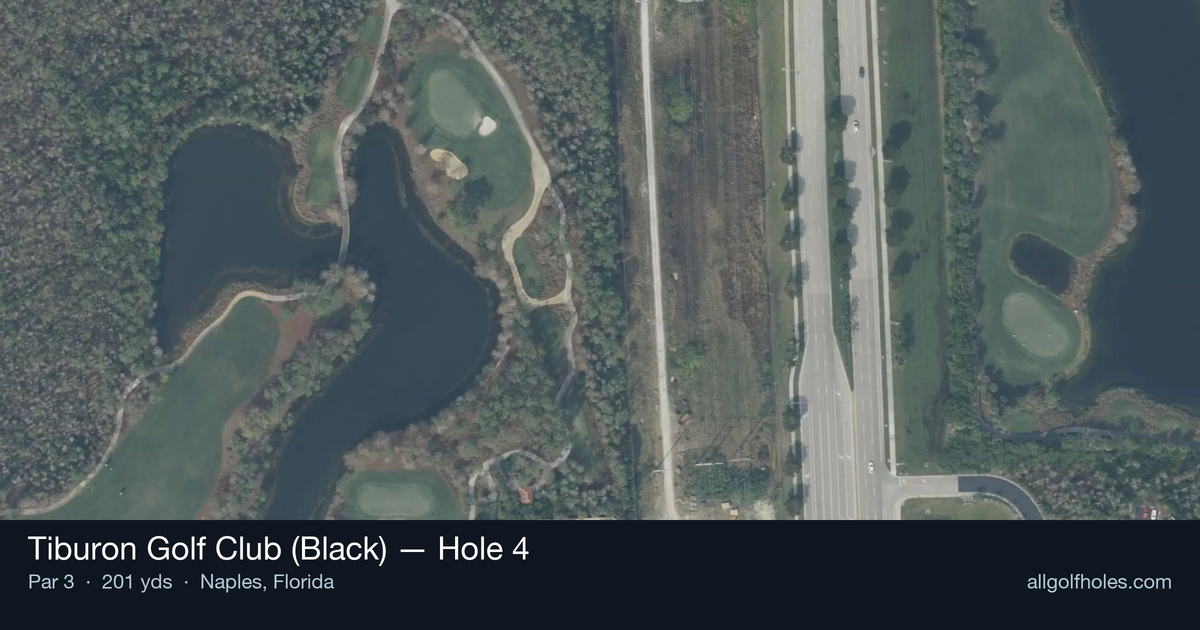
Aerial source not provided
Green size: 32 yds deep × 21 yds wide
Scorecard yardage is for Championship tees. The aerial shows its labeled reference position; distance rings measure to the green.
Championship tees · Par 3 · 201 yards
The plan for No. 4
The fourth hole at Tiburon Golf Club (Black) showcases Greg Norman's strategic design philosophy in a deceptively challenging par 3. At 201 yards, this straight shot demands precision over a small green that punishes wayward tee shots with its unforgiving margins. The Great White Shark's architectural fingerprints are evident in the hole's emphasis on accuracy over power, where club selection becomes critical in Naples' often-windy conditions. Despite being ranked as the 15th handicap hole, seasoned players know that the compact target requires unwavering focus and commitment to the chosen line. This hole epitomizes Norman's belief that great golf holes test mental fortitude as much as physical skill, making par a satisfying achievement.
Off the tee
Your tee shot strategy centers entirely around precise distance control and target selection. From 201 yards, most golfers will need a mid-iron to long-iron depending on conditions and personal carry distances. Focus on smooth tempo rather than trying to muscle the shot - Norman's design philosophy often punishes overly aggressive swings. Choose a specific target on the green rather than aiming at the flag, especially when the pin is tucked near edges. The straight layout eliminates directional guesswork, allowing you to focus purely on distance and trajectory. Factor in wind conditions carefully, as they can significantly impact club selection on this length of shot.
Approach & recovery
Since this is a par 3, your tee shot IS your approach shot. The key is landing the ball on the correct portion of the small green. With no significant hazards mentioned, your primary concern is avoiding short or long misses that leave difficult recovery shots. Aim for the center of the green when in doubt, giving yourself the best chance for a two-putt par. If you're feeling confident and the pin position allows, you can be more aggressive, but remember that small greens often have subtle slopes that can reject slightly off-target shots.
On the green
Small greens typically feature more pronounced slopes and breaks than larger putting surfaces. Take time to read the green carefully from multiple angles, as putts can break more than they appear on compact surfaces. Pay special attention to the grain direction, common in Florida courses, which can significantly affect ball roll. Lag putting becomes crucial here - focus on getting your first putt close rather than trying to hole everything. The small surface means you're never facing extremely long putts, making two-putt pars very achievable with smart speed control. ## RISK VS REWARD This hole offers a clear risk/reward scenario: the absence of major hazards encourages aggressive play toward pins, but the small green punishes misses with challenging recovery shots. The reward for precise iron play is a legitimate birdie opportunity, while the risk of missing the green entirely can lead to bogey or worse. Consider the pin position when deciding how aggressive to play. Center pins invite attacking the flag, while edge pins often call for conservative play to the fat part of the green. ## DIFFERENT SKILL LEVELS **High-Handicap Players:** Focus on getting the ball anywhere on the green rather than attacking pins. Use one extra club and swing smoothly, prioritizing solid contact over distance. Aim for the center of the green regardless of pin position, and be satisfied with two-putt pars. **Low-Handicap Players:** This hole offers a scoring opportunity with precise iron play. You can be more aggressive with pin hunting, especially with favorable positions. Focus on trajectory control and spin to stick approaches close to the pin. Use course management skills to identify when to attack versus when to play safe based on conditions and your confidence level. The Great White Shark's design philosophy shines through here - rewarding precision and punishing careless execution, even on seemingly straightforward holes.
Watch for
- Course conditioning and mapped hazards may affect line selection; confirm from the aerial.
Hole 4 Green Complex
Mapped green boundary
Green size: 3,792 sq ft
How did Hole 4 play?
How did this hole play today?
Frequently asked questions
Yardage reference: Championship tees · 201 yards.
What club should I use on this par 3?
↓
At 201 yards, most golfers will need a long iron or hybrid (5-iron to 6-iron) to reach this green. Adjust for elevation, wind, and pin position.
What hazards should I watch out for on hole 4?
↓
Key hazards include: 1 greenside bunker; water at 149.3 yards. Plan your shots to avoid these trouble spots.
How big is the green on hole 4?
↓
The green is small and requires precision. Expect challenging pin positions with limited room for error.