Hole 10 at Tiburon Golf Club (Black)
- Par
- 3
- Yardage
- 188 yds
- Stroke index
- 16
- Hazards
- 4 bunkers · Water
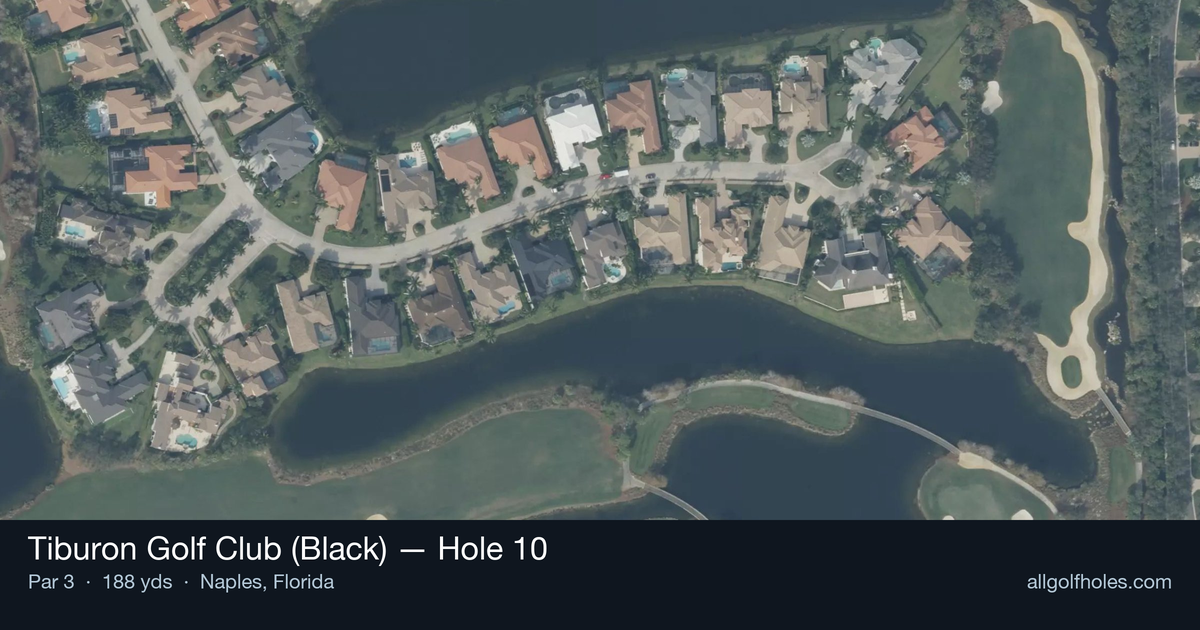
Aerial source not provided
Green size: 46 yds deep × 36 yds wide
Scorecard yardage is for Championship tees. The aerial shows its labeled reference position; distance rings measure to the green.
Championship tees · Par 3 · 188 yards
The plan for No. 10
The 10th hole at Tiburon Golf Club (Black) exemplifies Greg Norman's strategic design philosophy with a deceptively challenging par 3 that demands precision over power. At 188 yards, this mid-iron test features a compact green that rewards accurate tee shots while punishing wayward approaches. Norman's "Great White Shark" influence is evident in the hole's understated menace—what appears straightforward from the tee requires careful club selection and commitment to your line. The small green complex leaves little margin for error, making distance control paramount for scoring opportunities. This seemingly gentle par 3 often plays tougher than its 16 handicap ranking suggests, serving as a perfect example of Norman's ability to create strategic interest without relying on obvious hazards. Players who respect the precision required will find birdie chances, while those who underestimate its subtle challenges may walk away frustrated.
Off the tee
Club selection is paramount on this hole. Most golfers will be looking at a mid-iron to long-iron depending on conditions and pin position. Take one extra club and swing smoothly rather than forcing a shot - the small green punishes any miss, and it's better to be long and putting back than short in trouble. Aim for the center of the green regardless of pin position. The straight layout means your target line is clear, so focus entirely on distance control and tempo. Wind conditions will play a significant role at this yardage, so factor in any crosswinds or helping/hurting breezes when making your club selection.
Approach & recovery
Since this is a par 3, your tee shot IS your approach shot. The key is committing fully to your club selection and making a confident swing. The small green means there's little margin for error, so prioritize hitting the putting surface over getting close to the pin. If the pin is tucked in a corner, resist the temptation to fire directly at it. The center of the green gives you the best angle for your putt and the highest probability of avoiding trouble around the edges.
On the green
Norman's green designs typically feature subtle undulations that can fool the eye. Spend time reading the putt from multiple angles, as breaks may be more pronounced than they appear. The small size means most putts will be relatively short, but don't underestimate the importance of lag putting to the correct level. Pay attention to the grain of the Bermuda grass common in Southwest Florida, which can significantly affect ball roll, especially on longer putts. Putts into the grain will be slower and break less, while downgrain putts will roll faster and break more. ## RISK VS REWARD This hole offers limited risk/reward opportunities, which is actually its strategic challenge. The temptation might be to be aggressive toward pins, but the smart play is almost always to the fat part of the green. The scoring opportunity comes from making solid contact and two-putting for par, rather than trying to manufacture birdies through risky target selection. ## DIFFERENT SKILL LEVELS **High-Handicap Players**: Focus entirely on finding the green. Use a club that you're confident will carry the distance, even if it means being long. The small green makes up-and-down difficult, so prioritize hitting the putting surface. Don't worry about pin position - aim dead center every time. **Low-Handicap Players**: You can be more aggressive with pin hunting, but only when the risk/reward makes sense. Early in the round or in casual play, center of the green is still the smart play. In competitive situations with favorable pin positions, you can attack, but always have a clear miss strategy - know where you can afford to be wrong. The beauty of Norman's design here lies in its simplicity - there's nowhere to hide, and execution becomes everything. Respect the small green, make a committed swing, and take your par when it's offered.
Watch for
- Course conditioning and mapped hazards may affect line selection; confirm from the aerial.
Hole 10 Green Complex
Mapped green boundary
Green size: 5,999 sq ft
How did Hole 10 play?
How did this hole play today?
Frequently asked questions
Yardage reference: Championship tees · 188 yards.
What club should I use on this par 3?
↓
At 188 yards, most golfers will need a long iron or hybrid (5-iron to 6-iron) to reach this green. Adjust for elevation, wind, and pin position.
How difficult is hole 10?
↓
This hole is one of the tougher holes on the course for most golfers. Key challenges include: water in play, heavily bunkered.
What hazards should I watch out for on hole 10?
↓
Key hazards include: 4 greenside bunkers; water at 106.8 yards. Plan your shots to avoid these trouble spots.
How big is the green on hole 10?
↓
The green is medium-sized with moderate targets. Pay attention to pin placement when selecting your approach club.
Where is the best miss on hole 10?
↓
If you're going to miss the green, favor the left side. The right (water) brings more trouble into play and makes recovery difficult.