Hole 2 at Tiburon Golf Club (Black)
- Par
- 4
- Yardage
- 422 yds
- Stroke index
- 1
- Hazards
- 1 bunker · Water
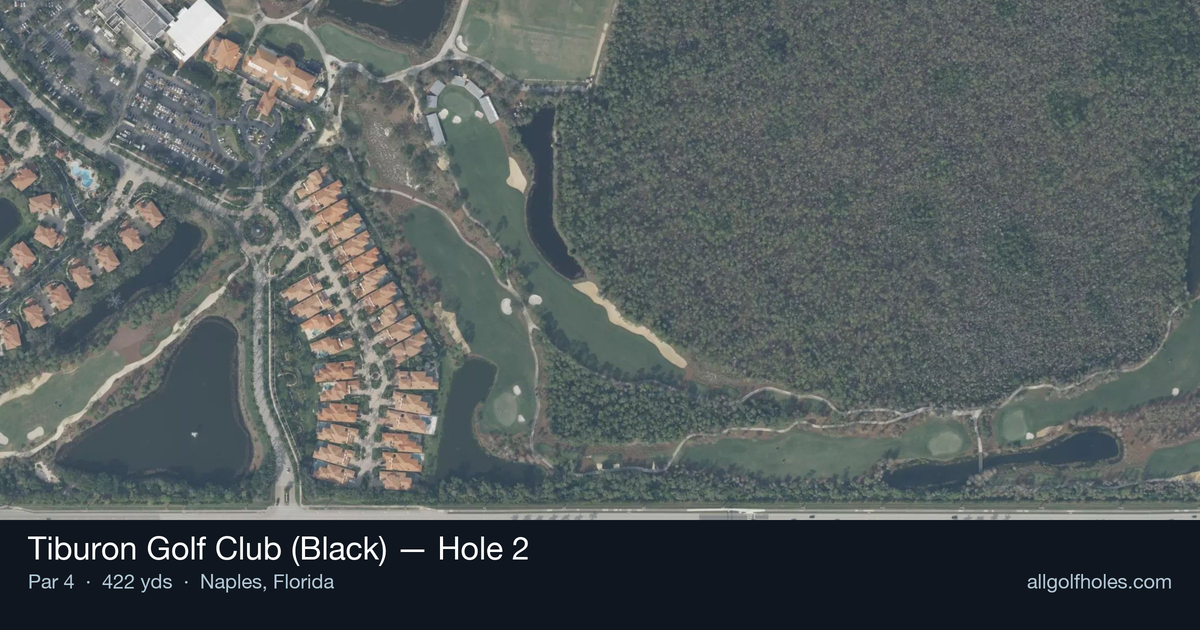
Aerial source not provided
Green size: 30 yds deep × 24 yds wide
Scorecard yardage is for Championship tees. The aerial shows its labeled reference position; distance rings measure to the green.
Championship tees · Par 4 · 422 yards
The plan for No. 2
The number one handicap hole at Tiburon Golf Club (Black) immediately announces its intentions as the most demanding par 4 on Greg Norman's masterful Black Course design. This 422-yard test features a deceptively straightforward layout that masks its true challenge—precision is paramount from tee to green. The Great White Shark's architectural philosophy shines through with a design that rewards strategic thinking over pure power. A well-positioned tee shot sets up a demanding approach to a small, well-protected green complex that refuses to accept anything less than a quality iron shot. The absence of obvious hazards creates a false sense of security, making course management and club selection critical. This opening statement hole exemplifies Norman's ability to create memorable challenges through subtle design elements rather than flashy features.
Off the tee
The tee shot strategy centers on finding the optimal position in the fairway while respecting the hole's demanding length. With 422 yards to navigate, most players will need their driver to have any reasonable approach shot remaining. Target the center-right portion of the fairway to set up the best angle into the small green. Avoid the temptation to overswing for extra distance - Norman's designs typically punish errant drives severely, even when hazards aren't immediately visible. A well-struck drive down the center leaves you with a mid-iron approach, while a mishit drive can quickly turn this scoring opportunity into a bogey or worse.
Approach & recovery
The approach shot to this small green represents the hole's primary defensive mechanism. With limited green surface to work with, precision trumps power on the second shot. Favor a club selection that ensures you reach the green rather than coming up short, as Norman often designed collection areas that funnel short shots away from putting surfaces. The straight layout suggests that the green likely sits perpendicular to the fairway, making distance control more critical than directional precision. Take one extra club and make a smooth, controlled swing rather than forcing a shot that might come up short of this demanding target.
On the green
Small greens at championship venues like Tiburon typically feature subtle but significant slopes that can confound even skilled putters. Expect the putting surface to have multiple tiers or pronounced slopes that make lag putting essential. Focus on getting your first putt to the correct level of the green rather than hunting for the hole. Pin position becomes crucial on a small green - when the flag is tucked in a corner, play to the center of the green and accept a longer putt rather than risking a shot that rolls off the putting surface. ## RISK VS REWARD The primary risk/reward decision occurs on the tee shot. Aggressive drivers who can carry their drive about 280 yards will have a short iron into the green, creating a legitimate birdie opportunity. However, the penalty for a missed drive is severe on the #1 handicap hole. Conservative players might consider a 3-wood or hybrid off the tee to ensure finding the fairway, accepting a longer approach shot in exchange for avoiding the trouble that likely lurks in the rough or surrounding areas. ## DIFFERENT SKILL LEVELS **Low Handicappers:** Attack this hole with confidence but respect its difficulty. Use driver if you're hitting it well, aim for the center of the green regardless of pin position, and focus on two-putting for par while remaining open to birdie opportunities. **High Handicappers:** Course management becomes critical here. Consider using your most reliable club off the tee, even if it's not your driver. Focus on finding the fairway first, then getting your approach shot somewhere on the green. Don't be discouraged by bogey - this hole is designed to challenge even tour professionals. **Mid Handicappers:** This hole rewards your best swings and punishes your worst. Play within yourself off the tee, take enough club on your approach to ensure you reach the green, and remember that par is an excellent score on the most difficult hole on the course. The #1 handicap designation tells you everything you need to know about this hole's character - it's where the "Great White Shark" shows his teeth, demanding the kind of precise, strategic golf that separates champions from contenders.
Watch for
- Course conditioning and mapped hazards may affect line selection; confirm from the aerial.
Hole 2 Green Complex
Mapped green boundary
Green size: 3,805 sq ft
How did Hole 2 play?
How did this hole play today?
Frequently asked questions
Yardage reference: Championship tees · 422 yards.
What's the best strategy off the tee?
↓
For this 422-yard par 4, most players will hit driver to set up a comfortable approach.
How difficult is hole 2?
↓
This hole is one of the tougher holes on the course for most golfers. Key challenges include: water in play, small green.
What hazards should I watch out for on hole 2?
↓
Key hazards include: 1 greenside bunker; water at 346.5 yards. Plan your shots to avoid these trouble spots.
How big is the green on hole 2?
↓
The green is small and requires precision. Expect challenging pin positions with limited room for error.