Hole 1 at Tiburon Golf Club (Black)
- Par
- 4
- Yardage
- 376 yds
- Stroke index
- 9
- Hazards
- 2 bunkers · Water
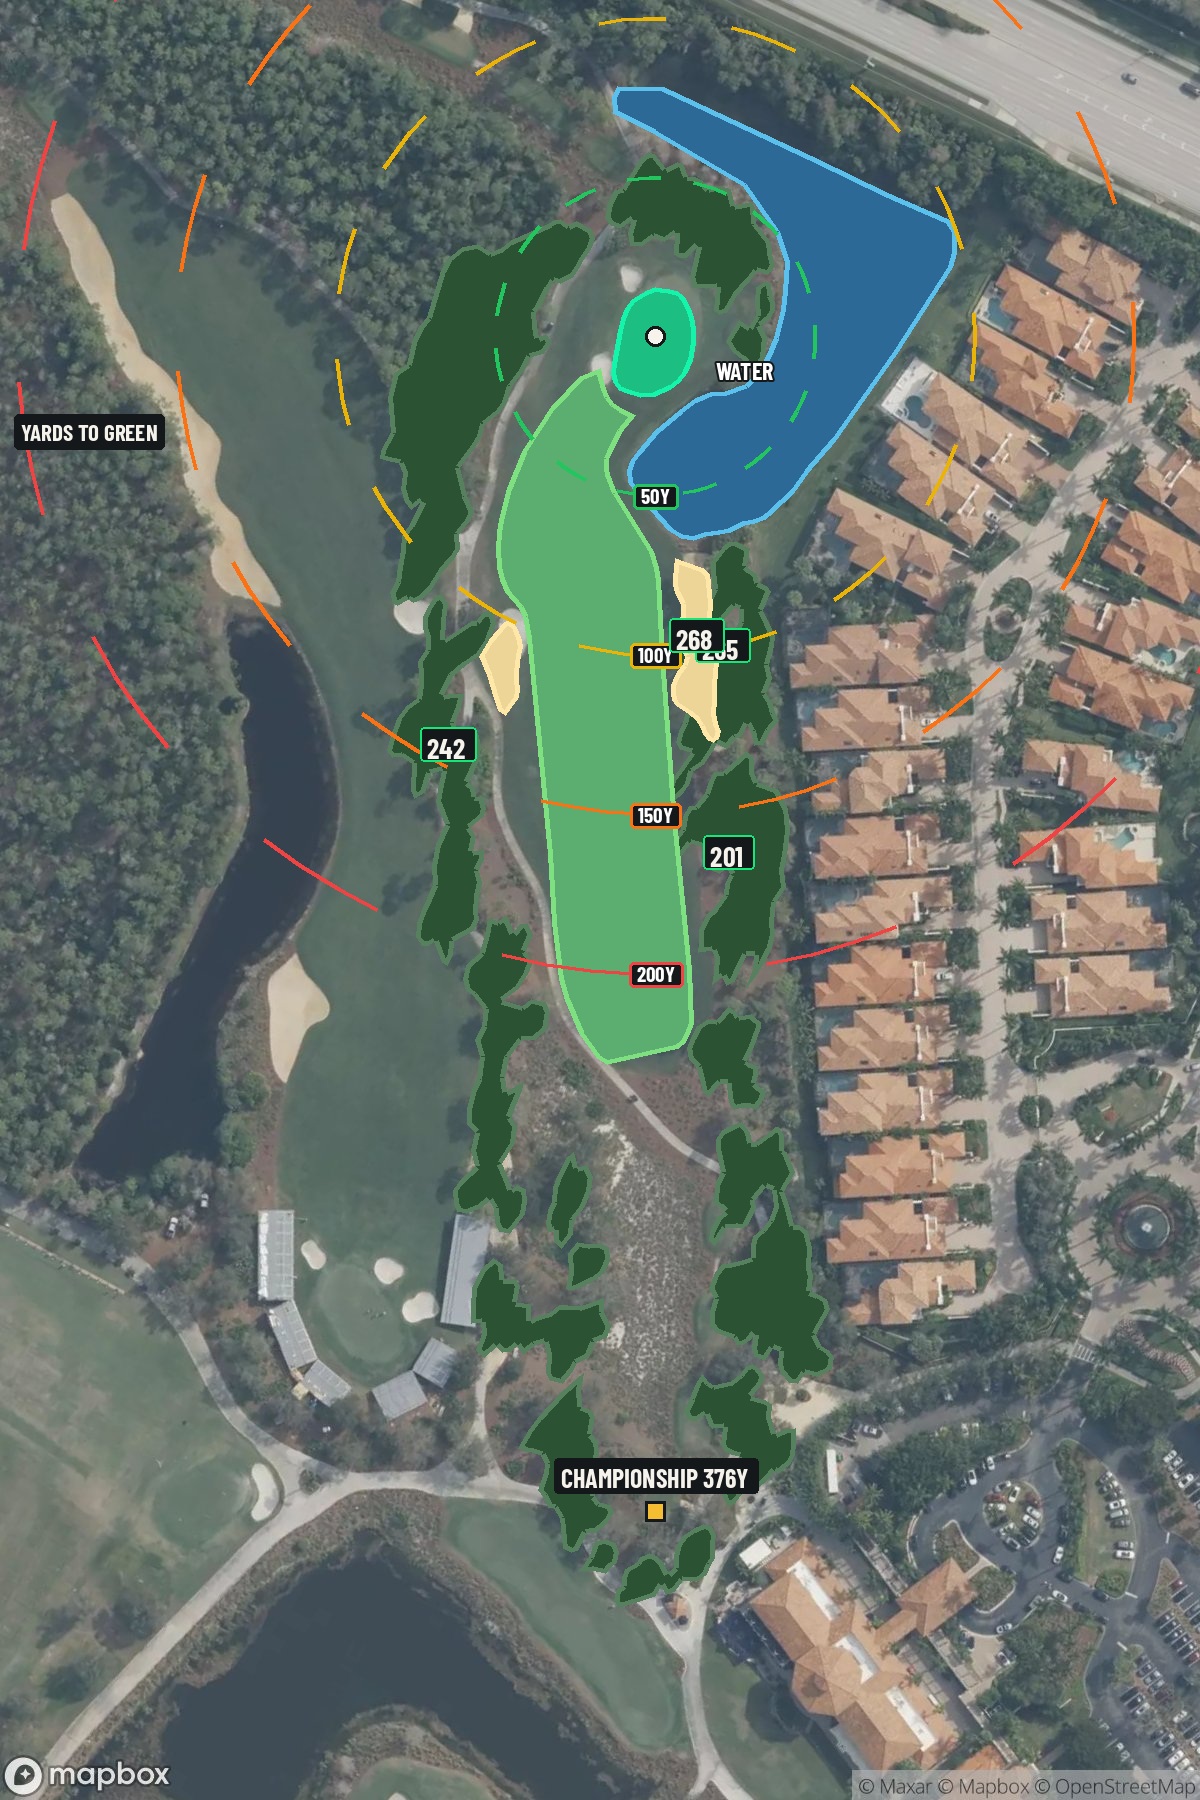 Hole 1 map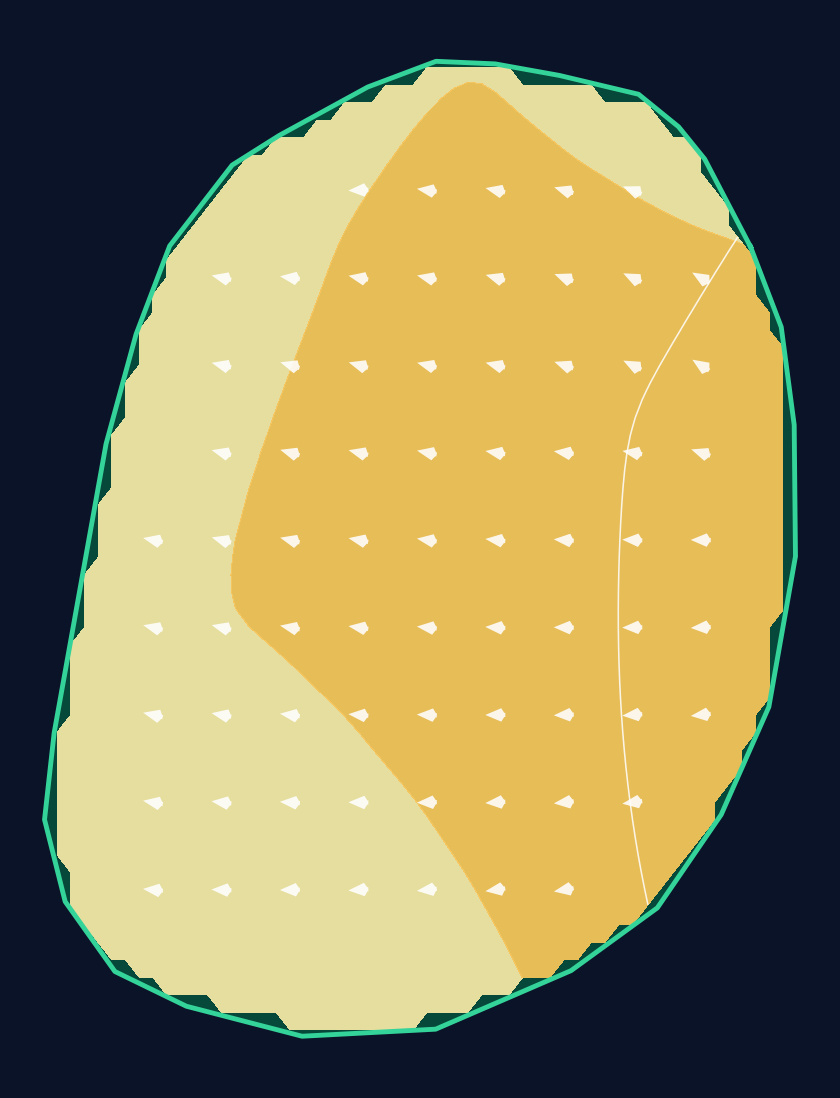
26 yd wide × 34 yd deep · 1.4 ft total elevation range
Light = gentler slope · Red = steeper slope
White lines: 1 foot of elevation. Arrows: downhill. General terrain, not a pin read.
Approach from bottom
Contour source
USGS 1 Arc Second n27w082 20221103 · collection 2018–2020
Map source & reference
Mapbox Satellite composite · capture date not provided. Green at the top; the labeled map reference is below.
Scorecard yardage is for Championship tees. The aerial shows its labeled reference position; distance rings measure to the green.
Championship tees · Par 4 · 376 yards
The plan for No. 1
Greg Norman's design philosophy immediately announces itself on Tiburon Golf Club (Black) hole 1, a deceptively challenging 376-yard par 4 that demands precision from the opening tee shot. The Great White Shark's signature strategic bunker placement creates a classic risk-reward scenario, with a well-positioned fairway bunker lurking left while out-of-bounds territory threatens the right side. This straight layout may appear straightforward, but accuracy proves paramount to set up a manageable approach to the compact green complex. The hole's strategic design forces golfers to commit to their line early, rewarding those who find the optimal landing area with a clear shot at birdie. As Tiburon's opening statement, this par 4 perfectly embodies Norman's philosophy of rewarding bold, well-executed shots while punishing wayward attempts.
Off the tee
Your target line should favor the left-center of the fairway, giving yourself maximum room to avoid the out-of-bounds that runs along the right side. However, be mindful of the well-positioned fairway bunker on the left that Norman strategically placed to catch overly cautious shots. The ideal tee shot lands in the narrow safe zone between these hazards, typically requiring a controlled driver or 3-wood depending on conditions and your comfort level. Focus on a smooth tempo rather than maximum distance - this hole rewards placement over power.
Approach & recovery
From a well-positioned tee shot, you'll face a short to mid-iron approach to a small green that demands precision. The compact putting surface means club selection becomes critical, as missing the target can leave you with challenging up-and-down situations. Aim for the center of the green unless the pin position clearly favors one side, and always err on the side of taking enough club to ensure you reach the putting surface. The small green size makes distance control more important than attacking specific pin positions.
On the green
The small green at the first hole requires careful speed control and precise line reading. With limited real estate to work with, lag putting becomes essential to avoid three-putts that can damage your confidence early in the round. Pay attention to any subtle slopes, as the compact surface can make breaks more pronounced than they initially appear. Focus on getting your first putt close rather than being overly aggressive with birdie attempts. ## RISK VS REWARD This opening hole offers minimal risk/reward opportunities, instead emphasizing solid course management. The primary decision point comes on the tee, where you must balance the desire to leave a shorter approach shot against the very real penalty for missing the narrow fairway. Conservative play with accurate execution typically yields better results than aggressive swings that find trouble. ## DIFFERENT SKILL LEVELS **High Handicappers:** Consider hitting 3-wood or hybrid off the tee to ensure you find the fairway, even if it means a longer approach shot. The penalty for missing the fairway far outweighs the benefit of a shorter iron into the green. Aim for the center of the green on your approach and focus on making solid contact. **Low Handicappers:** You can be more aggressive with driver if you're confident in your accuracy, but respect the tight margins. Use the precise distance control in your short iron game to attack accessible pin positions, but always have a bail-out plan if the pin is tucked behind trouble. The opening hole at Tiburon's Black Course sets the tone for your entire round - execute with precision and confidence, and you'll be rewarded with a solid start to tackle the challenges ahead.
Watch for
- Course conditioning and mapped hazards may affect line selection; confirm from the aerial.
Hole 1 Green Complex & Slope
USGS 3DEP terrain analysis
Green size: 4,795 sq ft
How did Hole 1 play?
How did this hole play today?
Frequently asked questions
Yardage reference: Championship tees · 376 yards.
What's the best strategy off the tee?
↓
For this 376-yard par 4, most players will hit 3-wood or driver to set up a comfortable approach.
How difficult is hole 1?
↓
This hole is a moderate challenge for most golfers. Key challenges include: water in play.
What hazards should I watch out for on hole 1?
↓
Key hazards include: water at 361.0 yards. Plan your shots to avoid these trouble spots.
How big is the green on hole 1?
↓
The green is medium-sized with moderate targets. The green is deeper than wide, so club selection is crucial. Pay attention to pin placement when selecting your approach club.
What's a good score on hole 1?
↓
This hole is a medium-length test where par is a solid result. A straightforward par 4 where course management pays off.