Hole 12 at Tiburon Golf Club (Black)
- Par
- 4
- Yardage
- 442 yds
- Stroke index
- 10
- Hazards
- 3 bunkers · Water
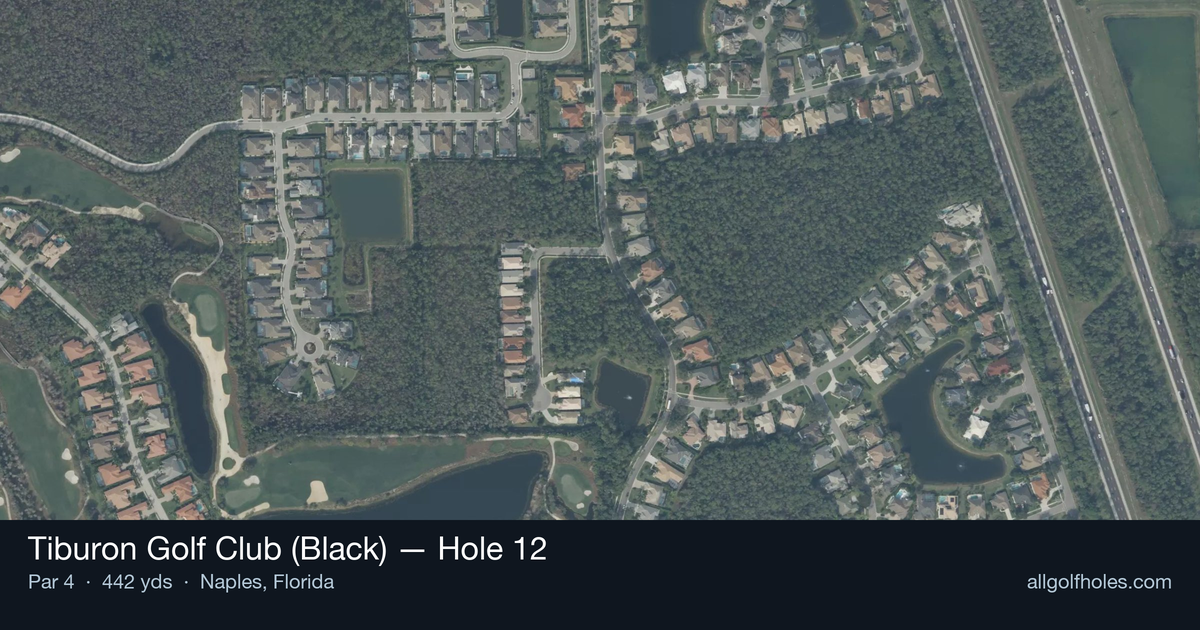
Aerial source not provided
Green size: 39 yds deep × 22 yds wide
Scorecard yardage is for Championship tees. The aerial shows its labeled reference position; distance rings measure to the green.
Championship tees · Par 4 · 442 yards
The plan for No. 12
The 12th hole at Tiburon Golf Club (Black) exemplifies Greg Norman's strategic design philosophy with a deceptively straightforward par 4 that demands precision over power. At 442 yards, this straight layout presents a generous fairway that invites an aggressive tee shot, but the real challenge lies in the approach to the compact green complex. The Great White Shark's signature risk-reward mentality shines through as players must navigate the delicate balance between distance and accuracy. The small green requires a well-struck approach shot with proper club selection, as anything short or long will leave a challenging recovery. This hole rewards course management and shot execution, making it a true test of iron play that separates the skilled from the hopeful in Naples' premier golfing destination.
Off the tee
The tee shot strategy centers on finding the optimal position for your approach angle. With no significant hazards to navigate, focus on hitting your most reliable tee shot rather than forcing distance. A well-struck driver or strong 3-wood should leave you in prime position, but course management suggests favoring accuracy over aggression. Target the center of the fairway, as the straight layout provides a clear line to the landing zone. Players who can carry the ball about 250-260 yards will find themselves in the ideal approach distance. The key is avoiding any rough or fairway bunkers that may lurk in the landing area, even if not prominently featured in the hazard list.
Approach & recovery
The approach shot is where this hole shows its teeth. The small green demands pinpoint accuracy, making club selection critical. Depending on your tee shot position, you'll likely face a mid-iron to long-iron into this compact target. Focus on the center of the green regardless of pin position - the small putting surface leaves little margin for error. Take one extra club if conditions are firm, as running shots off the back or sides will create difficult up-and-down situations. The green's unknown shape adds an element of discovery, making your first play conservative until you can read the contours.
On the green
With a small green, putting strategy becomes about lag putting and avoiding three-putts rather than aggressive birdie attempts. The compact surface likely features subtle breaks that can be deceptive. Focus on speed control and getting your first putt close rather than trying to hole everything. Pin positions on small greens can dramatically affect approach strategy, but without specific knowledge of the green's slope patterns, play to the fat part of the green and rely on solid putting fundamentals. ## RISK VS REWARD This hole offers a classic risk/reward scenario disguised as a straightforward par 4. The reward comes from aggressive pin-seeking on the approach, but the small green punishes misses severely. Conservative players who aim for the center of the green will likely walk away with par, while those who chase pins may find themselves scrambling for bogey. The absence of water or major hazards means the primary risk is missing the small green entirely, leading to challenging recovery shots and potential big numbers. ## DIFFERENT SKILL LEVELS **High-Handicap Players:** Focus on two solid, conservative shots. Use your most reliable tee shot club, even if it's a hybrid or fairway wood. On the approach, take plenty of club and aim for the center of the green. Don't get aggressive with pin positions - par is an excellent score here. **Low-Handicap Players:** This hole rewards precision and offers a legitimate birdie opportunity. Use the tee shot to set up your preferred approach distance and angle. Be more aggressive with pin positions, but respect the small green size. Consider the wind and green firmness when selecting approach clubs, and don't be afraid to take one extra club for safety. The 12th hole at Tiburón Black exemplifies Norman's design philosophy: straightforward in appearance but demanding in execution, where course management and precision trump raw power.
Watch for
- Course conditioning and mapped hazards may affect line selection; confirm from the aerial.
Hole 12 Green Complex
Mapped green boundary
Green size: 4,141 sq ft
How did Hole 12 play?
How did this hole play today?
Frequently asked questions
Yardage reference: Championship tees · 442 yards.
What's the best strategy off the tee?
↓
For this 442-yard par 4, most players will hit driver to set up a comfortable approach.
How difficult is hole 12?
↓
This hole is one of the tougher holes on the course for most golfers. Key challenges include: water in play, small green.
How big is the green on hole 12?
↓
The green is small and requires precision. Expect challenging pin positions with limited room for error.
What's a good score on hole 12?
↓
This hole is a demanding hole where bogey is not unusual. This longer par 4 will test most golfers. Focus on position over distance.