Hole 13 at Tiburon Golf Club (Black)
- Par
- 3
- Yardage
- 220 yds
- Stroke index
- 18
- Hazards
- 1 bunker · Water
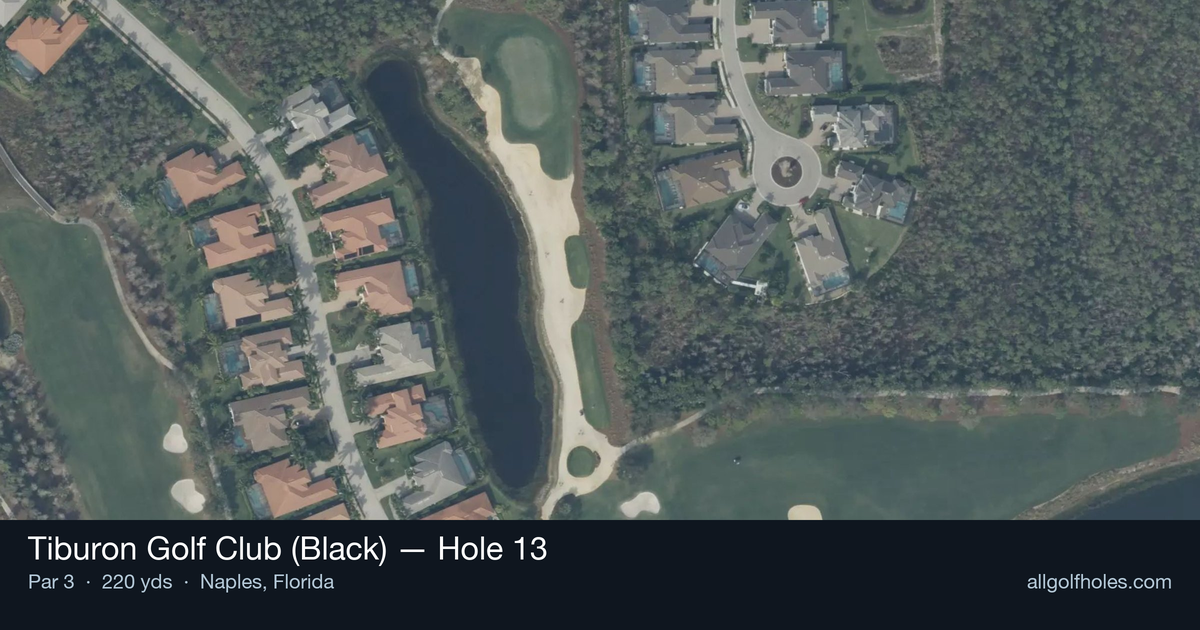
Aerial source not provided
Green size: 46 yds deep × 23 yds wide
Scorecard yardage is for Championship tees. The aerial shows its labeled reference position; distance rings measure to the green.
Championship tees · Par 3 · 220 yards
The plan for No. 13
The 13th hole at Tiburon Golf Club (Black) represents Greg Norman's philosophy of rewarding precision over power on this deceptive par 3. At 220 yards, this hole demands a committed tee shot to a small green complex that punishes anything less than accurate iron play. The Shark's design creates visual intimidation through strategic bunkering and subtle elevation changes that can fool even seasoned players into club selection errors. The compact green requires golfers to trust their yardage and commit fully to their approach, as tentative swings often find trouble around the putting surface. This hole exemplifies Norman's championship pedigree, testing mental fortitude as much as technical skill in the heart of the Black Course routing.
Off the tee
With 220 yards to navigate, club selection becomes the critical decision on this one-shot hole. Most golfers will need anything from a long iron to a hybrid or fairway wood, depending on wind conditions and pin position. The key is committing fully to your club choice rather than trying to force a shorter iron. Take one extra club and make a smooth, controlled swing rather than pressing with insufficient firepower. The straight layout means target line selection is straightforward, but execution must be precise given the small green size. Consider the pin position carefully - a back pin may require aggressive carry, while a front pin allows for a more conservative approach.
Approach & recovery
Since this is a par 3, your tee shot IS your approach shot, making first-swing success paramount. The small green demands pinpoint accuracy, so focus on the center of the green unless you're feeling particularly confident in your iron play. With no significant hazards mentioned, the primary danger lies in missing the green entirely and facing difficult up-and-down scenarios. The green's compact size means any approach shot landing on the putting surface gives you a reasonable birdie opportunity, while missing the target likely results in bogey or worse.
On the green
The small green size means every putt becomes crucial for scoring. While specific break information isn't available, Norman's design philosophy typically incorporates subtle undulations that reward careful green reading. Focus on lag putting from longer distances, as the compact surface means even a 30-foot putt is makeable with proper pace control. Two-putting should always be the primary goal, with aggressive birdie attempts only when you have a clear read and good feel for the green speed. ## RISK VS REWARD The risk/reward calculation here is unique among par 3s. The reward - a potential birdie on the easiest handicap hole - is significant for your scorecard. However, the risk of missing the small green with a long iron creates a challenging recovery situation. The smart play involves taking enough club to ensure you reach the green, even if it means potentially flying a front pin. Better to have a longer putt than a difficult chip shot from short of the green. ## DIFFERENT SKILL LEVELS **High-Handicap Players:** Focus entirely on finding the green with whatever club gets you there comfortably. Don't worry about pin hunting - the center of the green is your target every time. Consider using a hybrid or fairway wood for better launch and forgiveness. Accept that par is an excellent score here. **Low-Handicap Players:** This hole offers a legitimate birdie opportunity if you can dial in your distance control. Pay attention to wind conditions and pin position for club selection. You have the skill to be more aggressive with pin hunting, but remember that even tour professionals often aim for the fat part of the green on long par 3s. The key is avoiding the big number that can derail a good round. The 13th hole at Tiburon Black showcases why Greg Norman's design reputation extends far beyond his playing career - it's a hole that appears simple but demands the complete golf strategy skillset to master.
Watch for
- Course conditioning and mapped hazards may affect line selection; confirm from the aerial.
Hole 13 Green Complex
Mapped green boundary
Green size: 5,862 sq ft
How did Hole 13 play?
How did this hole play today?
Frequently asked questions
Yardage reference: Championship tees · 220 yards.
What club should I use on this par 3?
↓
At 220 yards, most golfers will need a fairway wood or hybrid to reach this green. Adjust for elevation, wind, and pin position.
How difficult is hole 13?
↓
This hole is one of the tougher holes on the course for most golfers. Key challenges include: long par 3, water in play.
What hazards should I watch out for on hole 13?
↓
Key hazards include: water at 115.9 yards. Plan your shots to avoid these trouble spots.
How big is the green on hole 13?
↓
The green is medium-sized with moderate targets. The green is deeper than wide, so club selection is crucial. Pay attention to pin placement when selecting your approach club.
What's a good score on hole 13?
↓
This hole is a challenging par where bogey is acceptable. This longer par 3 will test your long iron or hybrid game. Par is a good score.