Hole 11 at Tiburon Golf Club (Black)
- Par
- 4
- Yardage
- 359 yds
- Stroke index
- 8
- Hazards
- 3 bunkers · Water
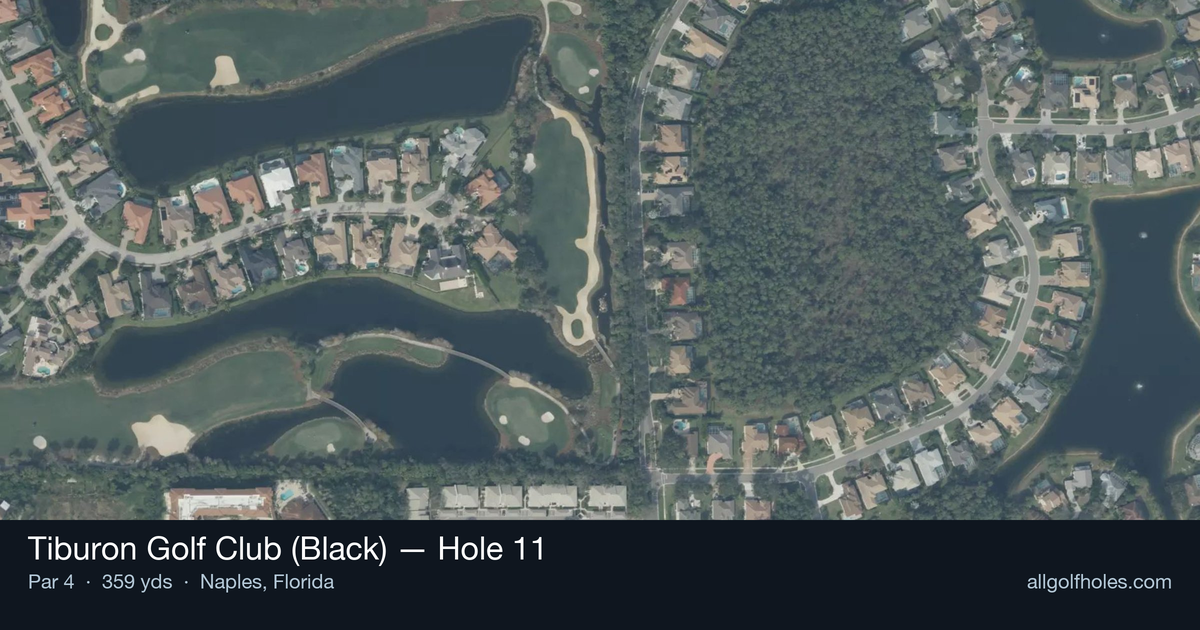
Aerial source not provided
Green size: 35 yds deep × 26 yds wide
Scorecard yardage is for Championship tees. The aerial shows its labeled reference position; distance rings measure to the green.
Championship tees · Par 4 · 359 yards
The plan for No. 11
The 11th hole at Tiburon Golf Club (Black) showcases Greg Norman's strategic design philosophy in a deceptively straightforward par 4. At 359 yards, this straight layout appears generous off the tee, but the Great White Shark's architectural cunning reveals itself in the approach shot. The compact green demands precision, rewarding accurate iron play while punishing wayward approaches. Without significant hazards to intimidate, golfers must rely on course management and shot execution rather than power. The hole's beauty lies in its simplicity—a classic risk-reward scenario where aggressive play toward the small target can yield birdie opportunities, but conservative strategy ensures par. This design epitomizes Norman's championship pedigree, creating memorable moments through strategic subtlety rather than overwhelming intimidation.
Off the tee
The tee shot strategy centers on positioning for the best approach angle to the small green. With 359 yards to work with, most players should focus on finding the center of the fairway rather than maximizing distance. A well-struck driver or 3-wood to the landing zone around 250-280 yards out leaves an ideal approach distance. For optimal positioning, aim for the center-left portion of the fairway, which typically provides the best angle into the green. The straight layout means there's no dogleg to navigate, but the small green size makes approach angle critical. Avoid the temptation to blast driver if it means sacrificing accuracy - a controlled tee shot sets up the entire hole.
Approach & recovery
The approach shot is where this hole reveals its true challenge. With a small green as your target, precision becomes paramount. Depending on your tee shot position, you'll likely face a short to mid-iron approach, making this an excellent scoring opportunity if executed properly. Club selection should prioritize accuracy over pin-hunting. Aim for the center of the green regardless of pin position, as the small target leaves little margin for error. Take one extra club and make a smooth, controlled swing rather than forcing a shot. The green's compact size means even a center-green approach will leave manageable putting distances. Pay attention to wind conditions, as they can significantly affect ball flight on this shorter approach. When in doubt, favor the safer side of the green and rely on your putting to make up the difference.
On the green
The small green demands excellent putting and green-reading skills. While specific break patterns vary with pin positions, the compact surface means most putts will be relatively short, making this an area where good putters can gain strokes. Focus on speed control above all else, as the small green means any putt hit too firmly could easily roll off the putting surface. Conservative lag putting to the center of the green on longer attempts often proves more effective than aggressive runs at distant pins. Study the green's subtle contours carefully during your approach, as the limited real estate means every slope and break becomes magnified in importance. ## RISK VS REWARD This hole presents a classic risk/reward scenario disguised as a straightforward par 4. The reward comes from the moderate length and birdie potential, while the risk lies in the precision required for the approach shot to the small green. The primary decision point comes with tee shot club selection. Aggressive drivers might gain 20-30 yards but risk missing the fairway or leaving an awkward yardage. Conservative play with a 3-wood or long iron ensures good positioning but might leave a slightly longer approach. Given the small green, the conservative approach often proves more rewarding, as position trumps distance on this hole. The scoring opportunity comes from precise execution rather than aggressive play. ## DIFFERENT SKILL LEVELS **High Handicappers** should prioritize keeping the ball in play and giving themselves the best chance at par. Use whatever club ensures a fairway hit off the tee, even if it means a longer approach. Aim for the center of the green on the approach shot and focus on two-putting for a solid par. **Low Handicappers** can be more aggressive with driver off the tee, but should still prioritize accuracy. The key advantage comes in approach shot precision - better players can attack specific areas of the small green and capitalize on shorter birdie putts. However, even scratch golfers should respect the green size and avoid forcing shots to difficult pin positions. **Mid Handicappers** should adopt a hybrid strategy - use driver if it's a reliable club, but don't hesitate to club down if accuracy is an issue. On approaches, play to the fat part of the green and trust your putting to create scoring opportunities. The beauty of Norman's design here is that it rewards good course management regardless of skill level, while still providing birdie opportunities for those who execute with precision.
Watch for
- Course conditioning and mapped hazards may affect line selection; confirm from the aerial.
Hole 11 Green Complex
Mapped green boundary
Green size: 3,601 sq ft
How did Hole 11 play?
How did this hole play today?
Frequently asked questions
Yardage reference: Championship tees · 359 yards.
What's the best strategy off the tee?
↓
For this 359-yard par 4, most players will hit 3-wood or driver to set up a comfortable approach.
How difficult is hole 11?
↓
This hole is a moderate challenge for most golfers. Key challenges include: water in play, small green.
How big is the green on hole 11?
↓
The green is small and requires precision. The green is deeper than wide, so club selection is crucial. Expect challenging pin positions with limited room for error.
What's a good score on hole 11?
↓
This hole is a medium-length test where par is a solid result. A straightforward par 4 where course management pays off.