Hole 7 at PGA West (TPC Stadium course)
- Par
- 4
- Yardage
- 346 yds
- Stroke index
- 11
- Hazards
- 4 bunkers · Water
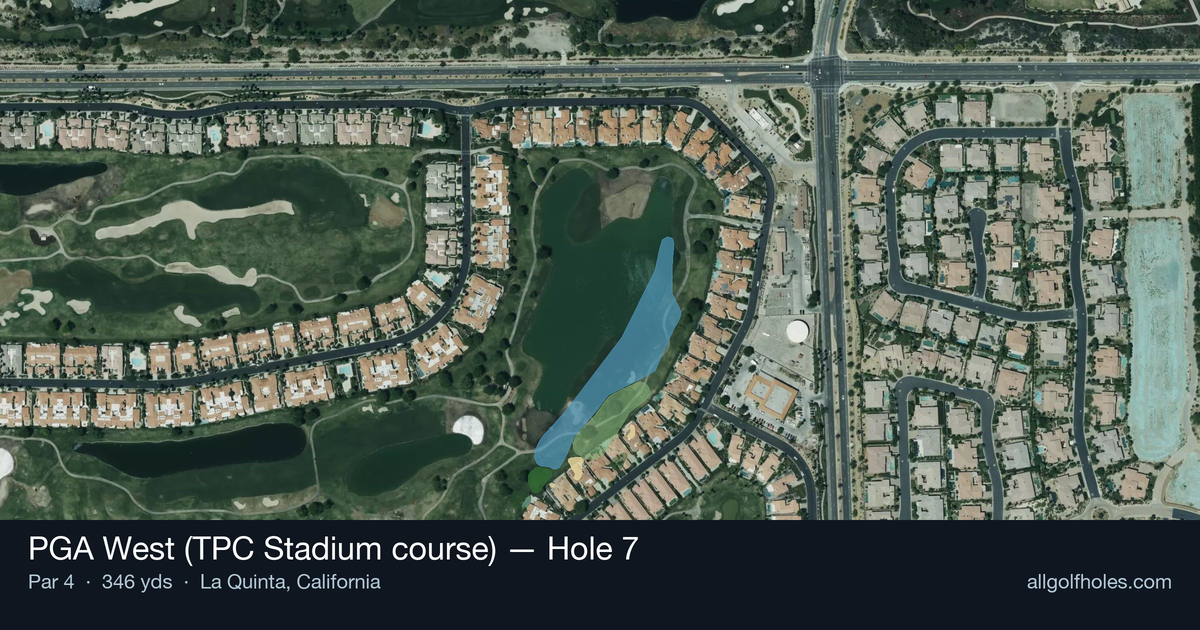
Aerial source not provided
Green size: 33 yds deep × 24 yds wide
Scorecard yardage is for Championship tees. The aerial shows its labeled reference position; distance rings measure to the green.
Championship tees · Par 4 · 346 yards
The plan for No. 7
The seventh hole at PGA West (TPC Stadium course) serves as the dramatic finale to what many consider the course's most challenging stretch, completing Pete Dye's notorious 5th-through-7th trilogy. This deceptively strategic par 4 at 346 yards demands precision over power, as water hazards frame the hole and create multiple decision points from tee to green. The straight layout might appear straightforward, but Dye's diabolical design philosophy shines through in the risk-reward calculations required on both the tee shot and approach shot. The compact green complex punishes wayward approaches, while the surrounding hazards ensure that even short irons require careful club selection and precise execution. As part of the legendary stretch that has tested professionals during Q-School finals and the famous Skins Games, this hole epitomizes the "love and hate" relationship Dye himself described about his masterpiece.
Off the tee
The tee shot strategy centers on positioning rather than distance. With the hole's modest length, most players should resist the urge to hit driver and instead focus on finding the optimal angle for the approach shot. A 3-wood, hybrid, or long iron off the tee often provides better control and leaves a comfortable wedge or short iron into the green. The straight layout allows for an aggressive target line down the center, but players must account for the desert conditions and firm fairways that can add significant roll. Position your tee shot in the landing zone that provides the clearest angle to the small green, typically favoring the center-left portion of the fairway.
Approach & recovery
The approach shot to the small green represents the hole's primary challenge. With limited green surface to work with, precision becomes critical. The compact target demands accurate distance control and proper trajectory to hold the putting surface. Focus on hitting the center of the green regardless of pin position, as the small target leaves little room for error. A smooth, controlled swing with a wedge or short iron typically provides the best results. The desert environment can affect ball flight, so factor in wind conditions and the firm conditions common to the region.
On the green
The small green requires careful speed control and precise reads. While specific break patterns vary with pin positions, the compact surface means that aggressive putting can quickly lead to three-putts. Focus on lag putting to the correct quadrant of the green, leaving yourself manageable second putts. Pay attention to subtle slopes and grain direction, as the smaller putting surface amplifies any misreads. Conservative putting strategy often yields better results than aggressive attempts at distant pins. ## RISK VS REWARD This hole presents a classic risk/reward scenario disguised as a simple short par 4. The reward comes from the scoring opportunity - a well-executed plan can yield birdie or eagle. However, the risk lies in the precision required; overly aggressive play can quickly lead to bogey or worse. The primary risk/reward decision involves tee shot club selection. Driver might leave a shorter approach but reduces control, while laying back provides better positioning but requires a longer, more precise approach to the small green. ## DIFFERENT SKILL LEVELS **High Handicappers**: Focus on two controlled shots rather than trying to overpower the hole. Use a fairway wood or hybrid off the tee for accuracy, then play conservatively to the center of the green. Accept par as a good score and avoid the temptation to be overly aggressive with the short length. **Low Handicappers**: This hole offers a legitimate birdie opportunity with proper execution. Consider driver if you can control it, but prioritize position over distance. Attack pins only when they're accessible, and use your short iron skills to take advantage of the scoring chance. **Mid Handicappers**: Strike a balance between aggression and caution. A controlled tee shot with a 3-wood or long iron, followed by a committed approach to the center of the green, typically yields the best results. Focus on avoiding big numbers rather than forcing birdies. The 7th hole at PGA West Stadium exemplifies Pete Dye's genius for creating strategic interest within a short layout, demanding respect and rewarding smart course management over raw power.
Hole 7 Green Complex
Mapped green boundary
Green size: 4,219 sq ft
How did Hole 7 play?
How did this hole play today?
Frequently asked questions
Yardage reference: Championship tees · 346 yards.
What's the best strategy off the tee?
↓
For this 346-yard par 4, most players will hit 3-wood or driver to set up a comfortable approach.
How difficult is hole 7?
↓
This hole is a moderate challenge for most golfers. Key challenges include: water in play, small green.
What hazards should I watch out for on hole 7?
↓
Key hazards include: water at 179.6 yards. Plan your shots to avoid these trouble spots.
How big is the green on hole 7?
↓
The green is small and requires precision. Expect challenging pin positions with limited room for error.
What's a good score on hole 7?
↓
This hole is a birdie opportunity if you find the fairway. This shorter par 4 rewards accuracy off the tee with a short iron approach.