Hole 6 at PGA West (TPC Stadium course)
- Par
- 3
- Yardage
- 255 yds
- Stroke index
- 5
- Hazards
- Water
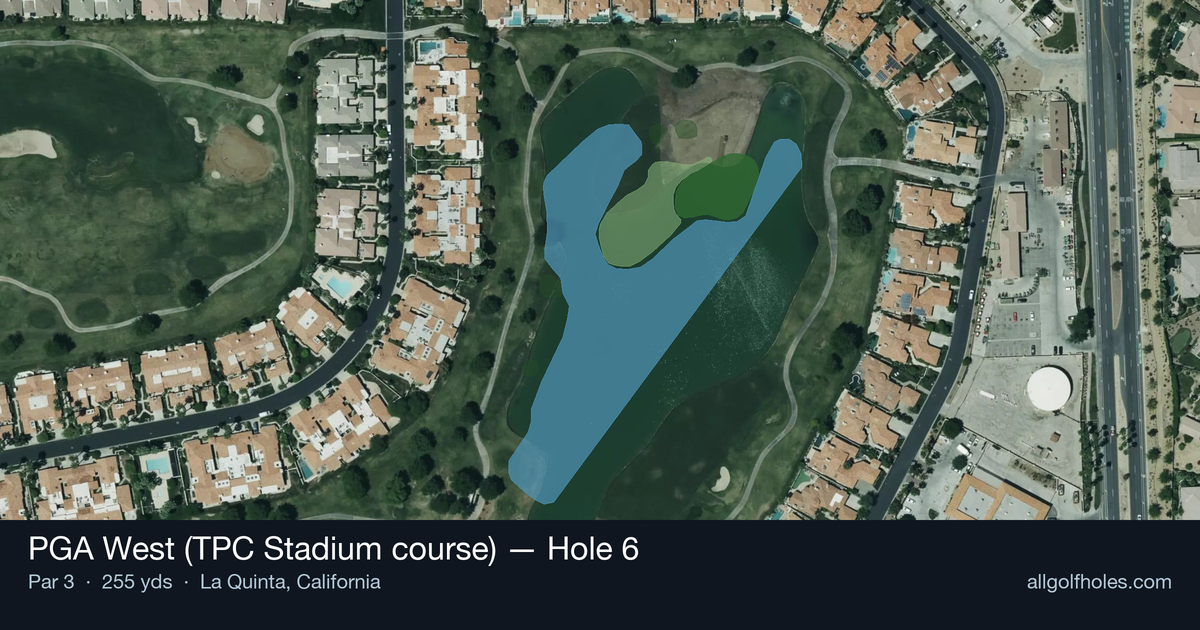
Aerial source not provided
Green size: 52 yds deep × 41 yds wide
Scorecard yardage is for Championship tees. The aerial shows its labeled reference position; distance rings measure to the green.
Championship tees · Par 3 · 255 yards
The plan for No. 6
The sixth hole at PGA West TPC Stadium course, aptly nicknamed "Amen," embodies Pete Dye's philosophy of strategic intimidation on this legendary par 3. At 255 yards, this demanding tee shot requires precise club selection and unwavering commitment to find the small, well-protected green complex. The hole's reputation stems from its unforgiving nature - any miscalculation leaves golfers scrambling for par on one of the course's most challenging short holes. As part of the Stadium Course that has hosted countless memorable PGA Tour moments and serves as the Q-School Finals venue, this hole tests every aspect of a golfer's short iron game. The elevated tee provides a commanding view, but the compact target demands nothing short of perfection from players seeking to conquer this Pete Dye masterpiece.
Off the tee
Club selection is paramount on this lengthy par 3, with most players requiring anything from a 4-iron to a rescue club depending on conditions and pin position. The target line should favor the center of the green, as the small putting surface leaves little margin for error. Wind conditions play a crucial role here - the desert environment can create swirling gusts that significantly affect ball flight. Take an extra club if there's any doubt, as coming up short often leads to a more difficult recovery than being slightly long. Focus on making a smooth, committed swing rather than trying to muscle a shorter club.
Approach & recovery
Since this is a par 3, your tee shot IS your approach shot, making course management even more critical. The small green demands precision, so aim for the fat part of the putting surface rather than chasing pins cut close to edges. Pay attention to the pin sheet and daily conditions - morning rounds may play shorter due to softer conditions, while afternoon play often requires an extra club. The key is trusting your yardage and committing fully to your club selection, as tentative swings rarely find their target on holes of this caliber.
On the green
The small green size means you'll likely face longer putts than expected, even with accurate iron play. Pete Dye greens typically feature subtle breaks that can be deceiving, so take time to read the entire putting surface. Speed control becomes crucial on a compact target - aggressive putting can easily roll off the green. Focus on getting your first putt close rather than trying to make everything, as two-putting from anywhere on this green represents solid execution. ## RISK VS REWARD This hole offers little in terms of risk/reward options - it's simply about executing a quality long iron shot under pressure. The reward comes from making par on one of the course's most difficult holes, while the risk is dropping shots on a hole where even tour professionals struggle. The strategic decision centers entirely on club selection and commitment to your swing, making this a pure test of ball-striking ability. ## DIFFERENT SKILL LEVELS **Low Handicappers:** Focus on aggressive club selection and pin-hunting when conditions allow. Trust your yardages and don't let the hole's reputation affect your normal pre-shot routine. This is a scoring opportunity if you execute properly. **Mid Handicappers:** Play to the center of the green regardless of pin position. Take plenty of club and focus on solid contact rather than perfect distance control. A bogey here isn't a round-killer - avoid compound mistakes. **High Handicappers:** Consider this hole a bonus par opportunity rather than a must-make. Use your most reliable long club and aim for the biggest part of the green. Accept that this hole will challenge your best swing and focus on avoiding big numbers. The "Amen" nickname isn't given lightly - this hole demands respect and rewards only the most committed, well-executed golf shots. Success here often sets the tone for the challenging back nine that lies ahead.
Hole 6 Green Complex
Mapped green boundary
Green size: 10,609 sq ft
How did Hole 6 play?
How did this hole play today?
Frequently asked questions
Yardage reference: Championship tees · 255 yards.
What club should I use on this par 3?
↓
At 255 yards, most golfers will need a fairway wood or hybrid to reach this green. Adjust for elevation, wind, and pin position.
How difficult is hole 6?
↓
This hole is one of the tougher holes on the course for most golfers. Key challenges include: long par 3, water in play, large green requiring good lag putting.
What hazards should I watch out for on hole 6?
↓
Key hazards include: water at 172.0 yards. Plan your shots to avoid these trouble spots.
How big is the green on hole 6?
↓
The green is large and can play quite long. Three-putt territory if you don't manage your approach distance well.
What's a good score on hole 6?
↓
This hole is a challenging par where bogey is acceptable. This longer par 3 will test your long iron or hybrid game. Par is a good score.