Hole 16 at PGA West (TPC Stadium course)
- Par
- 5
- Yardage
- 600 yds
- Stroke index
- 16
- Hazards
- 4 bunkers
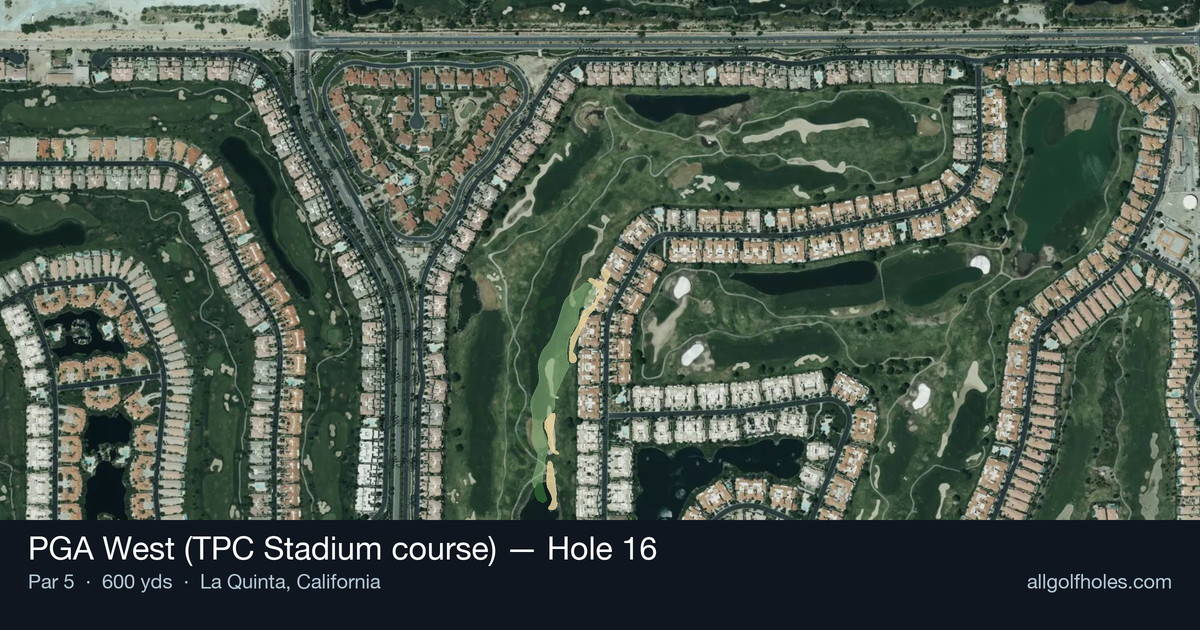
Aerial source not provided
Green size: 33 yds deep × 29 yds wide
Scorecard yardage is for Championship tees. The aerial shows its labeled reference position; distance rings measure to the green.
Championship tees · Par 5 · 600 yards
The plan for No. 16
The 16th hole at PGA West's TPC Stadium course presents a deceptively challenging 600-yard par 5 that epitomizes Pete Dye's diabolical design philosophy. While the straight layout appears straightforward from the tee, this hole's reputation stems from its infamous 19-foot-deep greenside bunker that has tormented professionals and amateurs alike. The generous fairway allows aggressive drives, but the approach shot demands surgical precision to avoid the cavernous sand trap that lurks beside the small green complex. This bunker, deeper than most residential swimming pools, has produced some of golf's most dramatic recovery shots during PGA Tour events. Missing the green here transforms a potential birdie opportunity into a potential disaster, making club selection and course management paramount on this seemingly benign finishing stretch hole.
Off the tee
The tee shot offers the most forgiving part of this hole, with the straight layout providing a generous target line down the center of the fairway. Driver is typically the play here for most golfers, as maximizing distance helps set up a more manageable approach angle. Focus on the center-left portion of the fairway to provide the best angle for your second shot. The relatively high handicap rating (16) suggests this hole plays easier than others on the course, but don't let that fool you into complacency.
Approach & recovery
This is where the hole reveals its true character. Whether you're going for the green in two or laying up for a wedge, precision becomes paramount. For those attempting to reach in two, favor the right side of the green to stay as far as possible from the infamous left-side bunker. A miss right or long is infinitely preferable to finding that 19-foot-deep pit of despair. If laying up, position your second shot to leave a full wedge approach - partial shots increase the risk of coming up short into the bunker. The small green demands accuracy, making club selection critical for holding the putting surface.
On the green
The small green at the 16th requires careful speed control and precise line selection. Pete Dye greens typically feature subtle breaks that can be deceptive, so take time to read the slopes carefully. Given the pressure of avoiding the greenside bunker on approach, many players arrive on this green feeling relieved, but don't let that relief turn into a careless three-putt. Focus on lag putting to the correct quadrant of the green, as the small size makes distance control more critical than usual. ## RISK VS REWARD The risk/reward calculation here is stark and unforgiving. Going for the green in two offers a legitimate birdie or eagle opportunity on a par 5, but the consequences of missing left are severe - potentially adding multiple strokes to your score from the deep bunker. The reward of reaching in two must be weighed against your current round situation and confidence level. Conservative play with a layup and wedge approach often proves the wiser choice, especially when the pin is positioned near the trouble. ## DIFFERENT SKILL LEVELS **Low-handicap players** should consider their recent ball-striking form when deciding whether to attack. If you're hitting it pure, the green-in-two play is viable, but always err on the safe side of the target. Your short game skills give you a better chance of recovery if needed, but even scratch players struggle from that deep bunker. **High-handicap players** should almost always lay up and play for par. The small green and severe bunker penalty make this a clear course management situation. Focus on hitting two solid shots to set up a comfortable wedge distance, then commit fully to a smooth approach shot that carries the bunker with room to spare. A bogey here beats a potential double or triple from the sand. Remember, this hole comes late in the round when nerves can be frayed, making smart decision-making even more crucial for protecting your score before tackling the famous finishing stretch.
Hole 16 Green Complex
Mapped green boundary
Green size: 4,183 sq ft
How did Hole 16 play?
How did this hole play today?
Frequently asked questions
Yardage reference: Championship tees · 600 yards.
Can this par 5 be reached in two?
↓
At 600 yards, A true three-shot hole for most players. Position your layup to leave a comfortable wedge distance.
How difficult is hole 16?
↓
This hole is a moderate challenge for most golfers. Key challenges include: long par 5, small green.
How big is the green on hole 16?
↓
The green is small and requires precision. The green is deeper than wide, so club selection is crucial. Expect challenging pin positions with limited room for error.
What's a good score on hole 16?
↓
This hole is a true three-shot hole where birdie requires execution. This longer par 5 demands patience. Two good shots set up the scoring opportunity.