Hole 2 at PGA West (TPC Stadium course)
- Par
- 4
- Yardage
- 371 yds
- Stroke index
- 15
- Hazards
- 9 bunkers
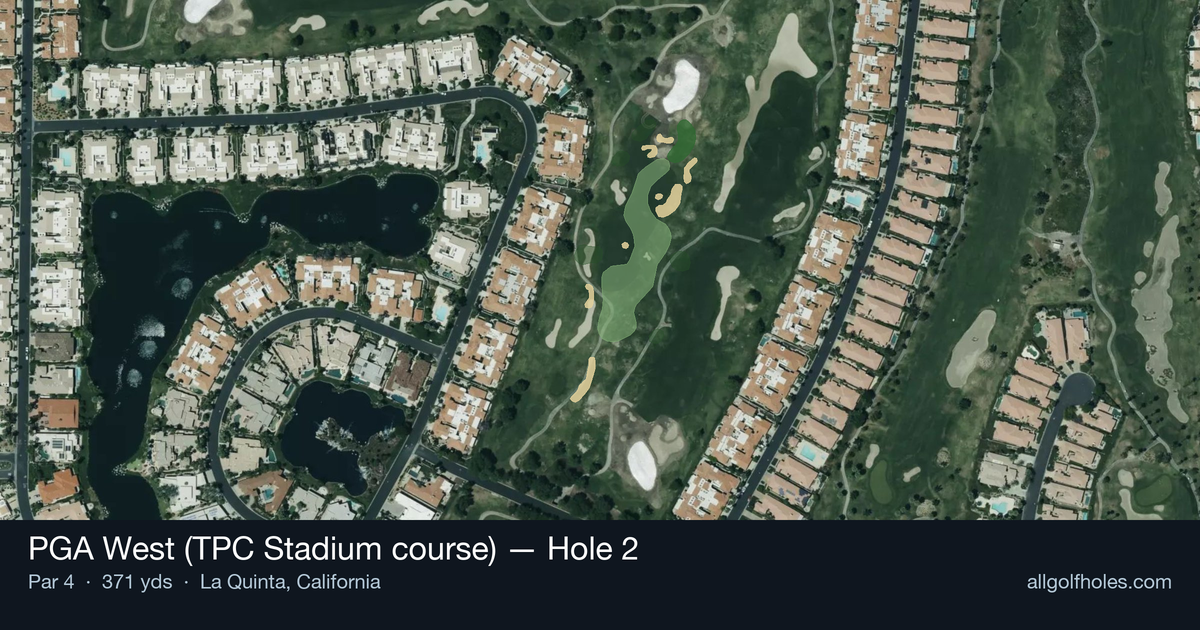
Aerial source not provided
Green size: 40 yds deep × 21 yds wide
Scorecard yardage is for Championship tees. The aerial shows its labeled reference position; distance rings measure to the green.
Championship tees · Par 4 · 371 yards
The plan for No. 2
The second hole at PGA West's legendary Stadium Course serves as an early confidence builder in Pete Dye's desert masterpiece. This straightaway par 4 stretches 371 yards through the California desert landscape, offering players a relatively generous fairway to find their rhythm after the opening hole. The tee shot plays to an accommodating landing area, allowing golfers to select their preferred club and establish tempo for the round ahead. The approach shot targets a compact green complex that demands precision, as Pete Dye's signature design philosophy becomes evident in the subtle undulations and strategic pin positions. While this hole may lack the dramatic water hazards that define the Stadium Course's later holes, it provides an essential scoring opportunity before players encounter the more treacherous challenges that have made this venue famous for hosting PGA Tour Q-School Finals.
Off the tee
The tee shot strategy centers on finding the ideal position in the landing zone rather than simply bombing driver as far as possible. Most players should consider a controlled driver or strong 3-wood aimed at the center of the fairway, leaving a comfortable approach distance. The straight layout allows for an aggressive target line down the middle, but Pete Dye's design philosophy suggests there are likely subtle contours and slopes that reward proper positioning. Focus on hitting the fairway rather than maximizing distance - a well-positioned ball about 250-280 yards out will provide the best approach angle to the small green.
Approach & recovery
The approach shot to this small green demands precision over power. From an ideal tee shot position, you'll likely have a short to mid-iron in hand, making club selection critical for distance control. The compact green size means there's little margin for error, so take one more club than you think you need and focus on a smooth, controlled swing. Aim for the center of the green regardless of pin position - the small target makes going directly at pins a high-risk proposition. Pay attention to wind conditions, as they can significantly affect ball flight on approach shots of this distance.
On the green
The small green size makes putting strategy relatively straightforward but demands respect. Focus on lag putting to ensure you don't leave yourself with lengthy comeback putts on the compact surface. Two-putt pars should be the primary goal for most players, with birdies coming naturally from well-executed approach shots that find the center of the green. Be particularly careful with downhill putts, as the small green means less room for error if you get aggressive with speed. ## RISK VS REWARD This hole offers a classic risk/reward scenario disguised as a straightforward par 4. The reward comes from the birdie potential created by proper positioning and execution, while the risk lies in the precision required on the approach to the small green. Players can be aggressive off the tee since no major hazards threaten, but must balance that aggression with the need for accuracy on the approach shot. The small green amplifies any mistakes in club selection or swing execution. ## DIFFERENT SKILL LEVELS **High-Handicap Players:** Focus on hitting fairway off the tee with whatever club gives you the most confidence - even a hybrid or long iron if that ensures finding the short grass. From there, take an extra club on the approach and aim for the center of the green, accepting par as a good score on this hole. **Low-Handicap Players:** This hole presents a legitimate birdie opportunity with proper execution. Use driver if you're confident in your accuracy, positioning the ball optimally for your preferred approach distance. Be aggressive with approach shots from good positions, but maintain respect for the small green size. This is a hole where good players should expect to make birdie with solid execution. The 2nd hole at Stadium Course serves as an early reminder that Pete Dye's design brilliance often lies in making seemingly simple holes require thoughtful execution - a perfect warm-up for the challenges that lie ahead on this legendary layout.
Hole 2 Green Complex
Mapped green boundary
Green size: 4,208 sq ft
How did Hole 2 play?
How did this hole play today?
Frequently asked questions
Yardage reference: Championship tees · 371 yards.
What's the best strategy off the tee?
↓
For this 371-yard par 4, most players will hit 3-wood or driver to set up a comfortable approach.
How difficult is hole 2?
↓
This hole is a good scoring opportunity for most golfers. Key challenges include: small green.
How big is the green on hole 2?
↓
The green is small and requires precision. The green is deeper than wide, so club selection is crucial. Expect challenging pin positions with limited room for error.
What's a good score on hole 2?
↓
This hole is a medium-length test where par is a solid result. A straightforward par 4 where course management pays off.