Hole 1 at PGA West (TPC Stadium course)
- Par
- 4
- Yardage
- 445 yds
- Stroke index
- 9
- Hazards
- 5 bunkers
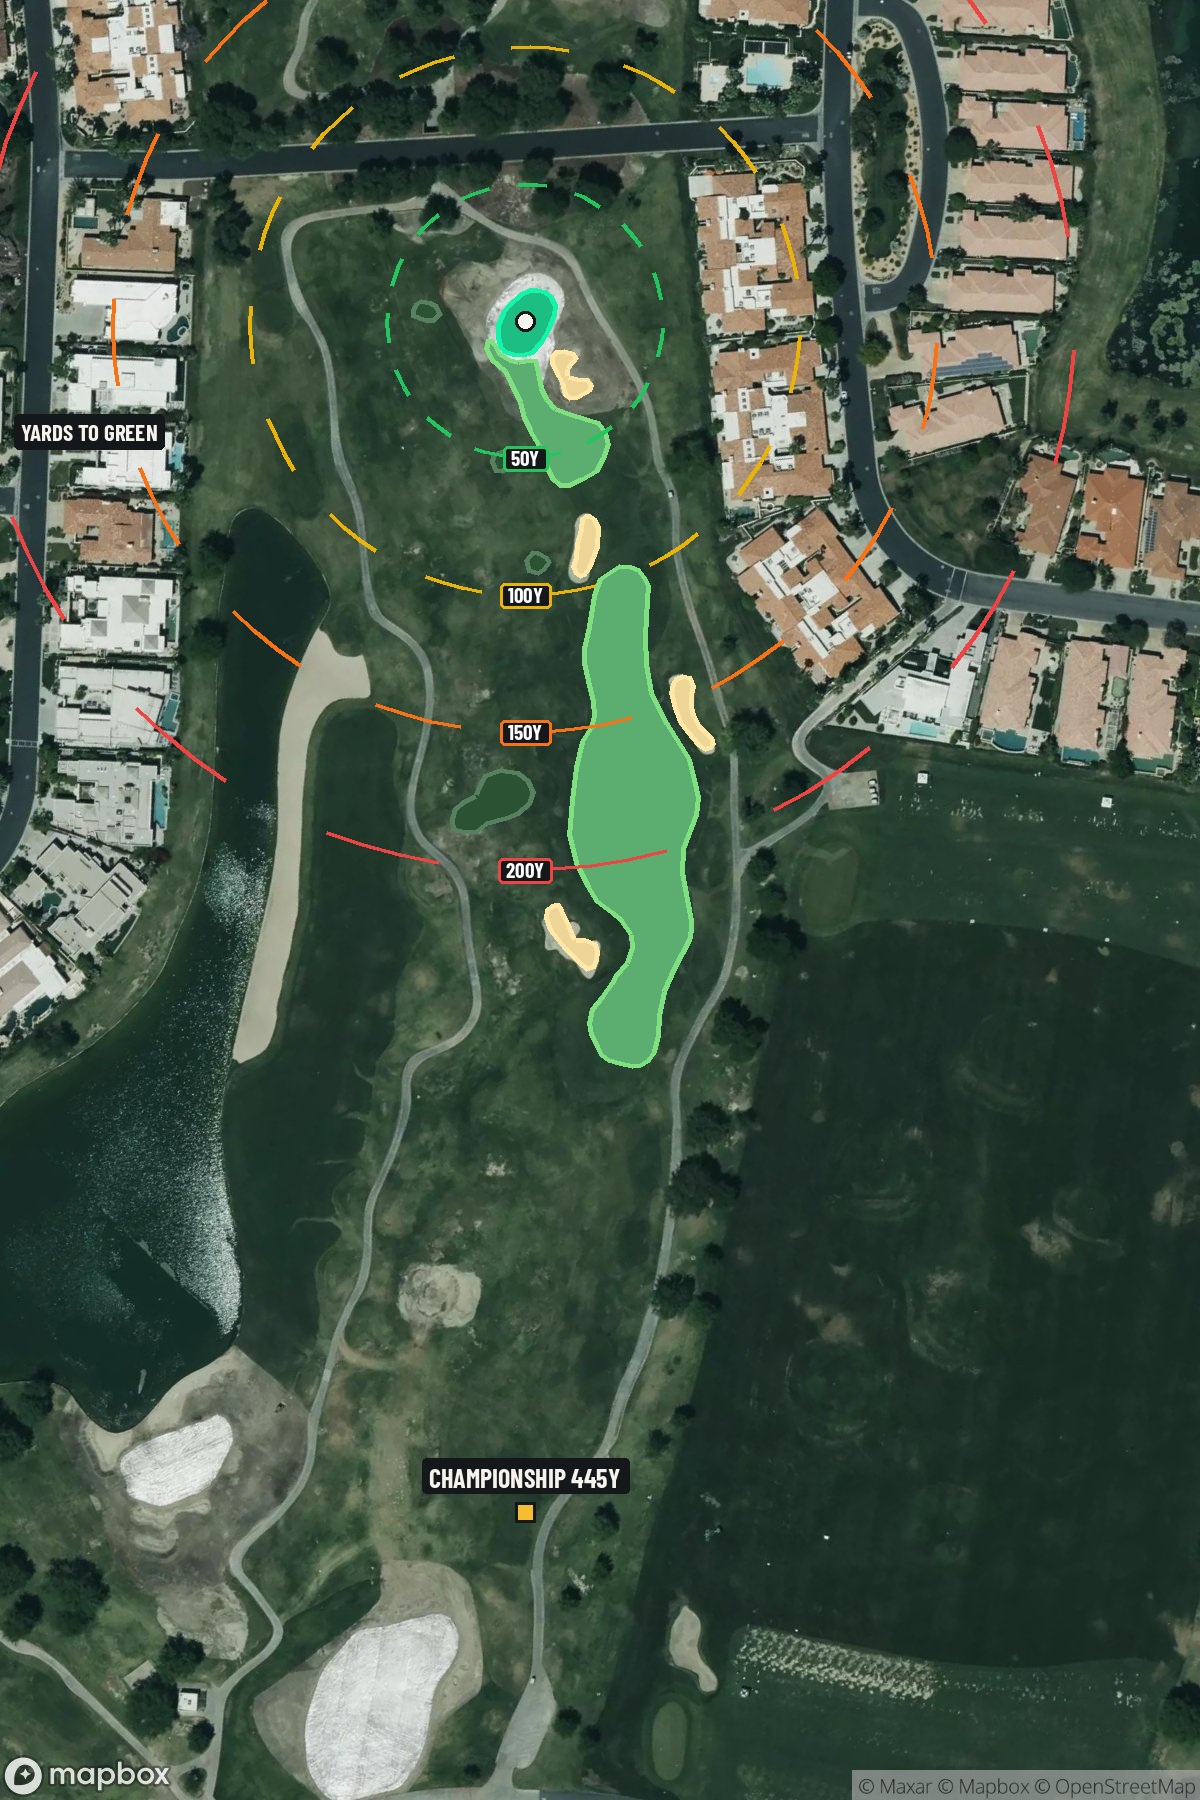 Hole 1 map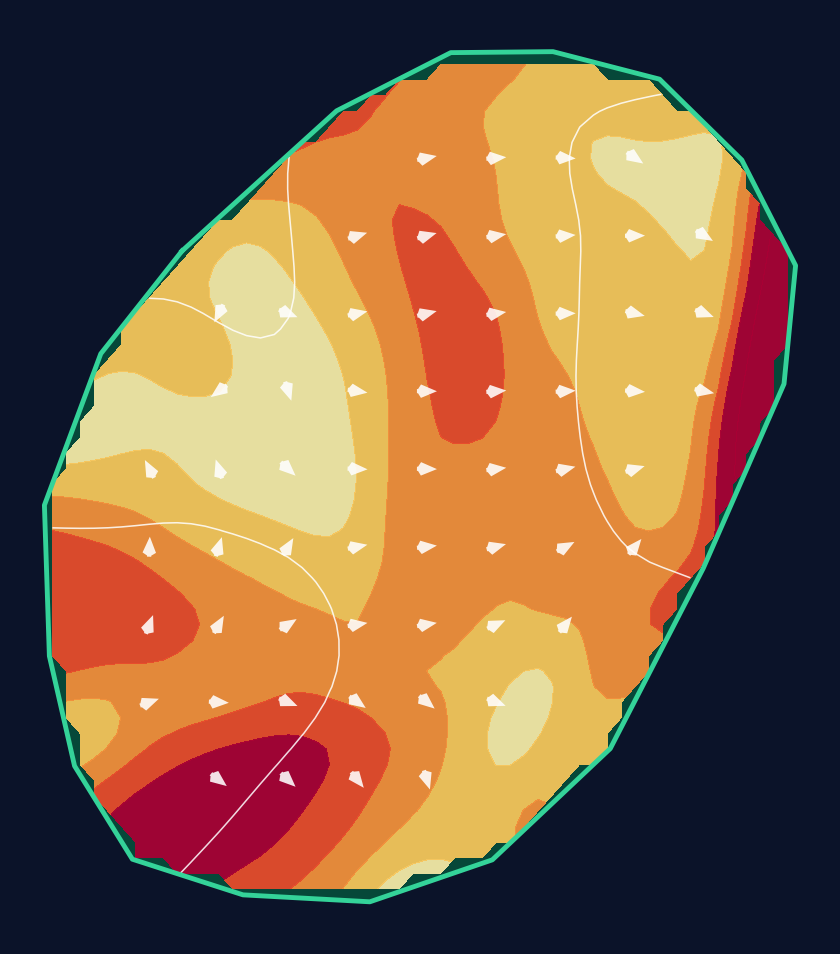
22 yd wide × 25 yd deep · 3 ft total elevation range
Light = gentler slope · Red = steeper slope
White lines: 1 foot of elevation. Arrows: downhill. General terrain, not a pin read.
Approach from bottom
Contour source
USGS 1 Meter 11 x56y373 CA_SaltonSea_EarthMRI_2021_D21 · collection 2021–2023
Map source & reference
Mapbox Satellite composite · capture date not provided. Green at the top; the labeled map reference is below.
Scorecard yardage is for Championship tees. The aerial shows its labeled reference position; distance rings measure to the green.
Championship tees · Par 4 · 445 yards
The plan for No. 1
The opening hole at PGA West (TPC Stadium course) sets an inviting yet demanding tone for one of golf's most celebrated venues. This 445-yard par 4 welcomes players with spectacular desert mountain views that have made it a favorite backdrop for golf photography and television coverage. The tee shot presents a generous fairway that encourages an aggressive start, but precision remains paramount as players navigate toward the compact green complex. What makes this hole particularly memorable is its deceptively large putting surface that demands careful approach shot placement, with subtle undulations that can confound even seasoned professionals. As the curtain-raiser to Pete Dye's masterpiece, this hole perfectly balances accessibility with the strategic demands that define the Stadium Course experience.
Off the tee
Your tee shot strategy should prioritize finding the fairway over maximum distance. The straight layout allows for an aggressive line down the center, but smart players will consider wind conditions and pin position when selecting their target line. A driver or 3-wood that finds the fairway about 250-280 yards out leaves you in the ideal position for your approach. The key is avoiding any rough that might complicate your second shot, as the small green will punish anything less than a pure strike.
Approach & recovery
The approach shot is where this hole shows its teeth. The small green size means your club selection and target line become critical decisions. Favor the center of the green regardless of pin position, as the putting surface won't give you much margin for error. Depending on your tee shot position, you'll likely face a mid-iron to long-iron approach. Take one extra club if there's any doubt, as being short of this green is typically more costly than being long. The elevated nature of the green means shots tend to release less than expected.
On the green
The putting surface, while described as "huge" in some accounts, plays smaller than it appears due to subtle undulations and slope. Focus on lag putting to the correct level of the green, as three-putts can quickly derail your opening hole momentum. The desert setting means greens typically run true but can be quick, especially later in the day. Read putts conservatively and trust your first instinct on break. ## RISK VS REWARD This opening hole offers a moderate risk-reward proposition. Aggressive players might be tempted to challenge the pin with their approach, but the small green size makes center-green strategy the percentage play. The real reward comes from making par or better to start your round with confidence, setting up a positive mindset for the challenging holes ahead, including the famous island green 17th. ## DIFFERENT SKILL LEVELS **High-handicap players** should treat this as a three-shot hole, focusing on keeping the ball in play off the tee and advancing it safely toward the green. Consider laying up to your favorite wedge distance if the approach shot feels uncomfortable. The goal is avoiding big numbers on the opening hole. **Low-handicap players** can be more aggressive with their tee shots and target specific quadrants of the green based on pin position. However, even scratch golfers should respect the small green size and prioritize hitting the putting surface over attacking pins. The key is starting the round with momentum while avoiding the mental mistakes that can compound on this demanding course. Remember, this is just the opening act to one of golf's most famous stadium courses. Play within your capabilities, trust your pre-shot routine, and use this hole to establish the patient, strategic mindset you'll need for the challenges ahead.
Hole 1 Green Complex & Slope
USGS 3DEP terrain analysis
Green size: 3,007 sq ft
How did Hole 1 play?
How did this hole play today?
Frequently asked questions
Yardage reference: Championship tees · 445 yards.
What's the best strategy off the tee?
↓
For this 445-yard par 4, most players will hit driver to set up a comfortable approach.
How difficult is hole 1?
↓
This hole is a moderate challenge for most golfers. Key challenges include: small green.
How big is the green on hole 1?
↓
The green is small and requires precision. Expect challenging pin positions with limited room for error.
What's a good score on hole 1?
↓
This hole is a demanding hole where bogey is not unusual. This longer par 4 will test most golfers. Focus on position over distance.