Hole 3 at PGA West (TPC Stadium course)
- Par
- 4
- Yardage
- 471 yds
- Stroke index
- 3
- Hazards
- 4 bunkers
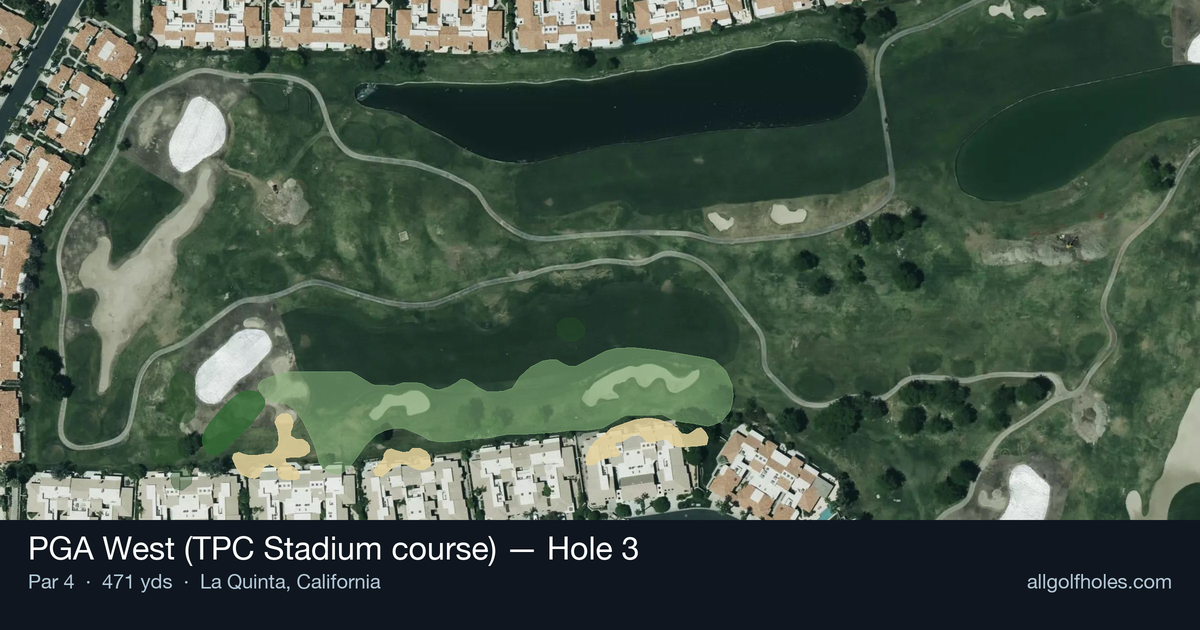
Aerial source not provided
Green size: 34 yds deep × 35 yds wide
Scorecard yardage is for Championship tees. The aerial shows its labeled reference position; distance rings measure to the green.
Championship tees · Par 4 · 471 yards
The plan for No. 3
The third hole at PGA West (TPC Stadium course) represents Pete Dye's philosophy of rewarding precision over power on this demanding 471-yard par 4. This straight-away test features a deceptively generous fairway that narrows considerably in the landing zone, demanding an accurate tee shot to avoid the strategically placed bunkers that guard the optimal approach angle. The hole's true defense lies in its small, elevated green complex that requires a committed mid-iron approach shot with precise distance control. With the handicap rating of 3, this early challenge sets the tone for the round ahead, where course management trumps aggressive play. The green's subtle undulations and firm Pete Dye conditioning make two-putting a premium, turning what appears straightforward into a genuine test of golf strategy and execution that exemplifies the Stadium Course's tournament-caliber design.
Off the tee
The tee shot strategy centers on finding the optimal distance for your approach while maintaining accuracy. Many players will benefit from a controlled 3-wood or hybrid off the tee rather than forcing a driver, as positioning trumps pure distance here. The goal is to find the center of the fairway in the prime landing zone, typically around 250-280 yards from the tee, which sets up a manageable mid-iron approach to the green. Focus on tempo and balance rather than maximum power. The straight layout means you can aim directly at your target without worrying about dogleg positioning, but the premium on accuracy is high given the approach shot requirements.
Approach & recovery
With the small green demanding precision, your approach shot becomes the scoring determinant on this hole. From the ideal tee shot position, you'll likely face a mid-iron to long-iron depending on conditions and pin position. The key is committing fully to your club selection and swing, as tentative shots rarely find their target on Pete Dye greens. Aim for the center of the green regardless of pin position, as the small target leaves little margin for error. Club up if you're between selections, as being short of this green typically leaves a more difficult recovery than being long. Pay attention to wind conditions, which can significantly affect club selection on this exposed hole.
On the green
The small green size means putting strategy focuses on lag putting and avoiding three-putts rather than aggressive birdie attempts. Read the green carefully from multiple angles, as Pete Dye greens often feature subtle breaks that aren't immediately apparent. Focus on getting your first putt within a comfortable two-putt range, especially on longer putts. The green's compact size means even modest misreads can leave you with challenging comeback putts. Practice your distance control, as speed becomes crucial on these smaller surfaces. ## RISK VS REWARD This hole offers limited risk/reward opportunities, instead demanding consistent execution of two solid shots. The primary risk comes from being overly aggressive with either the tee shot (trying to bomb driver when position matters more) or the approach (attacking tight pins instead of playing to the green's center). The reward for proper execution is a legitimate birdie opportunity, but the hole's design philosophy emphasizes avoiding bogey through smart play rather than creating eagle chances through heroic shots. ## DIFFERENT SKILL LEVELS **Low Handicappers** should focus on precise yardage control and commit to aggressive swings with conservative targets. Consider the 3-wood strategy off the tee to ensure optimal approach distance, and don't hesitate to take one more club on the approach shot. **High Handicappers** benefit most from playing this hole in three shots when necessary. If driver leaves you with a long iron or hybrid approach, don't force the shot to the green. Instead, consider laying up to a comfortable wedge distance and relying on your short game to save par. **Mid Handicappers** should embrace the strategic elements while maintaining realistic expectations. Focus on hitting the fairway first, then commit fully to your approach shot selection. This hole rewards patience and punishes indecision more than most. The 3rd hole at PGA West Stadium epitomizes championship golf design - straightforward in concept but demanding in execution, where success comes through combining power with precision and strategy with commitment.
Hole 3 Green Complex
Mapped green boundary
Green size: 4,598 sq ft
How did Hole 3 play?
How did this hole play today?
Frequently asked questions
Yardage reference: Championship tees · 471 yards.
What's the best strategy off the tee?
↓
For this 471-yard par 4, most players will hit driver to set up a comfortable approach.
How difficult is hole 3?
↓
This hole is a moderate challenge for most golfers. Key challenges include: long par 4.
How big is the green on hole 3?
↓
The green is medium-sized with moderate targets. Pay attention to pin placement when selecting your approach club.
What's a good score on hole 3?
↓
This hole is one of the tougher holes where par feels like birdie. A challenging par 4. Accept that bogey happens and avoid big numbers.