Hole 3 at PGA WEST (Norman course)
- Par
- 4
- Yardage
- 477 yds
- Stroke index
- 5
- Hazards
- 6 bunkers
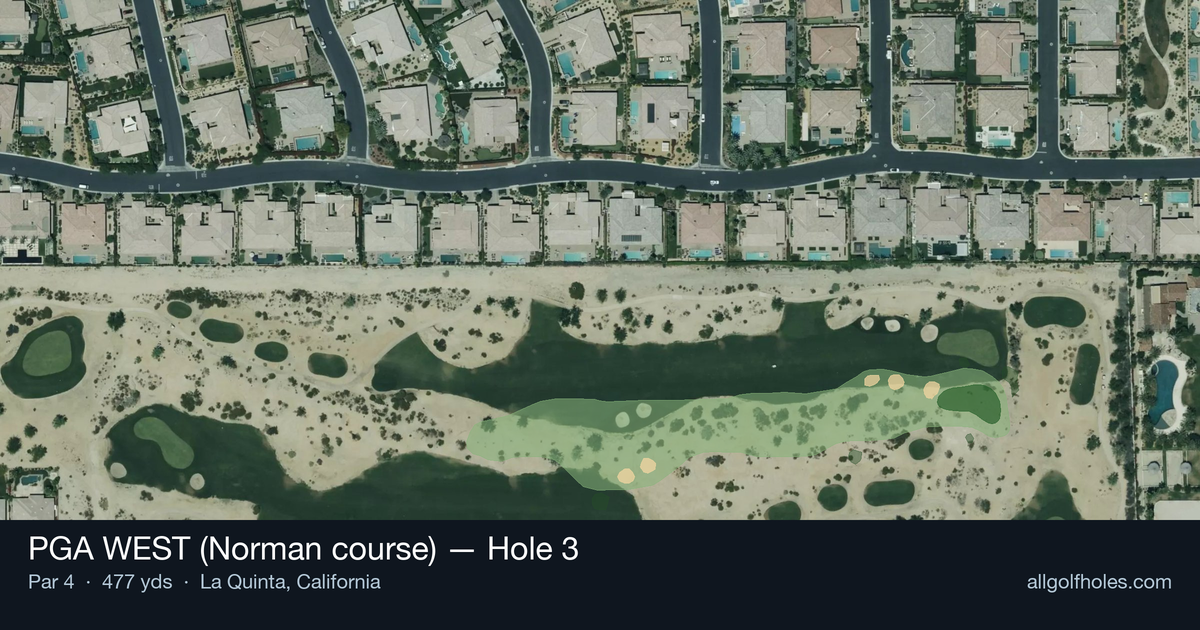
Aerial source not provided
Green size: 38 yds deep × 23 yds wide
Scorecard yardage is for Championship tees. The aerial shows its labeled reference position; distance rings measure to the green.
Championship tees · Par 4 · 477 yards
The plan for No. 3
The third hole at PGA WEST's Norman course presents a demanding par 4 that tests precision over power across its 477-yard stretch. This straight-away challenge features a deceptively simple layout that rewards strategic thinking and solid execution. The tee shot demands accuracy to find the optimal position in the fairway, setting up a crucial approach to a small, well-protected green complex. Without major hazards cluttering the landscape, this hole relies on its length and subtle design features to create difficulty. The compact green requires pinpoint iron play, as missing the target leaves challenging recovery shots. Greg Norman's architectural philosophy shines through in this strategic design, where course management trumps brute force. Smart golfers will focus on finding the right angles and committing to precise club selection, making this a true test of golf fundamentals in the California desert.
Off the tee
The tee shot strategy centers on finding the optimal position for your approach distance and angle. With 477 yards to work with, most players will need driver or strong 3-wood to leave a manageable approach. Focus on the center-left portion of the fairway, which typically provides the best angle into the small green. Higher handicap players should prioritize finding the fairway over maximum distance - even a shorter tee shot that finds the short grass gives you a better chance than being in the rough with a long iron in hand. The straight layout means you can be aggressive with your target line, but don't let the lack of obvious trouble lull you into complacency with your alignment.
Approach & recovery
The approach shot is where this hole shows its teeth. That small green becomes an increasingly difficult target as the distance increases, making your tee shot positioning crucial. Plan to hit one more club than the yardage suggests - the small target demands you swing smoothly and commit fully to your shot. Pay attention to pin position when selecting your approach strategy. Front pins allow for more aggressive play, while back pins require careful distance control to avoid going long. The green's compact size means there's little room for error, so favor the center of the green unless you're feeling particularly confident with your iron play.
On the green
While the green shape details aren't specified, small greens typically feature subtle breaks that can be deceptive. Take extra time reading your putts, as the compact surface means even slight misreads can cost you strokes. Focus on speed control above all else - with limited green to work with, getting your first putt close becomes paramount. Three-putting from anywhere on this green is a scoring killer, so be conservative with your first putt unless you have a clear read. The green's size works in your favor for shorter putts, as you're rarely facing extremely long attempts. ## RISK VS REWARD This hole offers a clean risk/reward proposition: the more aggressive you are off the tee, the shorter your approach becomes. However, the small green means that even shorter approaches require precision. The strategic decision comes down to whether you trust your long iron accuracy enough to lay back off the tee, or if you prefer the challenge of hitting a shorter iron into a small target. For most players, the reward of a shorter approach outweighs the risk of missing the fairway, especially given the straight layout and lack of major hazards. ## DIFFERENT SKILL LEVELS **Low Handicap Players**: Attack this hole with driver, aiming for maximum distance while maintaining fairway position. Your short iron accuracy should allow you to be aggressive into the small green, particularly with favorable pin positions. This becomes a genuine birdie opportunity with proper execution. **Mid Handicap Players**: Consider your comfort level with longer approach shots. If you're confident with 6-7 irons, go with driver. If you prefer shorter irons, a controlled 3-wood might leave you in better position. Focus on two-putting for par rather than forcing birdie attempts. **High Handicap Players**: Prioritize finding the fairway over distance. Even if this means hitting 3-wood or hybrid off the tee, having a clean lie for your approach is more valuable than being in rough with a difficult angle. Aim for the center of the green regardless of pin position, and be satisfied with bogey or better on this challenging hole.
Watch for
- Course conditioning and mapped hazards may affect line selection; confirm from the aerial.
Hole 3 Green Complex
Mapped green boundary
Green size: 4,243 sq ft
How did Hole 3 play?
How did this hole play today?
Frequently asked questions
Yardage reference: Championship tees · 477 yards.
What's the best strategy off the tee?
↓
For this 477-yard par 4, most players will hit driver to set up a comfortable approach.
How difficult is hole 3?
↓
This hole is a moderate challenge for most golfers. Key challenges include: long par 4, small green.
How big is the green on hole 3?
↓
The green is small and requires precision. The green is wider than it is deep, rewarding shots that find the correct tier. Expect challenging pin positions with limited room for error.
What's a good score on hole 3?
↓
This hole is one of the tougher holes where par feels like birdie. A challenging par 4. Accept that bogey happens and avoid big numbers.