Hole 6 at PGA West (Nicklaus Tournament course)
- Par
- 4
- Yardage
- 462 yds
- Stroke index
- 7
- Hazards
- 5 bunkers
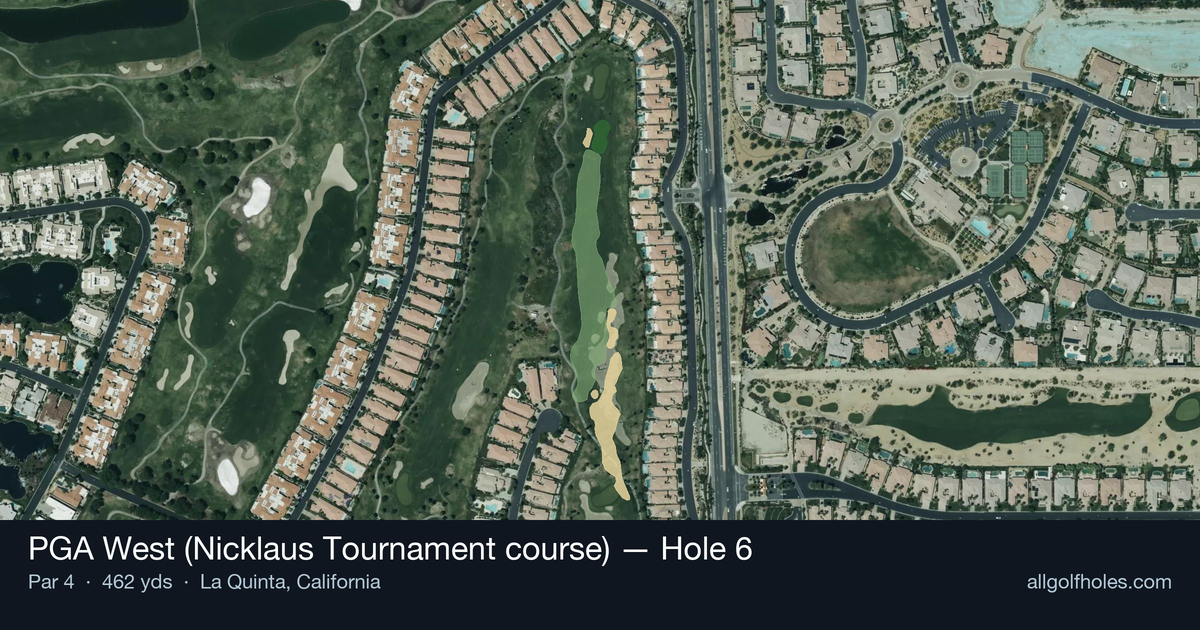
Aerial source not provided
Green size: 41 yds deep × 23 yds wide
Scorecard yardage is for Championship tees. The aerial shows its labeled reference position; distance rings measure to the green.
Championship tees · Par 4 · 462 yards
The plan for No. 6
The sixth hole at PGA West's Nicklaus Tournament course presents a deceptively challenging par 4 that demands both distance and precision from the championship tees at 462 yards. This straight-away layout may appear straightforward, but the absence of major hazards places premium emphasis on course management and approach shot accuracy. The tee shot requires finding the optimal position in the fairway to set up the best angle into the small, well-protected green complex. Jack Nicklaus designed this hole to reward strategic thinking over pure power, as the compact green demands pinpoint approach shots to score well. The seventh handicap ranking reflects the subtle difficulty that catches many players off-guard on this desert gem.
Off the tee
The tee shot strategy centers on maximizing distance while maintaining control. With a clear fairway ahead, this is an opportunity to unleash the driver and gain every possible yard. Target the center-left portion of the fairway to set up the best angle for your approach shot. The key is committing to an aggressive swing while maintaining your tempo - the length of this hole means even a slight mishit that finds the fairway will leave you with a much more manageable approach than playing conservatively. For most players, anything over 250 yards off the tee will put you in prime position. Don't let the lack of visible trouble lull you into complacency - accuracy is still important as missing the fairway will make the already challenging approach shot nearly impossible.
Approach & recovery
The approach shot is where this hole shows its teeth. Even after a good drive, you'll likely face a mid to long-iron into a small green. Club selection becomes critical - it's better to be long than short, as most small greens tend to fall off more severely in the front. Take one extra club and focus on a smooth, controlled swing. The target line should favor the center of the green, avoiding the temptation to fire at tucked pins. With limited green space to work with, precision trumps aggression here. Consider the wind conditions carefully, as they'll have more impact on longer approach shots.
On the green
The small green size means putting strategy focuses on lag putting and avoiding three-putts. With limited surface area, most putts will have relatively subtle breaks, but don't underestimate the importance of speed control. Uphill putts should be struck firmly, while downhill putts require a delicate touch. Pay attention to pin position - when the flag is tucked near an edge, aim for the fat part of the green and take your two-putt. The small target means getting close to the hole from long range is more about avoiding disaster than making birdies. ## RISK VS REWARD The primary risk/reward decision comes off the tee. Aggressive drivers who can consistently find the fairway with 270+ yard drives will have short irons into the green, creating legitimate birdie opportunities. However, the penalty for missing the fairway is severe given the length remaining. The approach shot offers little risk/reward - it's primarily about execution and smart club selection. Firing at pins is rarely worth the risk given the small margin for error. ## DIFFERENT SKILL LEVELS **High Handicappers:** Focus on two solid shots rather than trying to overpower the hole. A 3-wood or hybrid off the tee that finds the fairway is better than a driver in the rough. On the approach, take plenty of club and aim for the center of the green. Accept bogey as a reasonable score and avoid the big numbers that come from short-siding yourself. **Low Handicappers:** This is a hole where your length advantage pays dividends. Attack with the driver and look to get within 150 yards or less for your approach. You have the skill to work the ball into small targets, so don't be afraid to be aggressive if you've positioned yourself well off the tee. This represents a genuine birdie opportunity if executed properly. The key for all players is recognizing that par is a good score here - don't let the lack of obvious hazards fool you into thinking this hole is easier than it actually is.
Watch for
- Course conditioning and mapped hazards may affect line selection; confirm from the aerial.
Hole 6 Green Complex
Mapped green boundary
Green size: 4,672 sq ft
How did Hole 6 play?
How did this hole play today?
Frequently asked questions
Yardage reference: Championship tees · 462 yards.
What's the best strategy off the tee?
↓
For this 462-yard par 4, most players will hit driver to set up a comfortable approach.
How difficult is hole 6?
↓
This hole is a moderate challenge for most golfers. Key challenges include: long par 4.
How big is the green on hole 6?
↓
The green is medium-sized with moderate targets. The green is deeper than wide, so club selection is crucial. Pay attention to pin placement when selecting your approach club.
What's a good score on hole 6?
↓
This hole is one of the tougher holes where par feels like birdie. A challenging par 4. Accept that bogey happens and avoid big numbers.