Hole 3 at PGA West (Nicklaus Tournament course)
- Par
- 3
- Yardage
- 192 yds
- Stroke index
- 15
- Hazards
- 6 bunkers
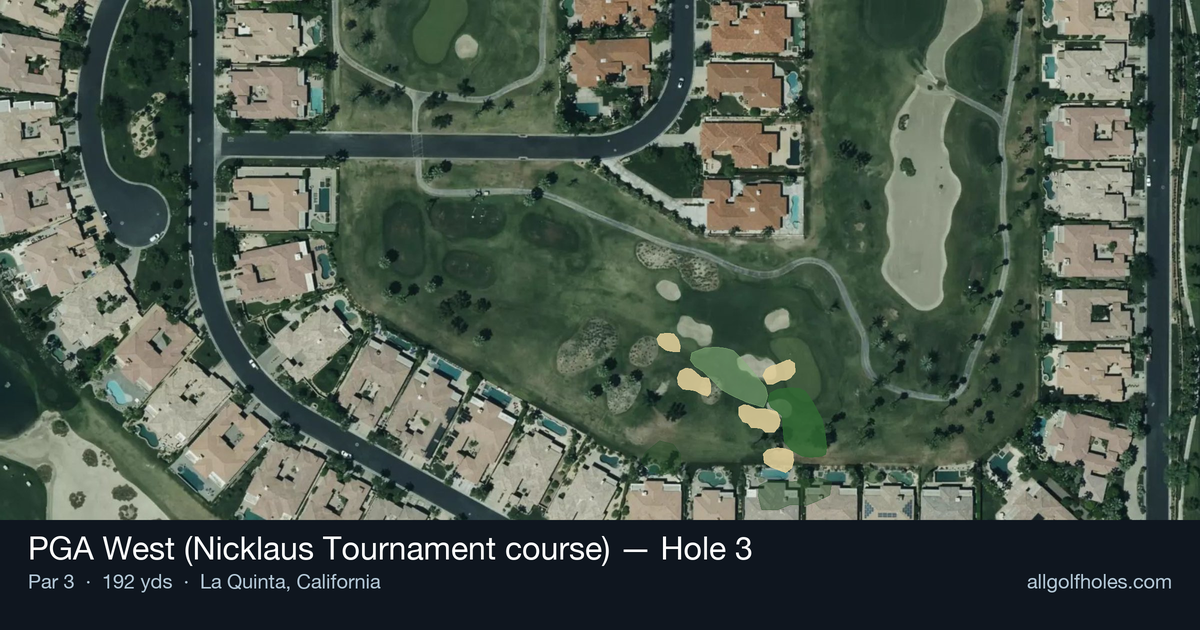
Aerial source not provided
Green size: 33 yds deep × 29 yds wide
Scorecard yardage is for Championship tees. The aerial shows its labeled reference position; distance rings measure to the green.
Championship tees · Par 3 · 192 yards
The plan for No. 3
The third hole at PGA West's Nicklaus Tournament course presents a deceptively challenging par 3 that demands precision over power. At 192 yards, this straight-forward design requires golfers to navigate to a small, well-protected green that punishes anything less than a committed swing. The lack of significant hazards might suggest an easier hole, but the compact target and desert surroundings create their own intimidation factor. Club selection becomes critical as the small green offers little margin for error, making distance control paramount. This hole exemplifies Jack Nicklaus's design philosophy of rewarding accuracy and course management, serving as a strategic test that can quietly derail a round if approached carelessly.
Off the tee
From 192 yards, most golfers will need a mid to long iron depending on conditions and elevation changes. The key is selecting a club that gets you to the back edge of the green in calm conditions, allowing for wind or adrenaline that might add distance. Take one extra club and make a smooth, controlled swing rather than forcing a shorter iron. The straight layout eliminates directional concerns, so focus entirely on distance control and solid contact. Commit to your club selection and avoid the temptation to guide the ball - aggressive, confident swings produce better results on longer par 3s.
Approach & recovery
Since this is a par 3, your tee shot is your approach. Aim for the center of the green regardless of pin position, as the small green size makes pin-hunting risky. If the pin is tucked to one side, favor that side slightly but never challenge the edges. The lack of significant hazards means missing the green isn't catastrophic, but the small target makes two-putting from off the green challenging. Focus on landing the ball on the front portion of the green and letting it release naturally rather than trying to fly it directly at the pin.
On the green
Small greens typically feature subtle but important breaks that become magnified on longer putts. Take time to read the green from multiple angles, especially behind the hole. Desert courses often have grain that affects ball roll, so observe how your ball reacts on practice putts. With limited green space, lag putting becomes crucial - getting your first putt close is more important than being aggressive. Pay attention to how other players' putts break, as you'll gain valuable information for your own read. ## RISK VS REWARD This hole offers limited risk/reward scenarios due to the absence of major hazards. The primary decision involves club selection aggression - taking enough club to ensure reaching the green versus risking going long. In windy conditions, the reward of being aggressive with club selection (taking extra club) outweighs the risk of going slightly long. The straightforward nature means conservative play should yield consistent results. ## DIFFERENT SKILL LEVELS **High-Handicap Players**: Focus entirely on making solid contact with a club that comfortably reaches the green. Don't worry about pin positions - aim for the center and accept any result on the putting surface. Consider using a hybrid or fairway wood if needed to ensure sufficient distance. The lack of major penalties means a conservative approach pays dividends. **Low-Handicap Players**: This becomes a scoring opportunity with precise distance control. Work on dialing in exact yardages and consider pin position more aggressively. Use course management skills to factor in wind, temperature, and green firmness. This is a hole where tour-level players expect to make birdie, so commit to aggressive lines when conditions permit while still respecting the small target. The key to mastering this hole lies in honest self-assessment of your distances and committing to proper club selection regardless of what others in your group are hitting.
Watch for
- Course conditioning and mapped hazards may affect line selection; confirm from the aerial.
Hole 3 Green Complex
Mapped green boundary
Green size: 4,014 sq ft
How did Hole 3 play?
How did this hole play today?
Frequently asked questions
Yardage reference: Championship tees · 192 yards.
What club should I use on this par 3?
↓
At 192 yards, most golfers will need a long iron or hybrid (5-iron to 6-iron) to reach this green. Adjust for elevation, wind, and pin position.
How difficult is hole 3?
↓
This hole is a moderate challenge for most golfers. Key challenges include: small green.
How big is the green on hole 3?
↓
The green is small and requires precision. Expect challenging pin positions with limited room for error.