Hole 2 at PGA West (Nicklaus Tournament course)
- Par
- 4
- Yardage
- 444 yds
- Stroke index
- 11
- Hazards
- 10 bunkers
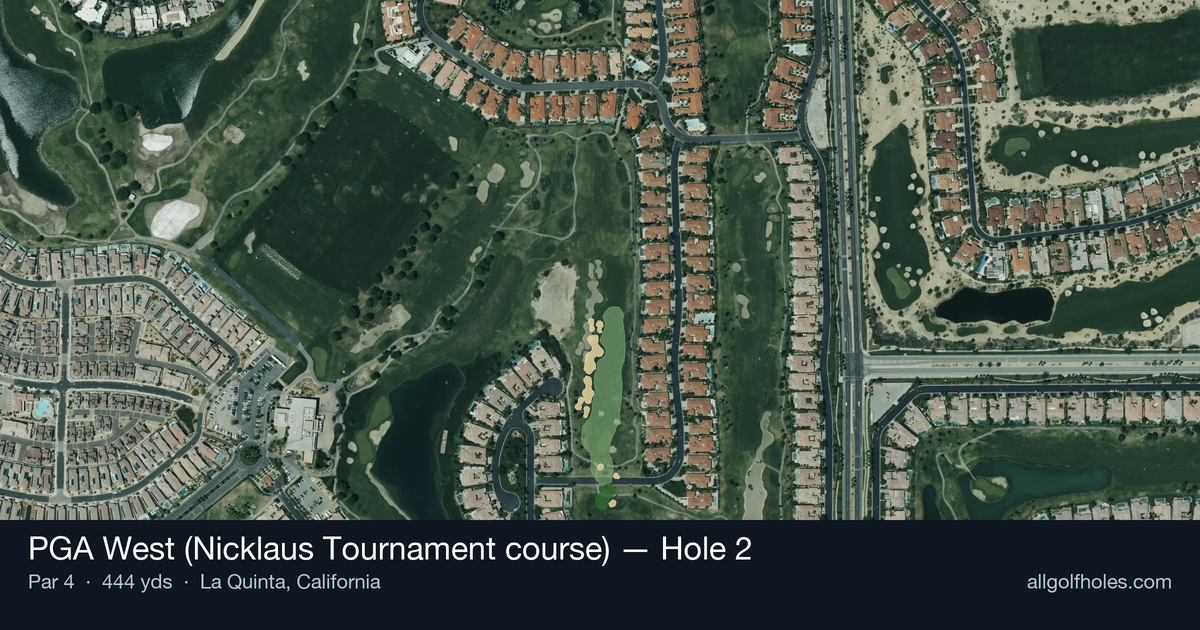
Aerial source not provided
Green size: 38 yds deep × 27 yds wide
Scorecard yardage is for Championship tees. The aerial shows its labeled reference position; distance rings measure to the green.
Championship tees · Par 4 · 444 yards
The plan for No. 2
The second hole at PGA West's Nicklaus Tournament course presents a deceptively challenging par 4 that demands precision over power. This straight 444-yard test features a generous fairway that invites aggressive tee shots, but the real challenge lies in the approach to a small, well-guarded green complex. Without major hazards to intimidate, golfers might underestimate this hole's difficulty, but the compact green requires pinpoint accuracy with mid-to-long irons. The putting surface's subtle contours can turn seemingly good approaches into challenging two-putts. As the 11th handicap hole, it rewards course management and precise iron play, setting an early tone for the strategic demands that define Jack Nicklaus's desert masterpiece in La Quinta.
Off the tee
Focus on finding the center of the fairway rather than trying to bomb your drive. A well-struck fairway wood or hybrid can be just as effective as driver here, especially if you struggle with accuracy off the tee. Aim for the middle of the landing zone, which should leave you with a comfortable approach distance. The straight layout means there's no need to work the ball - a simple, straight tee shot down the center is your best bet for success.
Approach & recovery
With a small green as your target, club selection becomes critical. Take one extra club to ensure you clear any front trouble and give yourself a better margin for error. Aim for the center of the green regardless of pin position - the small surface means even a center hit will leave you with a reasonable putt. Avoid the temptation to fire directly at tucked pins; instead, play to the fat part of the green and rely on your putting to make birdie.
On the green
Small greens typically feature subtle breaks that can be deceiving. Spend extra time reading your putt from multiple angles, as what appears straight may have more movement than expected. Focus on speed control - it's better to leave your first putt slightly short and straight than to blast it past the hole on a small surface where recovery becomes difficult. ## RISK VS REWARD This hole offers excellent scoring potential for players who embrace conservative strategy. The lack of major hazards means bogey should be rare if you play smart. The primary risk/reward decision comes with club selection off the tee - driver gives you a shorter approach but requires more precision, while a fairway wood offers better control with a slightly longer second shot. ## DIFFERENT SKILL LEVELS **High Handicappers:** Play this hole with your most reliable clubs. Consider hitting 3-wood or hybrid off the tee for better accuracy, then focus on hitting the green with your approach rather than getting close to the pin. Two-putt par is an excellent score here. **Low Handicappers:** This represents a clear birdie opportunity. Use driver if you're confident in your accuracy, but don't hesitate to dial it back if conditions are challenging. Attack the pin only when it's in an accessible position - otherwise, play to the center and trust your putting stroke to convert the birdie chance. The key to mastering this hole lies in patience and precision rather than power, making it an excellent test of your course management skills and ability to capitalize on scoring opportunities when they present themselves.
Watch for
- Course conditioning and mapped hazards may affect line selection; confirm from the aerial.
Hole 2 Green Complex
Mapped green boundary
Green size: 4,863 sq ft
How did Hole 2 play?
How did this hole play today?
Frequently asked questions
Yardage reference: Championship tees · 444 yards.
What's the best strategy off the tee?
↓
For this 444-yard par 4, most players will hit driver to set up a comfortable approach.
How difficult is hole 2?
↓
This hole is a good scoring opportunity for most golfers.
How big is the green on hole 2?
↓
The green is medium-sized with moderate targets. The green is deeper than wide, so club selection is crucial. Pay attention to pin placement when selecting your approach club.
What's a good score on hole 2?
↓
This hole is a demanding hole where bogey is not unusual. This longer par 4 will test most golfers. Focus on position over distance.