Hole 9 at Caledonia Golf & Fish Club
- Par
- 3
- Yardage
- 118 yds
- Stroke index
- 18
- Hazards
- 4 bunkers
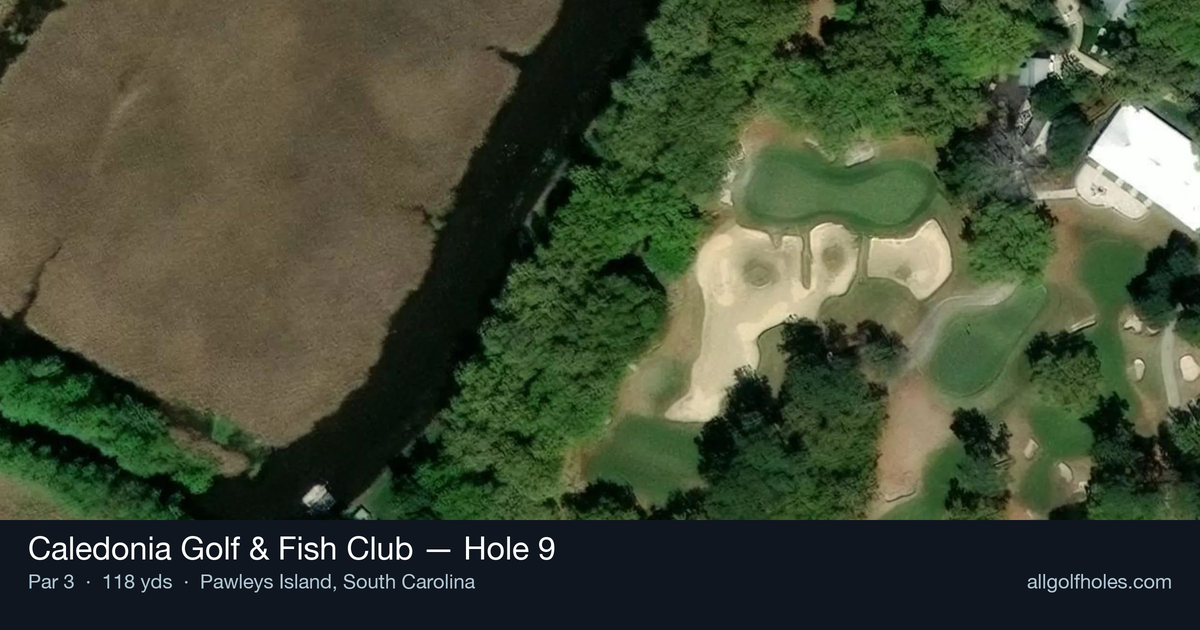
Aerial source not provided
Green size: 42 yds deep × 42 yds wide
Scorecard yardage is for Championship tees. The aerial shows its labeled reference position; distance rings measure to the green.
Championship tees · Par 3 · 118 yards
The plan for No. 9
The closing hole of the front nine at Caledonia Golf & Fish Club may measure just 118 yards, but this deceptive par 3 demands absolute precision from the tee. The hole's defining feature is its challenging double-tiered green, where club selection and distance control become paramount for scoring success. Despite its short length, golfers must navigate the elevation changes and pin placement carefully, as the wrong tier can leave a treacherous putt. Set against the backdrop of Caledonia's signature live oaks and lowcountry beauty, this hole epitomizes the course's philosophy that every hole is a signature hole. The small green complex punishes overconfident approaches, making it a memorable finish to the outward nine.
Off the tee
With no significant hazards protecting the green, your primary focus should be on distance control and accuracy. Club selection typically ranges from a pitching wedge to a 9-iron, depending on wind conditions and pin position. Take extra time to assess which tier the flag is positioned on, as being on the wrong level can easily lead to a three-putt. Aim for the center of the tier where the pin is located rather than attacking the flag directly. Factor in any wind off the nearby marshes, as even a slight breeze can significantly affect a short iron shot.
Approach & recovery
Since this is a par 3, your tee shot serves as your approach. The double-tiered green creates distinct target zones that you must identify before selecting your club. If the pin is on the lower tier, be cautious not to take too much club and fly it to the back level. Conversely, when the flag is positioned on the upper tier, ensure you have enough club to clear the slope. The small green size leaves little margin for error, making center-green strategy often the wisest choice.
On the green
The double-tiered nature of this green creates challenging putting scenarios when your ball lands on the wrong level. Putts from the lower tier to upper tier require firm, uphill strokes, while downhill putts from upper to lower tier demand exceptional touch and speed control. Focus on leaving your approach shot below the hole when possible, as uphill putts are much more manageable than the lightning-fast downhill sliders. Study the green carefully during your pre-shot routine to identify the subtle breaks that can affect even these relatively short putts. ## RISK VS REWARD The primary risk/reward decision centers on pin hunting versus playing to the safe center of the green. While the hole's short length might tempt aggressive play, the small target and tiered green make center-green strategy often the percentage play. The reward for precise execution is a legitimate birdie opportunity, but the risk of missing the correct tier can quickly turn this easy handicap hole into a bogey or worse. ## DIFFERENT SKILL LEVELS **High-Handicap Players:** Focus exclusively on getting your ball onto the green, preferably on the correct tier. Take one extra club to ensure you clear any front slope and aim for the center of whichever tier the pin occupies. Don't be afraid to lag your first putt close rather than attacking the hole aggressively. **Low-Handicap Players:** You can be more aggressive with pin hunting, but still respect the green's contours. Use your course management skills to identify when the pin position offers a genuine birdie opportunity versus when par is the smart play. Your superior distance control should allow you to attack pins positioned in the center of either tier while avoiding flags tucked near the tier transitions. This hole exemplifies how even short par 3s can provide significant strategic challenges through green design rather than length or hazards.
Watch for
- Course conditioning and mapped hazards may affect line selection; confirm from the aerial.
Hole 9 Green Complex
Mapped green boundary
Green size: 5,287 sq ft
How did Hole 9 play?
How did this hole play today?
Frequently asked questions
Yardage reference: Championship tees · 118 yards.
What club should I use on this par 3?
↓
At 118 yards, most golfers will need a short iron (9-iron to PW) to reach this green. Adjust for elevation, wind, and pin position.
How difficult is hole 9?
↓
This hole is a good scoring opportunity for most golfers. Key challenges include: heavily bunkered.
What hazards should I watch out for on hole 9?
↓
Key hazards include: 4 greenside bunkers. Plan your shots to avoid these trouble spots.
How big is the green on hole 9?
↓
The green is medium-sized with moderate targets. The green is wider than it is deep, rewarding shots that find the correct tier. Pay attention to pin placement when selecting your approach club.
What's a good score on hole 9?
↓
This hole is a legitimate birdie opportunity for accurate iron players. Most golfers should target par, with birdie chances if you hit the green in regulation.