Hole 3 at Caledonia Golf & Fish Club
- Par
- 3
- Yardage
- 187 yds
- Stroke index
- 14
- Hazards
- 2 bunkers
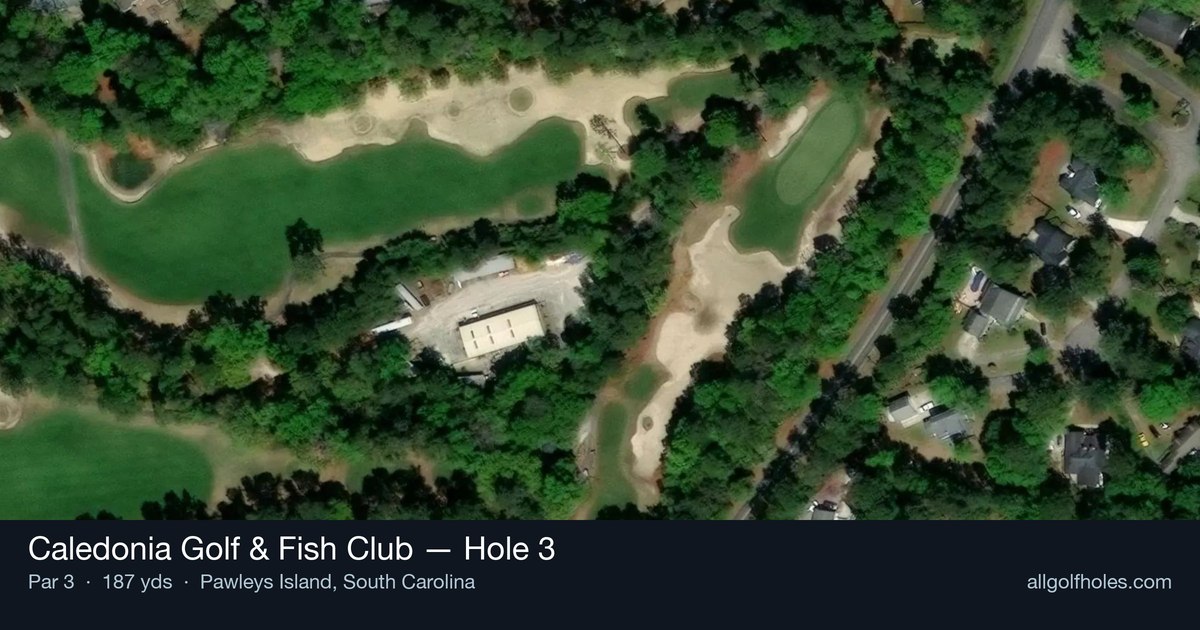
Aerial source not provided
Green size: 52 yds deep × 20 yds wide
Scorecard yardage is for Championship tees. The aerial shows its labeled reference position; distance rings measure to the green.
Championship tees · Par 3 · 187 yards
The plan for No. 3
The third hole at Caledonia Golf & Fish Club presents a deceptively challenging par 3 that embodies the course's reputation for subtle difficulty within South Carolina's stunning lowcountry setting. At 187 yards, this straight tee shot demands precision over power, with the small target green requiring golfers to commit fully to their club selection. Framed by the natural beauty that makes Caledonia memorable, the hole's understated design reflects the course's philosophy of strategic golf over brute force. While lacking dramatic hazards, the compact green complex punishes anything but accurate approach shots, making par a satisfying achievement. This early test sets the tone for Caledonia's clever design, where quick greens and thoughtful architecture challenge even seasoned players throughout their round.
Off the tee
Club selection is paramount on this one-shot hole. Most players will be looking at a mid-iron to long-iron depending on conditions, pin position, and personal distances. The key is committing fully to your yardage and swinging with confidence. Aim for the center of the green unless you're certain of your distance control with a specific pin position. Wind conditions can significantly impact club selection here, so take extra time to feel the breeze and factor it into your decision. The straight layout means you won't have to worry about doglegs or hidden trouble – what you see is what you get.
Approach & recovery
Since this is a par 3, your tee shot IS your approach shot. Focus on smooth tempo and solid contact rather than trying to attack every pin position. The small green means there's little room for error, so conservative target selection often pays dividends. When the pin is tucked in a corner, consider aiming for the fat part of the green and relying on your putting to get close. Missing the green entirely will leave you with a challenging up-and-down to save par.
On the green
The small green size means you'll likely have shorter putts if you find the putting surface, but it also means the green can play faster and breaks can be more pronounced. Take time to read the subtle undulations carefully. Pay attention to how your ball reacts when it lands – this will give you valuable information about green firmness that can help with putting speed. Don't be overly aggressive with birdie attempts; two-putting from anywhere on this green should be considered a victory. ## RISK VS REWARD The primary risk/reward decision comes with pin position. When the flag is accessible in the center of the green, this becomes a legitimate birdie opportunity for players of all skill levels. However, when the pin is tucked behind trouble or near the edges of the small green, the smart play is targeting the center and leaving yourself a manageable putt. The relatively benign hazard situation means you can be more aggressive here than on other par 3s, but the small target still demands precision over power. ## DIFFERENT SKILL LEVELS **High Handicappers:** Focus entirely on finding the green. Pick a club you're confident with and aim for the center regardless of pin position. A bogey here isn't devastating given the handicap rating, so don't feel pressured to attack difficult pins. Smooth tempo and solid contact will serve you better than trying to be too precise. **Low Handicappers:** This is where superior distance control and green-reading skills pay off. You can be more aggressive with pin hunting, but still respect the small target. Consider the pin position in relation to your natural shot shape, and don't be afraid to take one more club and swing easier for better accuracy. This hole rewards precision, which should play to your strengths. The key for all players is recognizing that while this hole lacks intimidating hazards, the small green makes it a genuine test of accuracy and course management – hallmarks of Caledonia's strategic design philosophy.
Watch for
- Course conditioning and mapped hazards may affect line selection; confirm from the aerial.
Hole 3 Green Complex
Mapped green boundary
Green size: 6,488 sq ft
How did Hole 3 play?
How did this hole play today?
Frequently asked questions
Yardage reference: Championship tees · 187 yards.
What club should I use on this par 3?
↓
At 187 yards, most golfers will need a long iron or hybrid (5-iron to 6-iron) to reach this green. Adjust for elevation, wind, and pin position.
How difficult is hole 3?
↓
This hole is a good scoring opportunity for most golfers.
How big is the green on hole 3?
↓
The green is fairly large with multiple pin positions. Lag putting becomes important on longer putts.