Hole 11 at Caledonia Golf & Fish Club
- Par
- 3
- Yardage
- 167 yds
- Stroke index
- 13
- Hazards
- 2 bunkers · Water
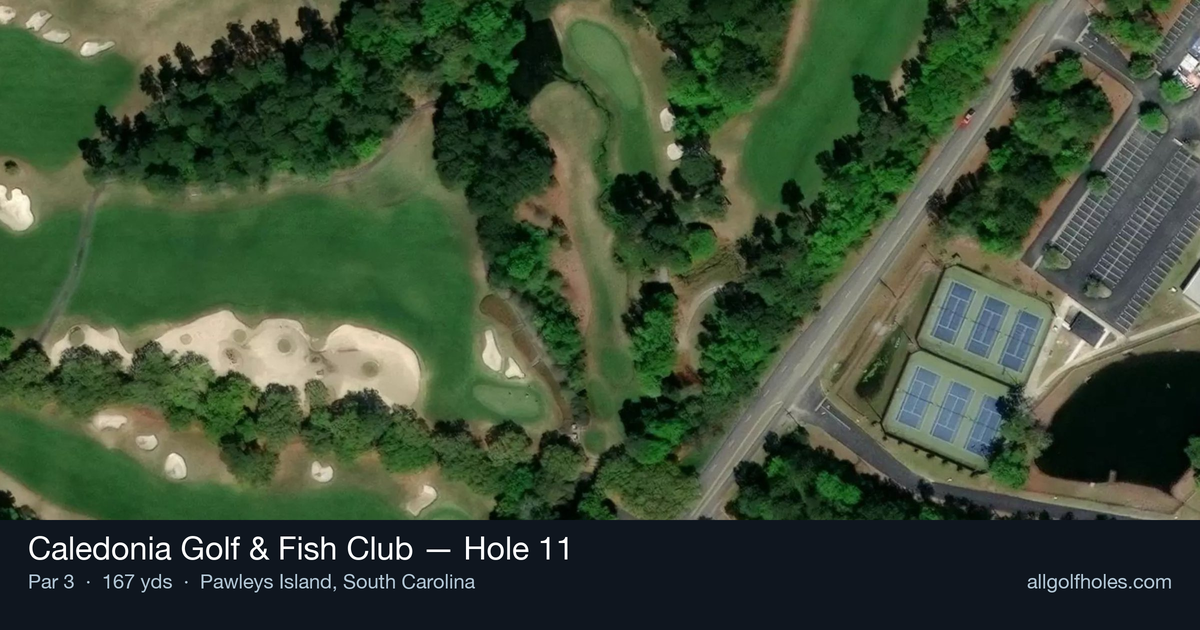
Aerial source not provided
Green size: 40 yds deep × 31 yds wide
Scorecard yardage is for Championship tees. The aerial shows its labeled reference position; distance rings measure to the green.
Championship tees · Par 3 · 167 yards
The plan for No. 11
Caledonia Golf & Fish Club hole 11 exemplifies the course's reputation for having 18 signature holes, presenting a deceptively challenging par 3 at 167 yards. This well-framed hole showcases the natural beauty that defines Caledonia, where ancient live oaks and pristine lowcountry landscape create an intimate theater for your tee shot. The small green demands precision, but what truly defines this hole is how dramatically pin positions alter the playing experience from day to day. A right pin placement can completely transform your club selection and approach strategy compared to a left or center flag. Without houses or development to distract, it's simply you against nature's canvas, where course management and accurate iron play determine success on this memorable mid-round test.
Off the tee
Club selection is paramount on this mid-length par 3, typically calling for a mid-iron to long-iron depending on conditions and pin position. The key strategic consideration is committing to enough club to reach the small green comfortably rather than coming up short. Aim for the center of the green when the pin is tucked, as the compact putting surface leaves little margin for error. Wind conditions common to the South Carolina coast can significantly impact club selection, so factor in any breeze when making your decision.
Approach & recovery
Since this is a par 3, your tee shot serves as your approach shot. The small green size demands precision, making it essential to pick a specific target rather than simply aiming at the flag. When pin positions are accessible, you can be more aggressive with your target line. However, when dealing with tucked pins that are "blocked off," as noted by course observers, play to the fat part of the green and rely on your putting to get close. The natural framing of the hole helps with alignment, but don't let the visual beauty distract from executing a committed swing.
On the green
The small green creates challenging putting scenarios, particularly when you're on the wrong tier or section relative to the pin. Focus on getting your approach shot to the correct level of the green, as two-putting becomes much easier when you're not dealing with severe slopes. With pin positions varying dramatically day to day, study the green carefully during your pre-round warm-up or while waiting on the tee to understand the day's challenge. ## RISK VS REWARD This hole offers a clear risk/reward scenario based on pin position. When the flag is in an accessible location, the scoring opportunity justifies being aggressive with your target line. However, when pins are tucked or "blocked off," the smart play is targeting the center of the green and accepting a longer putt rather than risking a missed green entirely. The relatively short length might tempt you to be overly aggressive, but the small green size punishes misses severely. ## DIFFERENT SKILL LEVELS **High-Handicap Players:** Focus on club selection that ensures you reach the green comfortably, even if it means taking one more club than you think you need. Aim for the center of the green regardless of pin position, as getting on the putting surface is the primary objective. Don't be tempted to attack tucked pins – the small green makes recovery shots extremely difficult. **Low-Handicap Players:** Use your course management skills to assess daily pin positions and adjust strategy accordingly. When pins are accessible, you can be more aggressive with your target line and club selection. However, recognize when pins are in "blocked off" positions and play conservatively to the fat part of the green. Your superior putting skills will allow you to score well even from longer distances on this small green. The 11th hole at Caledonia perfectly embodies the course's philosophy of natural beauty combined with strategic depth, where daily pin positions create an ever-changing puzzle that rewards thoughtful course management over raw power.
Watch for
- Course conditioning and mapped hazards may affect line selection; confirm from the aerial.
Hole 11 Green Complex
Mapped green boundary
Green size: 4,403 sq ft
How did Hole 11 play?
How did this hole play today?
Frequently asked questions
Yardage reference: Championship tees · 167 yards.
What club should I use on this par 3?
↓
At 167 yards, most golfers will need a mid-iron (7-iron to 8-iron) to reach this green. Adjust for elevation, wind, and pin position.
How difficult is hole 11?
↓
This hole is a moderate challenge for most golfers. Key challenges include: water in play, small green.
What hazards should I watch out for on hole 11?
↓
Key hazards include: 2 greenside bunkers; water at 176.4 yards. Plan your shots to avoid these trouble spots.
How big is the green on hole 11?
↓
The green is small and requires precision. The green is deeper than wide, so club selection is crucial. Expect challenging pin positions with limited room for error.
What's a good score on hole 11?
↓
This hole is a solid par with birdie chances for precise approach shots. Making par is a good result here. Focus on hitting the green and avoiding three-putts.